Analyze open-source projects
This section explains how you can analyze open-source projects using Qodana and covers the following use cases:
Configuring Qodana and its features
Analyzing code locally or using CI/CD pipelines
Forwarding analysis reports to Qodana Cloud and viewing them there
The Qodana products licensed under the Community license are free of charge and are well-suited for open-source projects.
Before you start
Available linters and features
The following Qodana linters and their features are available with the Community license:
Programming languages and features | Description |
|---|---|
Java, Kotlin, Groovy | The |
C#, C/C++, VB.NET | The |
C and C++ | The |
Python | The |
Static analysis of code | Analyze an entire codebase or its incremental changes |
Baseline | Compare code against its snapshot to track various problems |
Quality gate | Set thresholds to terminate Qodana locally and in CI/CD pipelines. This can be set up for a number of problems and their severities. |
To run Qodana locally, make sure that you have already deployed Qodana CLI on your machine.
Use linter names from the table above to replace, e.g. qodana-jvm-community, to replace the <linter> placeholders in configuration snippets provided in this section.
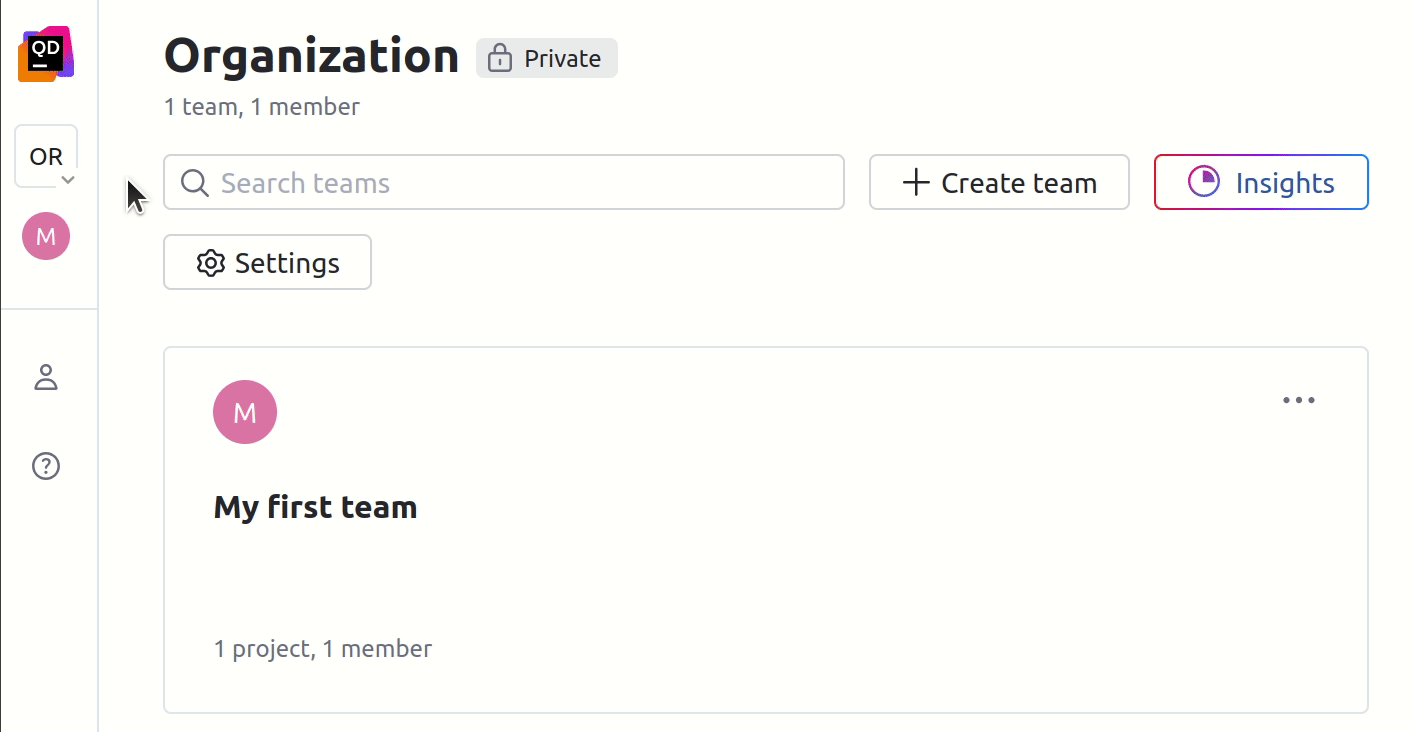
Prepare Qodana Cloud
In the Qodana Cloud UI, navigate to your organization.
On the organization page, click .

This will open the dialog.
On the dialog, specify the team name, its visibility and then click .

On a team page, click the button.

In the project, click to generate a project token.

The generated project token will be used in the configuration snippets as the value for the QODANA_TOKEN variable.
Analyze your projects
Inspection profiles
By default, Qodana analyzes your code using the qodana.starter profile. You can use additional inspections by specifying the qodana.recommended profile. To do this, save this configuration to the qodana.yaml file contained in your project root:
Alternatively, you can make the same configuration directly in the application configuration:
To analyze the overall configuration of your project, employ the qodana.sanity profile instead.
Incremental analysis
Regular analyses are enabled by default and are performed on an entire project. Incremental analyses can be carried out as described below:
Incremental analysis | Description |
|---|---|
The | Pull or merge requests |
The | Changes between two commits |
To analyze pull requests, use the --diff-start option, for example:
The pull request mode is enabled by default in GitHub Actions, so it does not require any additional configuration.
Here are the configuration samples for analyzing changes between two commits:
Information about incremental analysis is available in the Incremental analysis section.
Baseline and quality gate
Baseline and quality gates are configured using the following options:
Feature | Configured via |
|---|---|
Baseline |
|
Absolute number of problems |
|
Severity thresholds |
failureConditions:
severityThresholds:
any: <number> # Total problems
critical: <number> # Severities
high: <number>
moderate: <number>
low: <number>
info: <number>
|
Use these snippets to configure a baseline and a quality gate for a total number of problems:
You can also configure the absolute number of problems using the fail-threshold option saved in the qodana.yaml file contained in your project root:
Once configured in the qodana.yaml file, this does not have to be set up in the application configuration.
Severity thresholds are configurable only via the qodana.yaml file.
View analysis reports
Information from project reports is aggregated and displayed in several sections marked on this image.

Here is the description of each section:
The project name, the branch name, the time passed since the last analysis, the number of detected problems, and their severity.
The analysis report, which uses the code coverage and license audit features.
The context menu that lets you:
Configure the HTTPS or SSH URL of the VCS
Move your project to another team
Rename the project
Copy or regenerate the project token
Delete the project
This table shows how Qodana Cloud interprets and displays several reports depending on their metadata.
Branch name | Commit time | Commit hash | Displays |
|---|---|---|---|
The same | The same | N/A | The latest report and overwrites the previous reports |
The same | Different | N/A | Separate reports |
N/A | N/A | The same | Single report |
To see the project reports, click it. This will open the report page.

The upper part of the report page contains:
The branch selector, which lets you view reports for each branch in your project.
The commit hash and time of the latest analysis.
The timeline, which shows the date of the analysis and the number of detected problems.
Buttons for navigating to the build page, downloading the report in SARIF format, opening the help guide, and configuring the project.
A selector for viewing either the absolute number of detected problems or the number of problems relative to a baseline set for this project.
To learn more about Qodana report UI, see the Analysis reports section.