Interact with the agent
Once a session is started, JetBrains Air in IDEs hosts it in the Agent Session View, where you can interact with the agent. By default, the view opens in a separate editor tab, and you can also open it in the Chat tool window.
Agent Session View overview
The Agent Session View holds one conversation with an agent. Here you can find your messages and the agent's replies, add context, configure the agent's settings, and perform other actions.
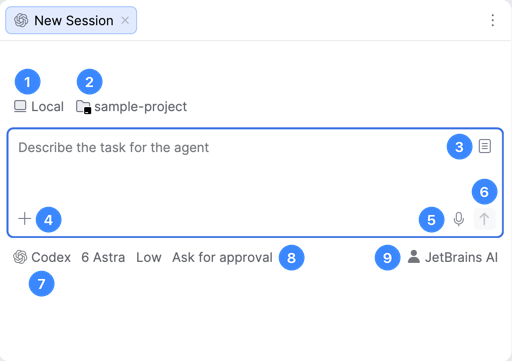
Run mode: Switch between Local and Cloud to choose whether the agent runs on your machine or in the cloud.
Project: Select the project that the session works with.
Prompt library: Save prompts and reuse them for recurring tasks instead of typing them again.
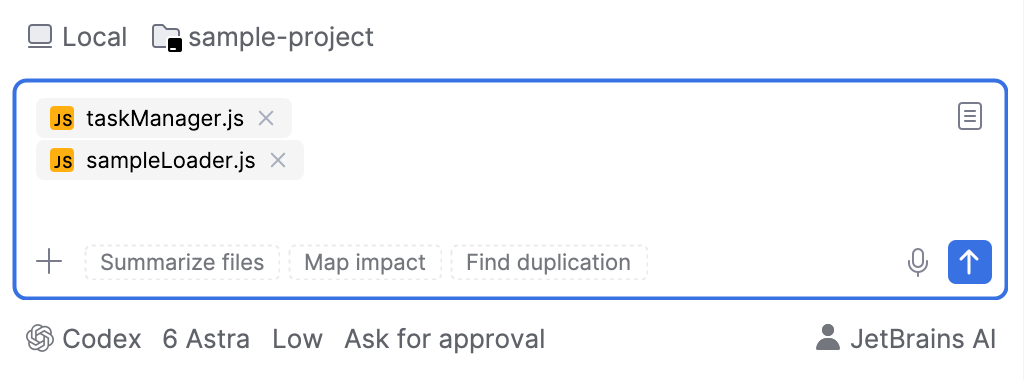
Add: Attach project files, folders, commits, or other context to the request.
Start Voice Input: Dictate your request instead of typing it. JetBrains Air in IDEs turns the recorded speech into prompt text.
Send: Send the request to the agent.
Agent preset: Click the selected agent to choose another agent preset.
Agent settings: Configure the model, effort, and access for the next request. The availability of these settings depends on the agent.
Authorization: Select the authorization source that the agent works through. For more information, refer to Select the authorization for a session.
After you send the first prompt, a context indicator also appears in the text field.
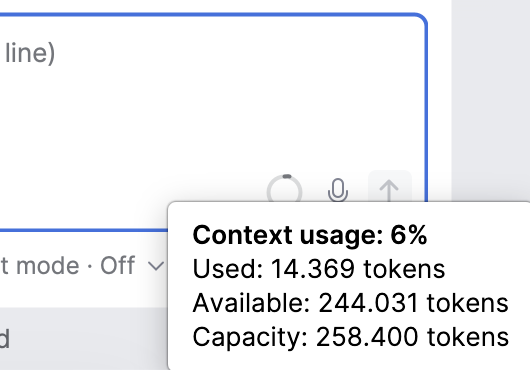
Hovering over it shows how much of the model's context window is used in the current session. Prompts, attached context, and agent responses contribute to this usage, and the indicator updates as the session continues.
Configure agent settings
The chosen preset starts the agent with pre-configured settings, such as processing model, effort level, access mode, and so on. You can change these settings for the current session using the controls below the text field.
Typically, you can configure the following:
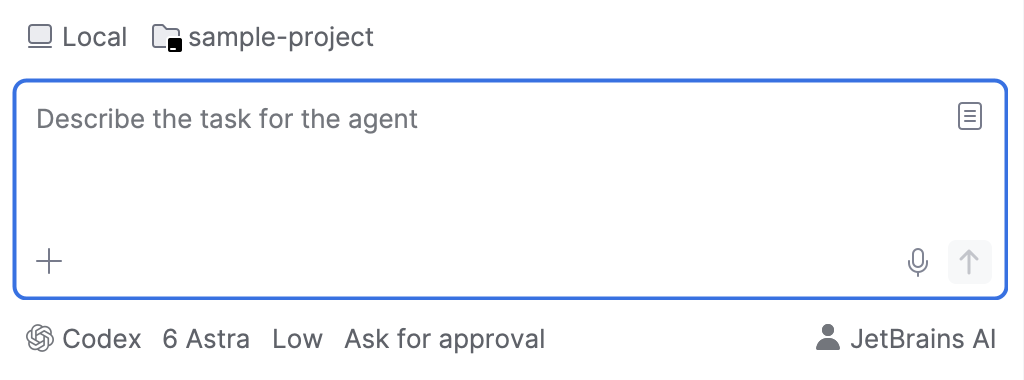
Model: Select the model to process your requests.
Reasoning effort: Choose how much reasoning effort the agent uses to work on your requests.
Access and mode: Choose which actions the agent can perform without asking for confirmation. This list can also contain agent interaction modes, such as Plan mode.
Additional agent settings like Fast mode: These settings are agent-dependent.
Attach context
Click  Add in the text field to search for context to add. The popup lists the recent files first and offers the following sources:
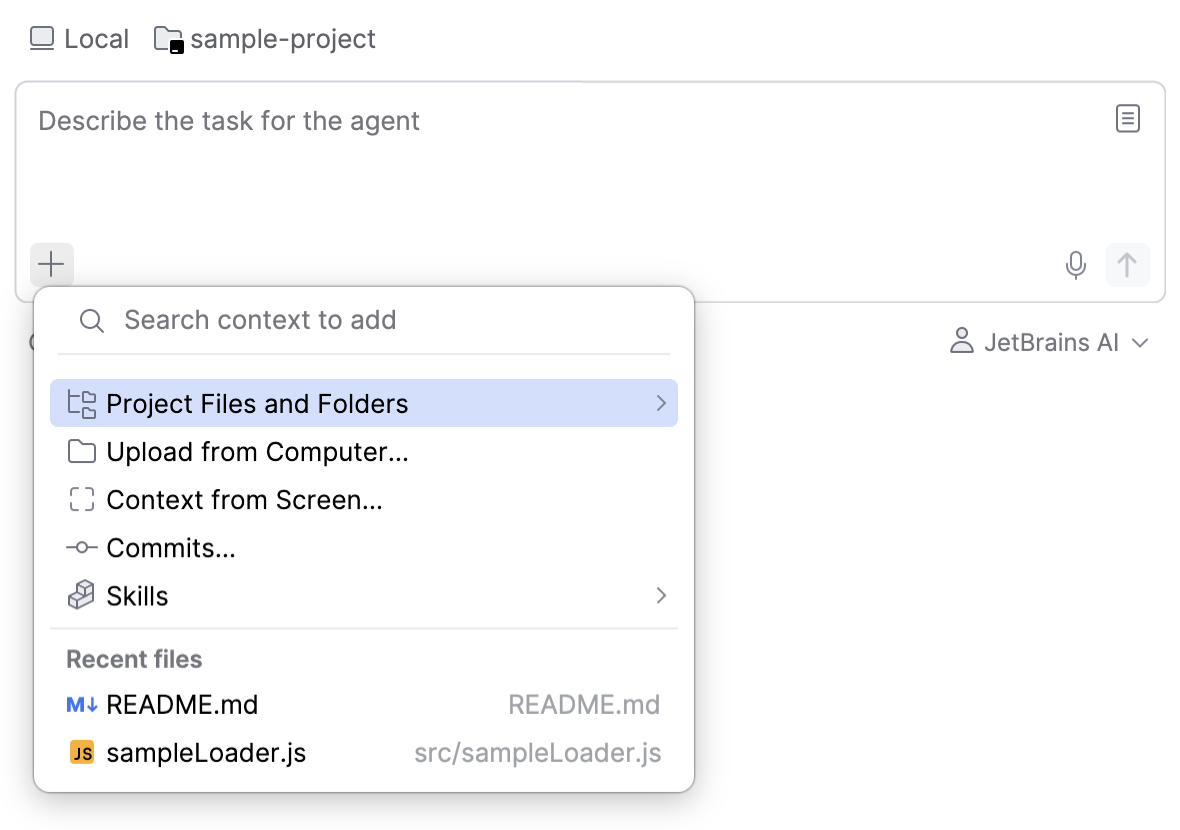
Project Files and Folders: Any file or directory in the project.
Upload from Computer: A file outside the project, such as a log or a specification.
Context from Screen: A screenshot. On macOS 14 and newer, this opens the native window and display picker, which can capture another application even when its window is behind the IDE, and shows an Attach/Retake/Cancel preview before you add the capture.
Commits: One or more commits from the repository history.
Skills: A skill that tells the agent how to perform a specific kind of task.
JetBrains Air in IDEs adds these attachments to the prompt that the agent receives, so the agent works with the context required for the task.
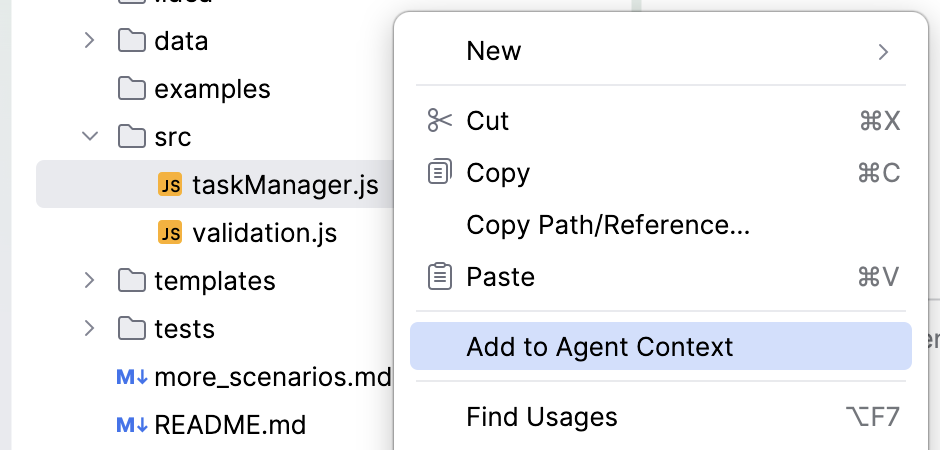
As an alternative, you can use the Add to Agent Context action to hand a specific part of your project to an agent. To do this:
Right-click a selection in the editor, a file in the Project tool window, a console, a test in the test runner tree, or a change in a version control view.
Select Add to Agent Context from the context menu.
Compose and send a request
To prepare a prompt for the agent, write your request in the text field using natural language. If you need to span the request across multiple lines, press Shift+Enter to start a new line.
Alternatively, you can dictate the request, reuse your previous prompts, or use suggestions provided by JetBrains Air in IDEs when composing a prompt.
Dictate a prompt
Instead of typing a request, you can dictate it. Click  Start Voice Input in the prompt field, dictate the request, and click
  to finish the recording.
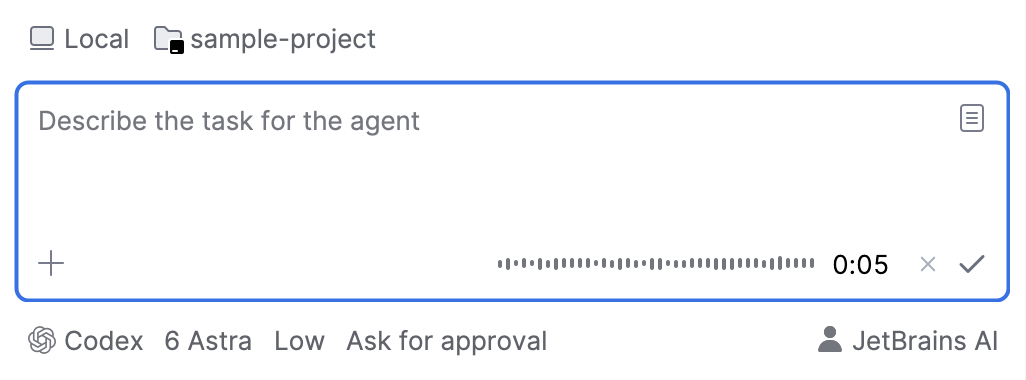
JetBrains Air in IDEs transcribes the recording and adds it to the prompt.
Use prompt suggestions
After you add context, JetBrains Air in IDEs can show predefined prompt suggestions in the text field. The suggestions are based on the type and context of the attachments and help you formulate a request for them.
Click a suggestion to add it to the request, then edit as needed before sending it.
Reuse prompts
To reuse your previous prompts, click the  Open prompt library button in the top-right corner of the text field and select the required entry from the Prompts dialog.

You can save a prompt by clicking the  Save to Prompts button next to it. Saved prompts appear at the beginning of the list.
Add a prompt to a queue
While the agent is working, you can draft another prompt in the text field and add it to the queue. The agent processes queued prompts in order after it finishes the current request.
While the agent is working, type your next prompt in the text field.
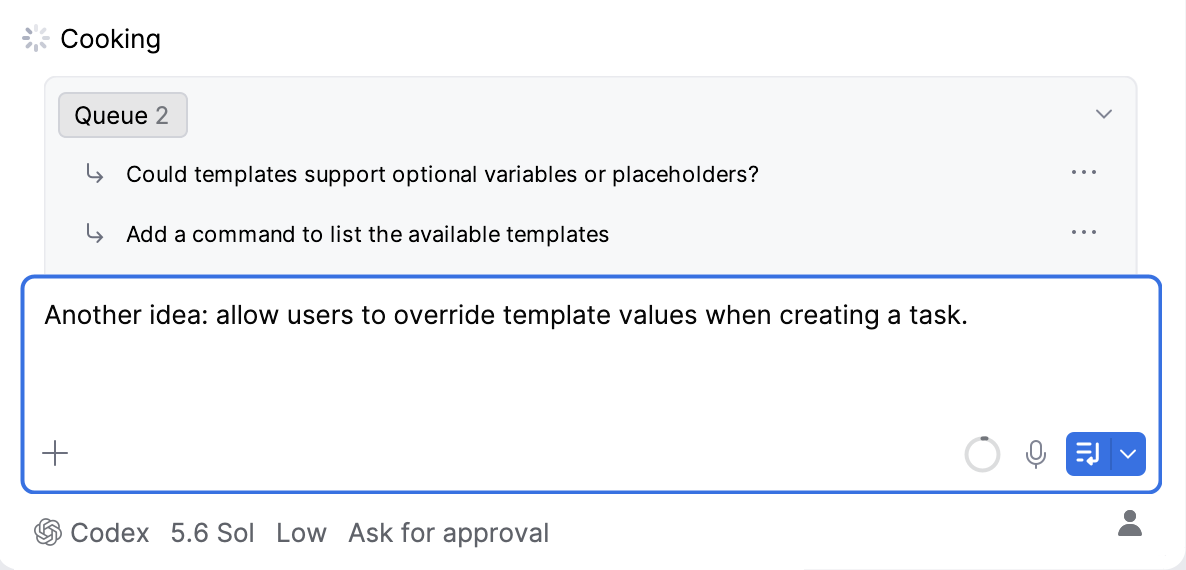
Send the request. The prompt is added to the queue, and the queue counter shows the number of prompts waiting to be processed.
To manage a queued prompt, use the controls displayed next to it:
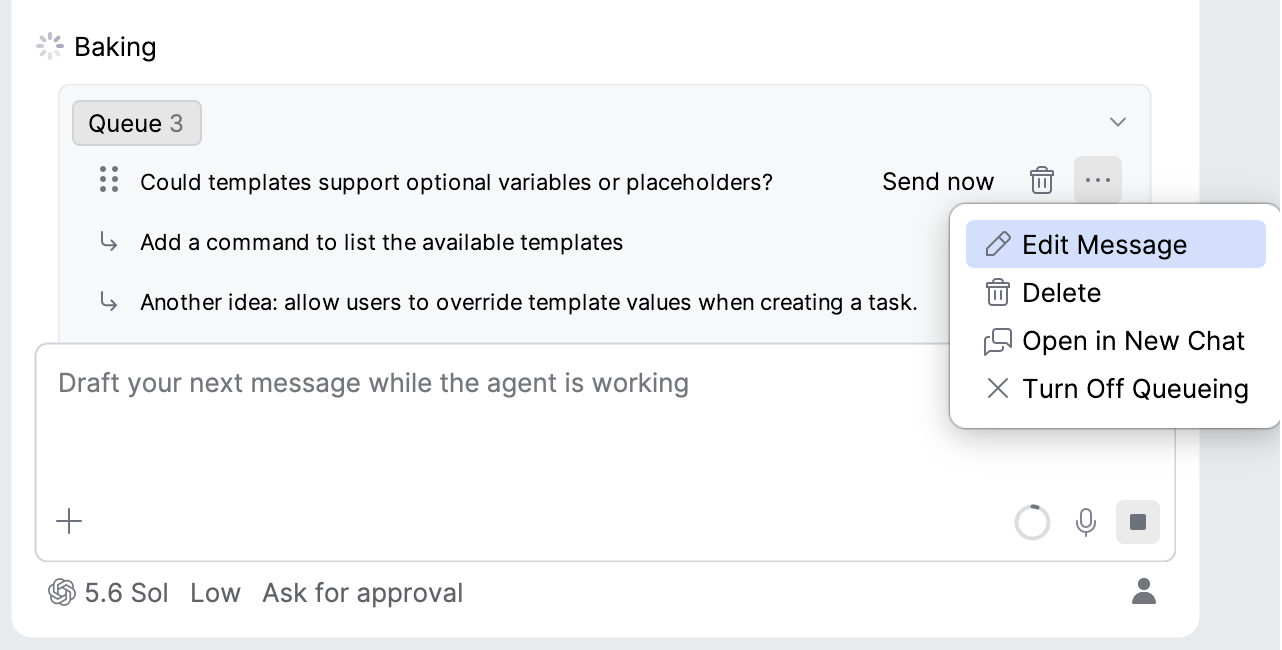
Click Send now to send the prompt immediately.
Click the
 button and select Edit Message to change the prompt, Delete to remove it, or Open in New Chat to start a new session with the selected prompt.
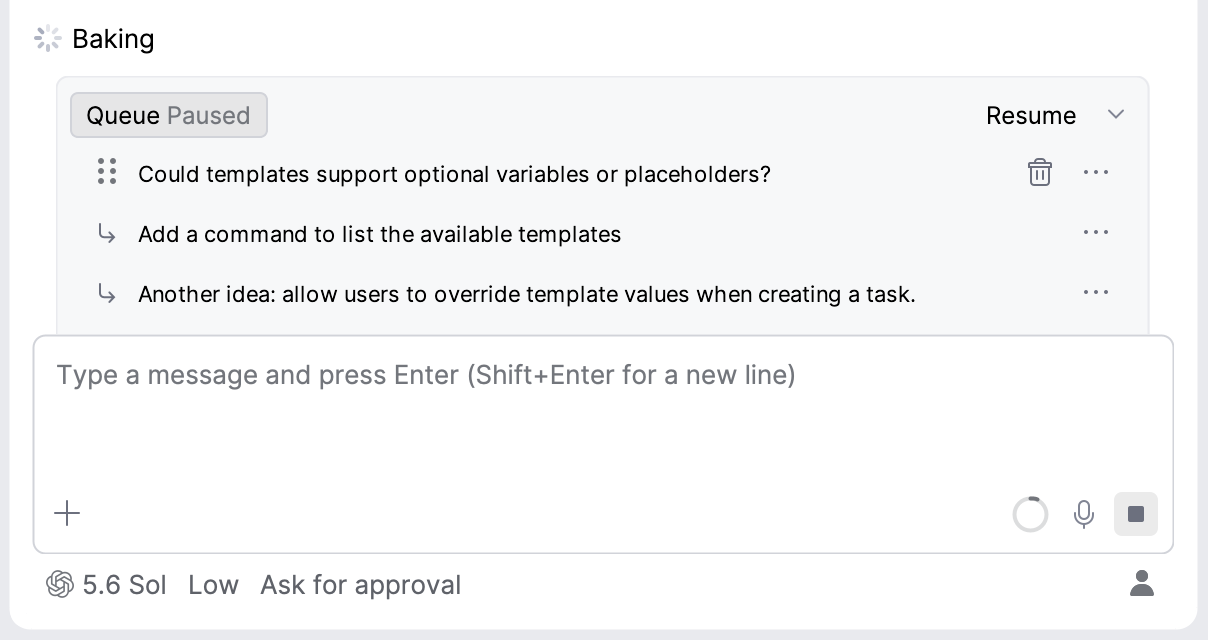
Select Turn Off Queueing to stop sending the agent queued prompts, pausing their execution.
Hold a queued prompt by the
 icon and drag it to the required position in the queue.
If the queue is paused, click Resume next to the queue header to continue processing the queued prompts.
Answer agent questions
Sometimes an agent might request specific details from you. In these cases, JetBrains Air in IDEs displays an interactive form containing a question and a list of suggestions on how to proceed with the task. The session pauses until you submit or dismiss the form, and your answer is added to the chat as a single summary block.
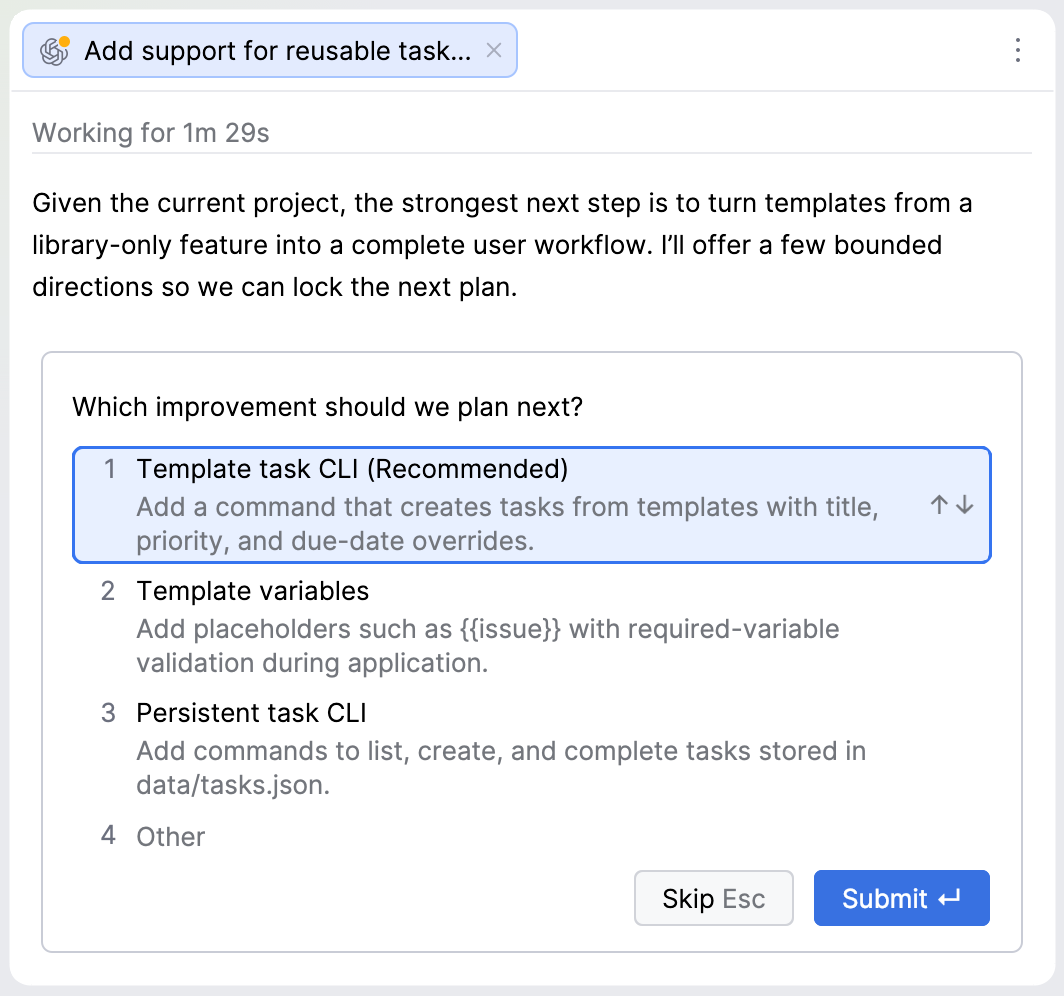
Use the up and down arrow keys to navigate the choices. Press Enter to confirm the selected choice, or press Esc to close the form.
Review the changes of the last turn
When an agent finishes working on the task, a list appears above the prompt field. It reports how many files were added or changed, and how many lines were added and removed in each of them.
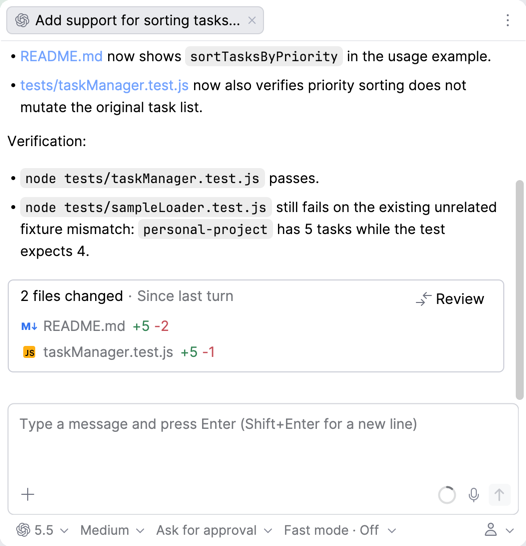
To review the changes made by the agent, do either of the following:
Click a file in the list to open the diff of that file.
Click Review in the top-right corner of the list to start the review from the first file in the list. The toolbar of the diff reports your position in the list, such as 3/5 files, and moves you to the next or the previous file.
A list covers a single turn: it holds the files that the agent added or changed while working on your last request, not the whole session. The list stays with the message that it belongs to, so you can scroll back through the conversation and see what every turn changed, and the next turn adds a list of its own. To go through everything that the session changed, expand the session in the Agent Sessions tool window, as described in Review the files an agent changed.