Release notes
This section lists functionality added to DataGrip in the current release. To view release notes for other DataGrip versions, click the version switcher on the help site and select the version that you need.

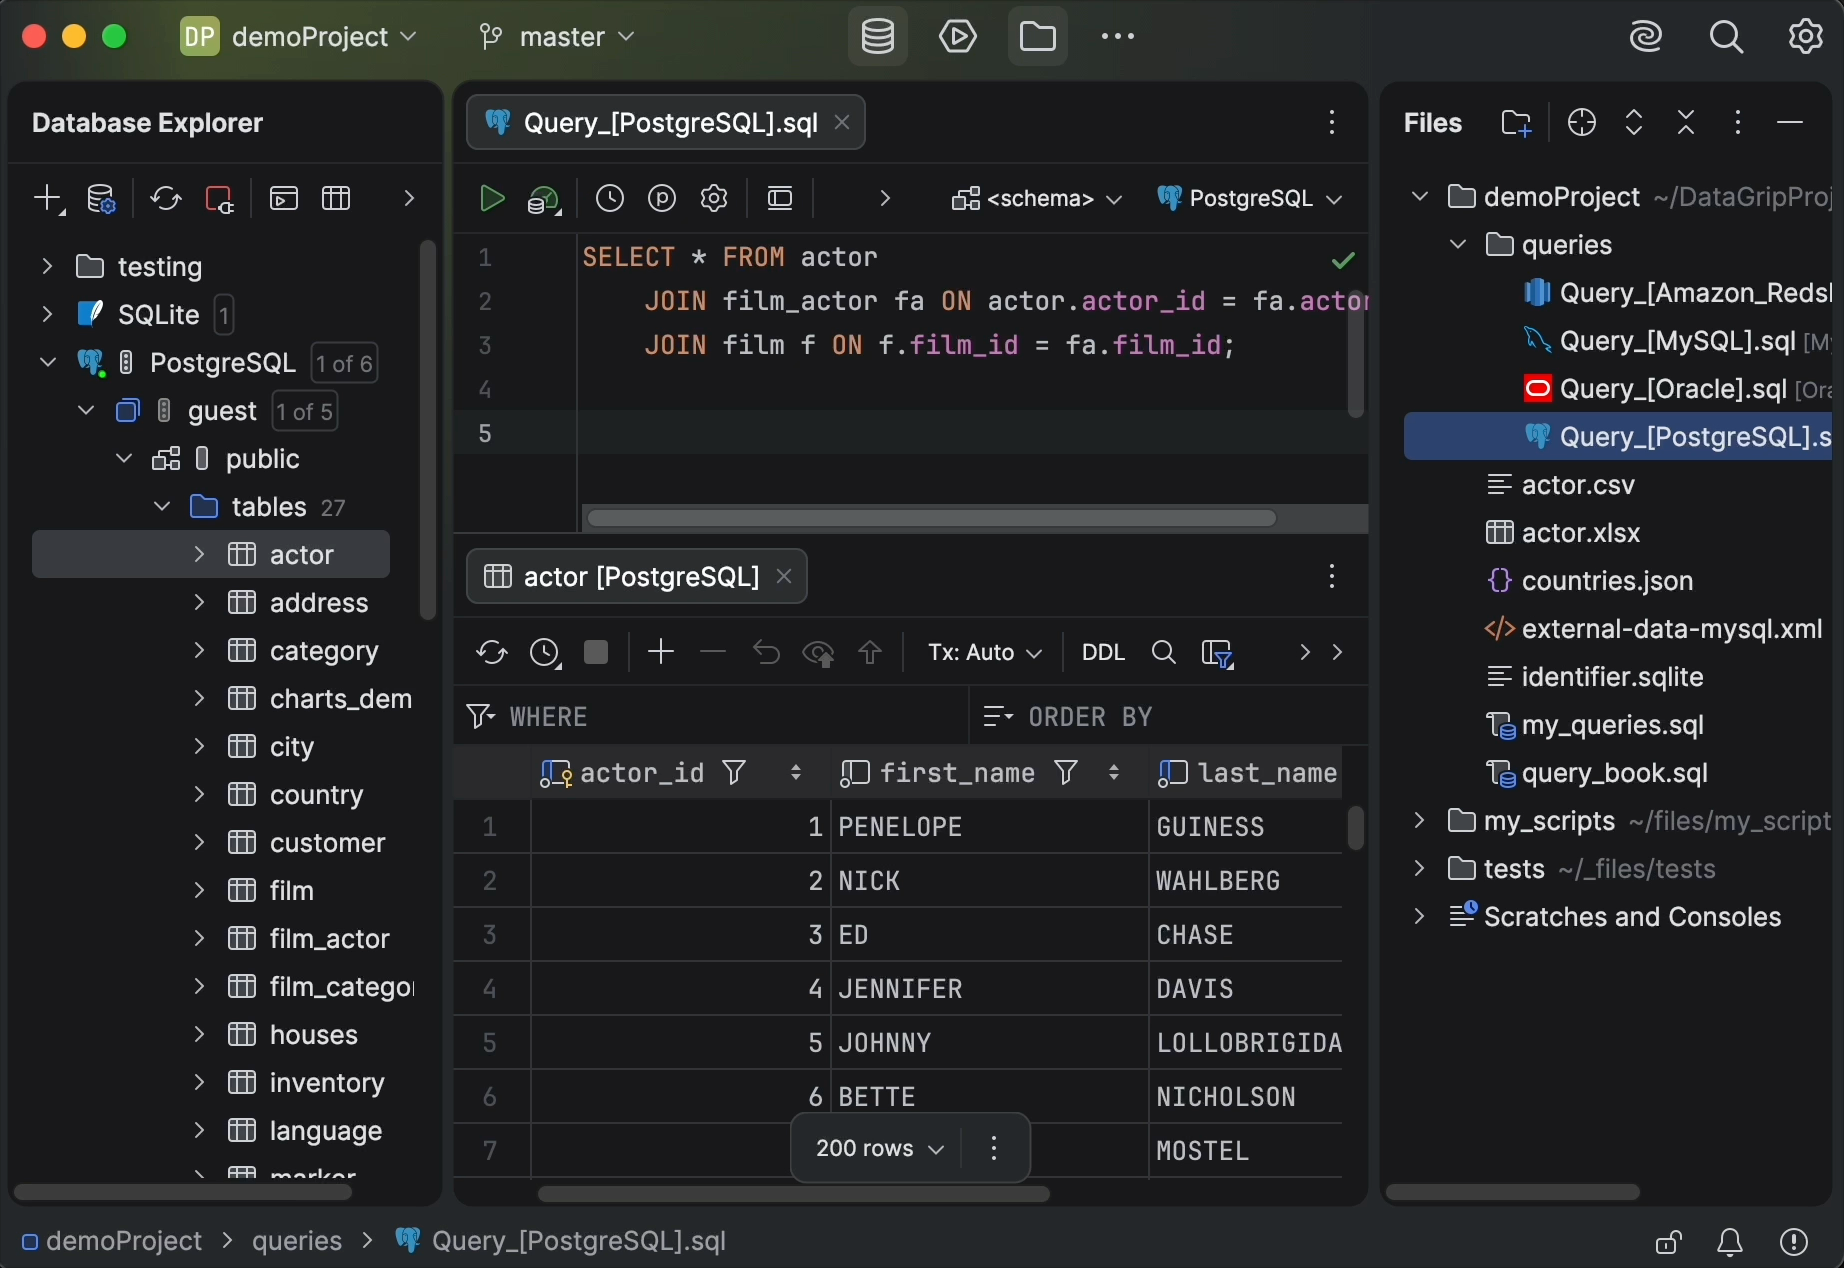
Query Consoles become Query Files
This change is reverted in 2025.3.1. Query consoles are back as the default workflow.
For more information, refer to the Query Consoles Are Coming Back blog post.
Redesigned folders in Database Explorer
We have redesigned the folders that are used in Database Explorer. Previously, they were virtual and were not stored anywhere. Since these folders are essentially groups but not directories, their configuration information is now stored in .idea/db-forest-config.xml. You can add this configuration file to the VCS to share it with your colleagues, or you can also ignore it there. Any folders you may already have will be automatically converted to the new configuration.
In the tree, you can arrange your folders in any way that works for you, as they are not sorted alphabetically. To do this, use the Move context menu action group or the corresponding shortcuts.
To create a new folder at the highest level, click New on the toolbar and select Folder. To create a new subfolder, select in the relevant folder’s context menu. A folder’s name is not considered an identifier, so you can have two folders with the same name inside the same folder.
For more information about the tree, refer to the Database Explorer topic.

Explain Plan
Query file toolbar button
The Explain Plan actions are now more accessible. You can open the menu with these actions by clicking ![]() Explain Plan on the query console toolbar.
Explain Plan on the query console toolbar.

[AI Assistant] Explanation for query plans
To use this feature, install and enable the AI Assistant plugin.
You can ask our AI Assistant to explain your query plans. To do this, right-click your query and go to or . The plan will appear in the Plan tab of the Services tool window. On the left toolbar of the tab, click Analyze SQL Plan with AI. AI Assistant will then provide an explanation in the chat, where you can ask any additional questions you might have about the plan.

[AI Assistant] Query optimization
To use this feature, install and enable the AI Assistant plugin.
AI Assistant can now optimize your query for better performance and efficiency. It does this by:
Automatically detecting inefficiencies such as redundant
JOINclauses, missing indexes, or suboptimal execution plans.Providing actionable suggestions or automatically rewriting queries to improve performance.
Leveraging Explain Plan outputs for deeper analysis and diagnostics.
This feature can require attaching the database schema to suggest proper explanations.
For AI Assistant to optimize your query, right-click the query and select .

AI Assistant will then give you a list of suggestions in the chat, and you can continue to ask any questions you might have there.

Connectivity
Cloud provider support
DataGrip now works with cloud database providers! You can connect your cloud account to the IDE, browse the list of databases you have in it, and choose the ones you’d like to connect to. DataGrip will create a new data source, filling in all connection details.
Supported clouds are as follows:
Azure (for now, Azure support requires the Azure Cloud Explorer plugin to be installed)
To connect to your cloud account, navigate and select the cloud you want to connect to.

All the cloud accounts connected to your IDE are displayed in the Clouds tab of the Data Sources and Drivers dialog.

[Amazon Redshift] Introspection levels
Introspection levels are now available for the Amazon Redshift databases. DataGrip now automatically adjusts the amount of loaded metadata for these databases based on your database size. This means that for a larger database, you don’t have to wait till all the metadata is loaded to start working with it.
For more information about introspection by levels, refer to the Introspection levels topic.

Code editor
An action to remove history records from Browse Query History
Now, you can delete query history records that DataGrip stores and displays in the Query History dialog. To do this, open the dialog by clicking Browse Query History on the query console toolbar. Then, from the list of executed queries, select the one you want to delete and click Remove.

[Snowflake] Support for classes
Snowflake database functionality now supports Classes, including the following:
Introspection of built-in classes and methods, as well as class instances.
Parsing of DDL statements for class instances, related
SHOWstatements, and thefoo!bar()syntax for method calls.Resolution of references to classes, class instances, and methods.
Parameter info and signature inspection for method calls.
Working with data
[Microsoft SQL Server Clustered and nonclustered columnstore indexes support
DataGrip now supports creating and modifying clustered and nonclustered columnstore indexes for Microsoft SQL Server. You can work with them in code generation and also use the indexes in the Create and Modify dialogs.

[Microsoft SQL Server] Support for VECTOR and JSON data types
We’ve also added support for the VECTOR and JSON data types that were introduced to Microsoft SQL Server 2025 earlier this year. These data types are now available in code completion suggestions, where they are highlighted properly, and you can also use them in the Create and Modify dialogs.
[Redis] Keys of different types in one group
We've added support for the hierarchical Redis keys. You can specify a separator, like :: or :, and keys will be displayed in the Database Explorer using a directory structure. For keys with names like user::<segment_01>::<segment_02>, the view is as follows:

To enable this view, specify a key separator on the General tab of the Data Sources and Drivers dialog.

Toolbar action for clearing all local filters in a grid
We’ve added the local filters clearing action to the data editor toolbar. Now, you can clear the local filters for all columns in your grid by clicking Table Result Local Filter and selecting Clear Local Filter For All Columns.

UI and UX improvements
Main menu redesign
We have restructured and improved the main menu by clearing out some of the clutter and keeping only the most useful actions, such as Reformat Code, Recent Changes, Jump to Query File, and Show Query History. Now it is easier to find and invoke the actions you most often need.

Islands theme becomes the default one
DataGrip uses the new Islands interface theme by default. The theme is available in both dark and light modes. This update is a visual refresh, which means that all functionality will remain the same.
To turn the new theme on or off, open the IDE Settings dialog and navigate to settings page.
Light mode:
Dark mode: