# 教程:创建您的第一个 Spring 应用程序
> For the complete documentation index, see [llms.txt](https://www.jetbrains.com.cn/help/idea/llms.txt).
> **TL;DR**
> 必需插件: Spring 和 Spring Boot (捆绑)
本教程介绍如何在 IntelliJ IDEA 中创建和运行 [Spring](https://spring.io/) 应用程序。 这是一个由 [Spring Boot](https://spring.io/projects/spring-boot) Maven 项目,由 [Spring Initializr](https://start.spring.io/)生成。 这是创建 Spring 应用程序的最快方式,IntelliJ IDEA 提供了专门的项目向导。
在本教程中,您将学习如何创建一个返回问候语的 GET 端点,并在浏览器中测试此端点。 还将学习如何为 Spring 应用程序添加 static HTML 主页。
本教程使用 [Java 25](https://openjdk.org/projects/jdk/25/) 语法。
Procedure: 创建一个新的 Spring Boot 项目
1. 启动 IntelliJ IDEA。
如果打开欢迎屏幕,请点击 新建项目 。 否则,请在主菜单中转到 `文件 | 新建 | 项目` 。
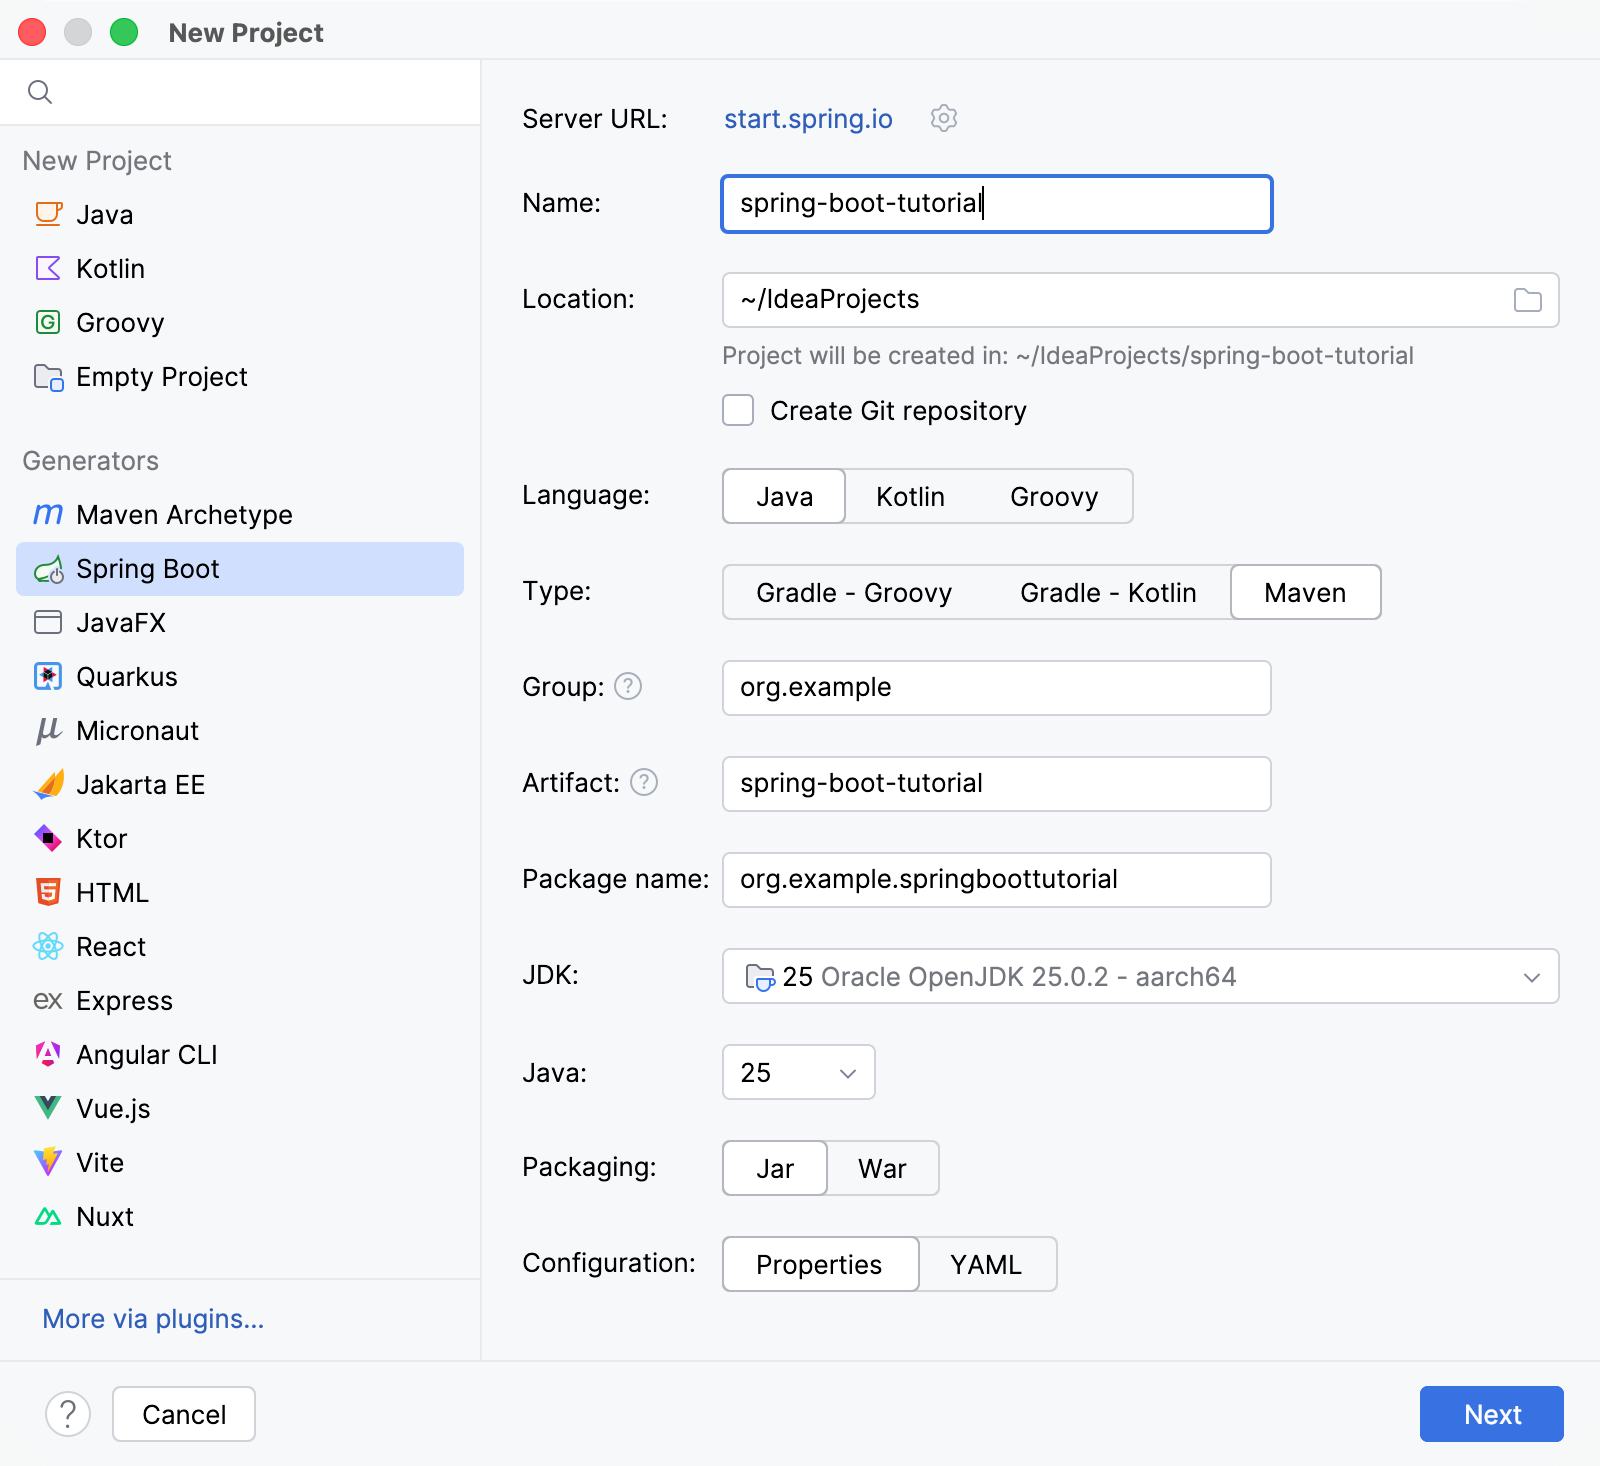
2. 在 新建项目 向导中,从 生成器 列表中选择 Spring Boot 。
3. 为项目指定名称(例如, `spring-boot-tutorial` ),并在必要时更改默认位置路径。
4. 选择 Java 作为 语言 ,并选择 Maven 作为 类型 。
5. 从 JDK 列表中,选择最新可用的 Oracle OpenJDK 版本。
如果 JDK 已安装在您的计算机上,但未在 IDE 中定义,请选择 添加 JDK 并指定 JDK 主目录的路径。
如果您的计算机上没有所需的 JDK,请选择 下载 JDK 。
6. 从 Java 列表中选择最新版本。
7. 保留 [其他字段](spring-initializr-project-wizard.html#step-1-basic-project-configuration) 中的默认值。 点击 下一步 继续。
8. 在下一个屏幕上,选择 Spring Web 依赖项,该依赖项位于 Web 节点下。 任何使用 [Spring MVC](https://docs.spring.io/spring/docs/current/spring-framework-reference/web.html) 的 web 应用程序都需要此依赖项。
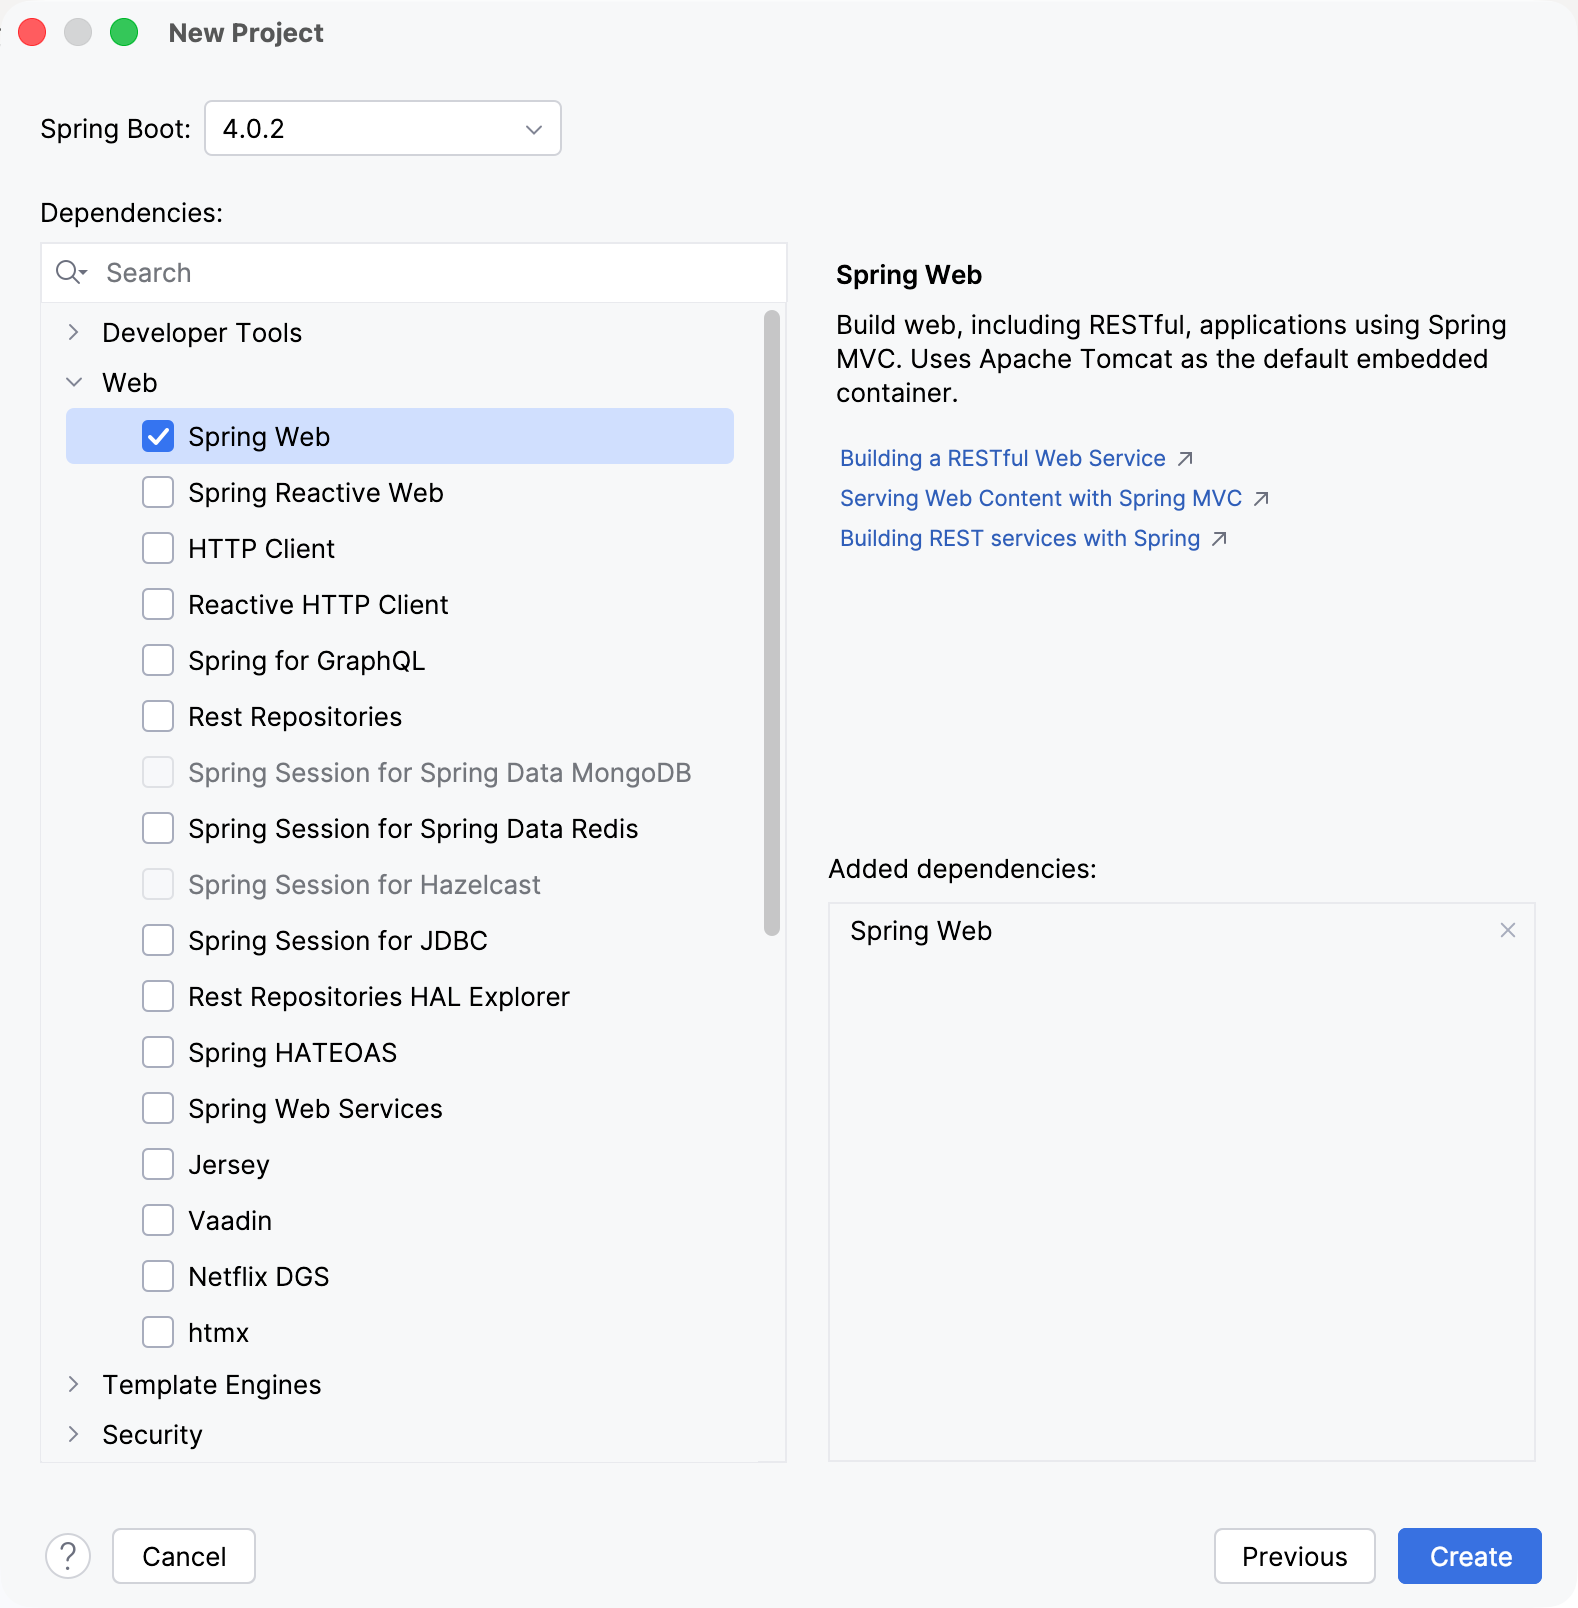
9. 点击 创建 。 IntelliJ IDEA 将生成并设置项目。
> **Note:**
> 除 新建项目 向导外,您还可以在现有的 Spring Boot 项目中管理 Spring Starters:在编辑器中打开 `pom.xml` 或 `build.gradle` 文件时,点击 添加启动器… 内嵌提示旁的 `dependencies` 列表或按 `Alt+Insert` (Windows), `⌘ N` (macOS), `⌃ N` (IntelliJ IDEA Classic (macOS)), `⌘ N` (macOS System Shortcuts), `Alt+Insert` (XWin), `Alt+Insert` (GNOME), `Alt+Insert` (KDE), `Alt+Insert` (Emacs), `Ctrl+N` (Sublime Text), `⌘ N` (Sublime Text (macOS)), `Ctrl+N` (Visual Studio), `⌘ N` (Visual Studio (macOS)), `Alt+Insert` (NetBeans), `Alt+Insert` (Eclipse), `⌘ N` (Eclipse (macOS))并选择 添加启动器 。 这使您可以快速查找、添加和删除现有项目中的 Spring 依赖项,而无需手动修改文件或考虑兼容版本。
>
>
>
> 您可以在 IDE 设置( `Ctrl+Alt+S` (Windows), `⌘ Comma` (macOS), `⌘ Comma` (IntelliJ IDEA Classic (macOS)), `⌘ Comma` (macOS System Shortcuts), `Ctrl+Alt+S` (XWin), `Ctrl+Alt+S` (GNOME), `Ctrl+Alt+S` (KDE), `Ctrl+Alt+S` (Emacs), `Ctrl+Alt+S` (Sublime Text), `⌘ Comma` (Sublime Text (macOS)), `Ctrl+Alt+S` (Visual Studio), `⌘ Comma` (Visual Studio (macOS)), `Ctrl+Alt+S` (NetBeans), `Ctrl+Alt+S` (Eclipse), `⌘ Comma` (Eclipse (macOS)))中的 `编辑器 | 内嵌提示 | 其他` 内,在 Groovy 、 Kotlin 和 XML 下禁用或启用此嵌入提示。
Procedure: 添加一个发送问候的方法
Spring Initializr 创建一个包含 `main()` 方法的类,以引导您的 Spring 应用程序。 在本教程中,您将直接向此类添加新的 `sayHello()` 方法。
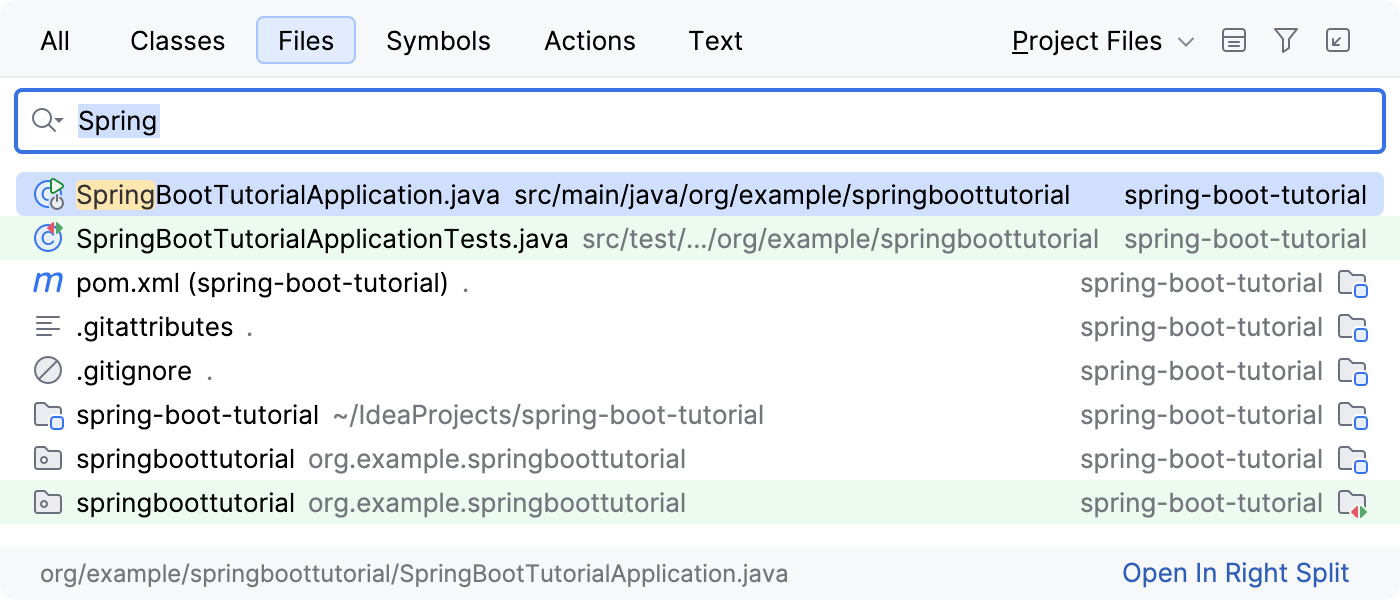
1. 在 `src/main/java/org/example/springboottutorial` 软件包中,打开 `SpringBootTutorialApplication.java` 文件。
> **Tip:**
> IntelliJ IDEA 提供 转到文件… 操作来快速查找和打开文件。 请前往 `导航 │ 文件` 或按 `Ctrl+Shift+N` (Windows), `⌘ ⇧ O` (macOS), `⌘ ⇧ N` (IntelliJ IDEA Classic (macOS)), `⌘ ⇧ O` (macOS System Shortcuts), `Ctrl+Shift+N` (XWin), `Ctrl+Shift+N` (GNOME), `Ctrl+Shift+N` (KDE), `Ctrl+X, Ctrl+F` (Emacs), `Ctrl+P` (Sublime Text), `⌘ P` (Sublime Text (macOS)), `Ctrl+Shift+T` (Visual Studio), `⌘ ⇧ T` (Visual Studio (macOS)), `Alt+Shift+O` (NetBeans), `Ctrl+Shift+R` (Eclipse), `⌘ ⇧ R` (Eclipse (macOS)),开始键入文件名并从列表中选择。
>
> 
2. 添加用于发送问候语的 `sayHello()` 方法。 为此,请在代码中添加所有必要的导入和注解,并将新的 `sayHello ()` 方法添加到现有 `SpringBootTutorialApplication` 类中,使文件如下所示:
```JAVA
package org.example.springboottutorial;
import org.springframework.boot.SpringApplication;
import org.springframework.boot.autoconfigure.SpringBootApplication;
import org.springframework.web.bind.annotation.GetMapping;
import org.springframework.web.bind.annotation.RequestParam;
import org.springframework.web.bind.annotation.RestController;
@SpringBootApplication
@RestController
public class SpringBootTutorialApplication {
static void main(String[] args) {
SpringApplication.run(SpringBootTutorialApplication.class, args);
}
@GetMapping("/hello")
public String sayHello(@RequestParam(value = "myName", defaultValue = "World") String name) {
return String.format("Hello %s!", name);
}
}
```
`sayHello()` 方法接受 `名称` 参数,并返回与参数值组合的词 `Hello` 。 所有其他事务都通过添加 Spring 注释来处理:
* `@RestController` 注解将 `SpringBootTutorialApplication` 类标记为请求处理程序(REST 控制器)。
* `@GetMapping("/hello")` 注解将 `sayHello()` 方法映射到针对 `/hello` 的 GET 请求。
* `@RequestParam` 注解将 `名称` 方法参数映射到 `myName` Web 请求参数。 如果未在 web 请求中提供 `myName` 形参,则默认使用 `世界` 。
> **Tip:**
> 可以直接在编辑器中查看 Spring 注解的 Javadoc:将鼠标悬停在相应注解上,或使用 [文档工具窗口](documentation-tool-window.html)。
Procedure: 运行您的 Spring 应用程序
IntelliJ IDEA 会创建一个 Spring Boot 运行配置,您可以用它运行您的新 Spring 应用。
1. 在主工具栏的 [运行微件](guided-tour-around-the-user-interface.html#toolbar) 中,选择 `SpringBootTutorialApplication` 并点击  运行 ,或按 `Shift+F10` (Windows), `⌃ R` (macOS), `⇧ F10` (IntelliJ IDEA Classic (macOS)), `⌥ ⇧ R` (macOS System Shortcuts), `Shift+F10` (XWin), `Shift+F10` (GNOME), `Shift+F10` (KDE), `Shift+F10` (Emacs), `Shift+F10` (Sublime Text), `Shift+F10` (Sublime Text (macOS)), `Ctrl+F5` (Visual Studio), `⌃ F5` (Visual Studio (macOS)), `F6` (NetBeans), `Alt+Shift+X` (Eclipse), `⌘ ⇧ F11` (Eclipse (macOS))。 还可以使用  运行 图标,该图标位于类声明或 `main()` 方法声明旁边的装订区域中。
IntelliJ IDEA 将在 [运行工具窗口](run-tool-window.html) 中显示正在运行的 Spring Boot 应用程序。 控制台 选项卡显示 Spring 日志消息的输出。
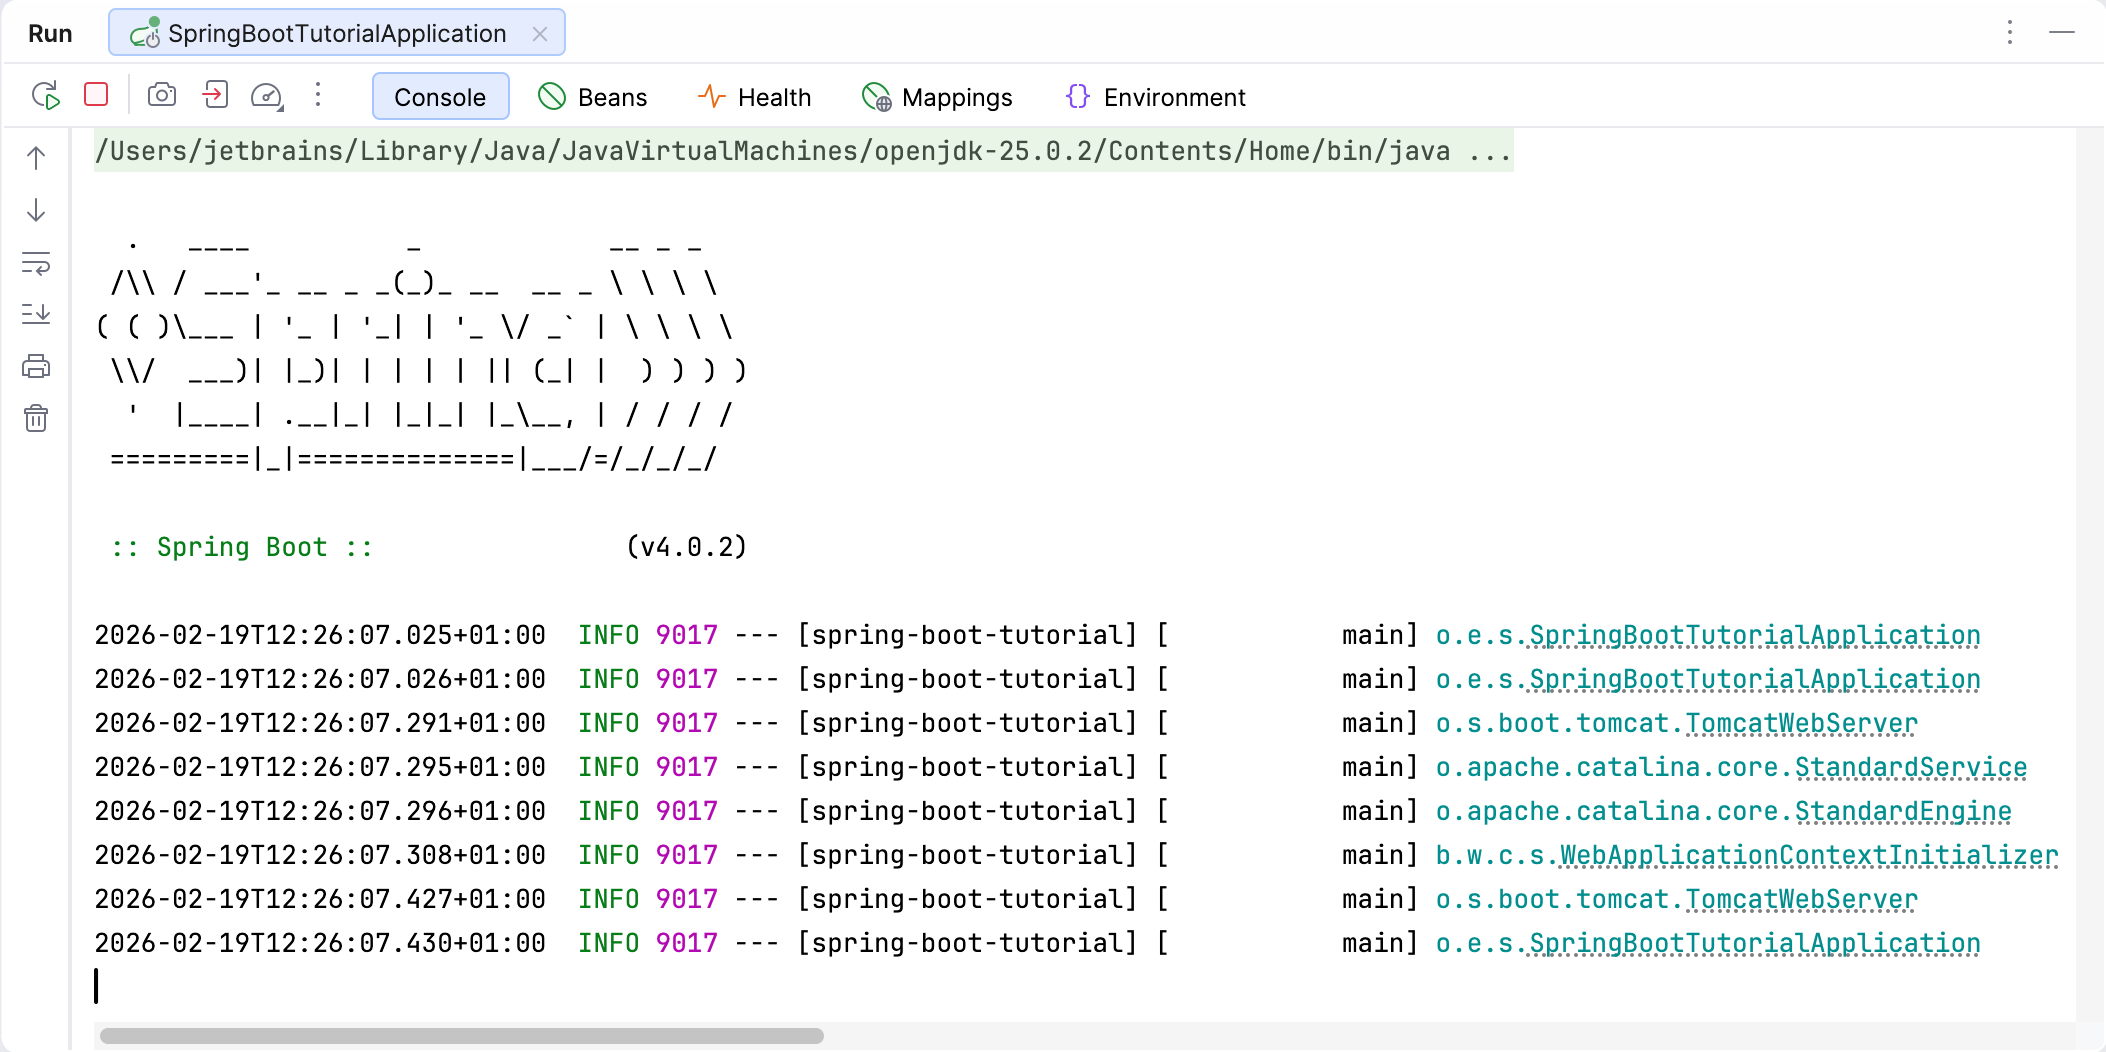
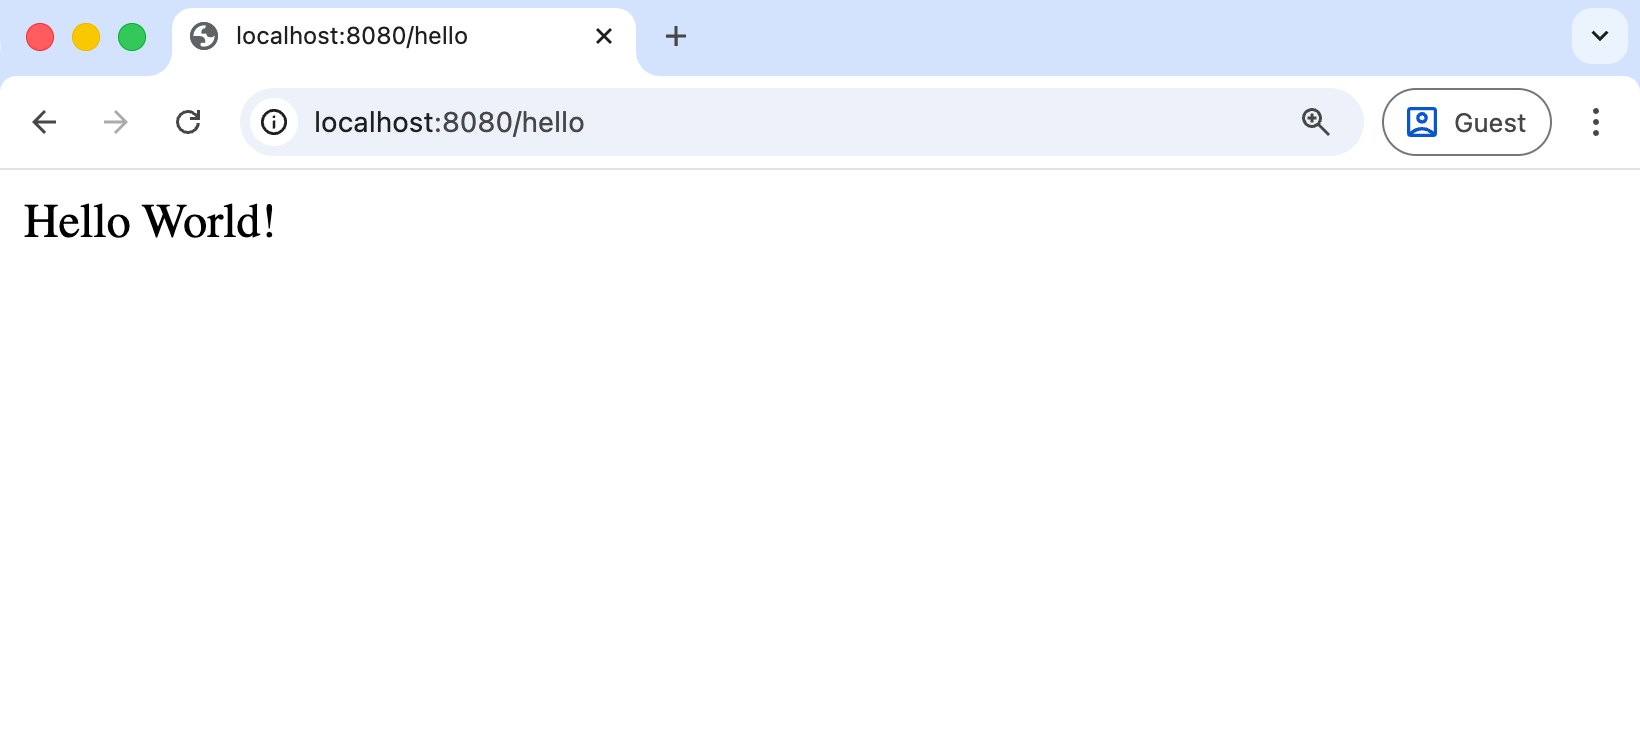
2. 打开 Web 浏览器。 默认情况下,内置 Apache Tomcat 服务器正在侦听 8080 端口,因此请转到 [http://localhost:8080/hello](http://localhost:8080/hello)。 如果一切正确,应该会看到应用程序以 `Hello World!` 响应。
> **Tip:**
> 可以使用专用意图操作在浏览器中快速打开此 URL。 在编辑器中,将文本光标放在控制器 URL 映射处(例如 `/hello` ),按 `Alt+Enter` (Windows), `⌥ ⏎` (macOS), `⌥ ⏎` (IntelliJ IDEA Classic (macOS)), `⌥ ⏎` (macOS System Shortcuts), `Alt+Enter` (XWin), `Alt+Enter` (GNOME), `Alt+Enter` (KDE), `Alt+Enter` (Emacs), `Alt+Enter` (Sublime Text), `⌥ ⏎` (Sublime Text (macOS)), `Alt+Enter` (Visual Studio), `⌥ ⏎` (Visual Studio (macOS)), `Alt+Enter` (NetBeans), `Ctrl+1` (Eclipse), `⌘ 1` (Eclipse (macOS)),然后选择 在网页浏览器中打开 。
`Hello World!` 是默认的泛型响应。 您可以在网络请求中提供一个参数,以便应用程序正确地向您问候。 例如,尝试 [http://localhost:8080/hello?myName=Human](http://localhost:8080/hello?myName=Human)。
Procedure: 添加主页
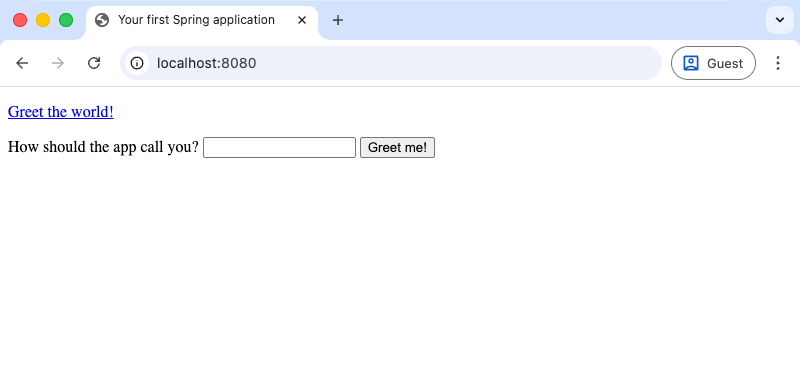
创建的 Spring Boot 应用程序在 [/hello](http://localhost:8080/hello) 上有一个可用的端点。 但是,如果您在 [http://localhost:8080/](http://localhost:8080/) 打开应用程序的根上下文,您将会遇到错误,因为没有定义根资源。 让我们添加一个包含指向您 endpoint 的链接的静态 HTML 主页。
1. 在 项目 工具窗口中,右键点击 `/src/main/resources/static/` 目录,选择 新建 | HTML 文件 ,指定名称 `index.html` ,然后按 `Enter` (Windows), `⏎` (macOS), `⏎` (IntelliJ IDEA Classic (macOS)), `⏎` (macOS System Shortcuts), `Enter` (XWin), `Enter` (GNOME), `Enter` (KDE), `Enter` (Emacs), `Enter` (Sublime Text), `⏎` (Sublime Text (macOS)), `Enter` (Visual Studio), `⏎` (Visual Studio (macOS)), `Enter` (NetBeans), `Enter` (Eclipse), `⏎` (Eclipse (macOS))。
2. 请修改默认模板或将其替换为以下 HTML 代码:
```HTML
Your first Spring application
Greet the world!
```
3. 在 运行 工具窗口中,点击 或按 `Shift+F10` (Windows), `⌃ R` (macOS), `⇧ F10` (IntelliJ IDEA Classic (macOS)), `⌥ ⇧ R` (macOS System Shortcuts), `Shift+F10` (XWin), `Shift+F10` (GNOME), `Shift+F10` (KDE), `Shift+F10` (Emacs), `Shift+F10` (Sublime Text), `Shift+F10` (Sublime Text (macOS)), `Ctrl+F5` (Visual Studio), `⌃ F5` (Visual Studio (macOS)), `F6` (NetBeans), `Alt+Shift+X` (Eclipse), `⌘ ⇧ F11` (Eclipse (macOS))重新启动您的 Spring 应用程序。
现在,您的应用将 `index.html` 作为根资源提供服务,位于 [http://localhost:8080/](http://localhost:8080/)。
## 总结
通过本教程,您已经学会了如何:
* [创建新的 Spring Boot 项目](#create-new-spring-boot-project)在 IntelliJ IDEA 中
* 使用 Spring 注解 [创建 HTTP GET 请求](#add-greeting-method)
* 在本地 [运行 Spring 应用程序](#run-spring-application)
* 为 Spring 应用程序 [添加 static HTML 主页](#add-home-page)
## 后续步骤
您在本教程中创建的这个简单应用程序演示了如何开始使用 Spring。 要了解 IntelliJ IDEA 如何帮助您编写代码并在运行时管理应用程序,请参阅 [下一个教程](spring-support-tutorial.html),其中重点介绍更高级的 Spring 支持功能。
要构建一个支持文件上传和下载、使用 H2 数据库并包含可执行文件 JAR 的 REST API,请按照 [教程:构建 Spring Boot REST API](spring-boot-rest-api-tutorial.html) 操作。
完整教程列表请参阅 [IntelliJ IDEA 教程](instance-tutorials.html)。