Migrate from Cursor
Cursor utilizes a blank canvas approach, giving users the flexibility to customize the environment according to their specific needs and workflows.
RubyMine provides a different experience by offering a ready-to-use environment out of the box. Its built-in developer toolset, deep language support, and advanced AI features are available from the start, minimizing the need for additional configuration.
For a list of RubyMine’s key features, visit the Features overview page.
Import settings
When you launch your RubyMine for the first time, you will see the Import Settings dialog with the list of other IDE's settings found on your machine.
Select Cursor to import settings.
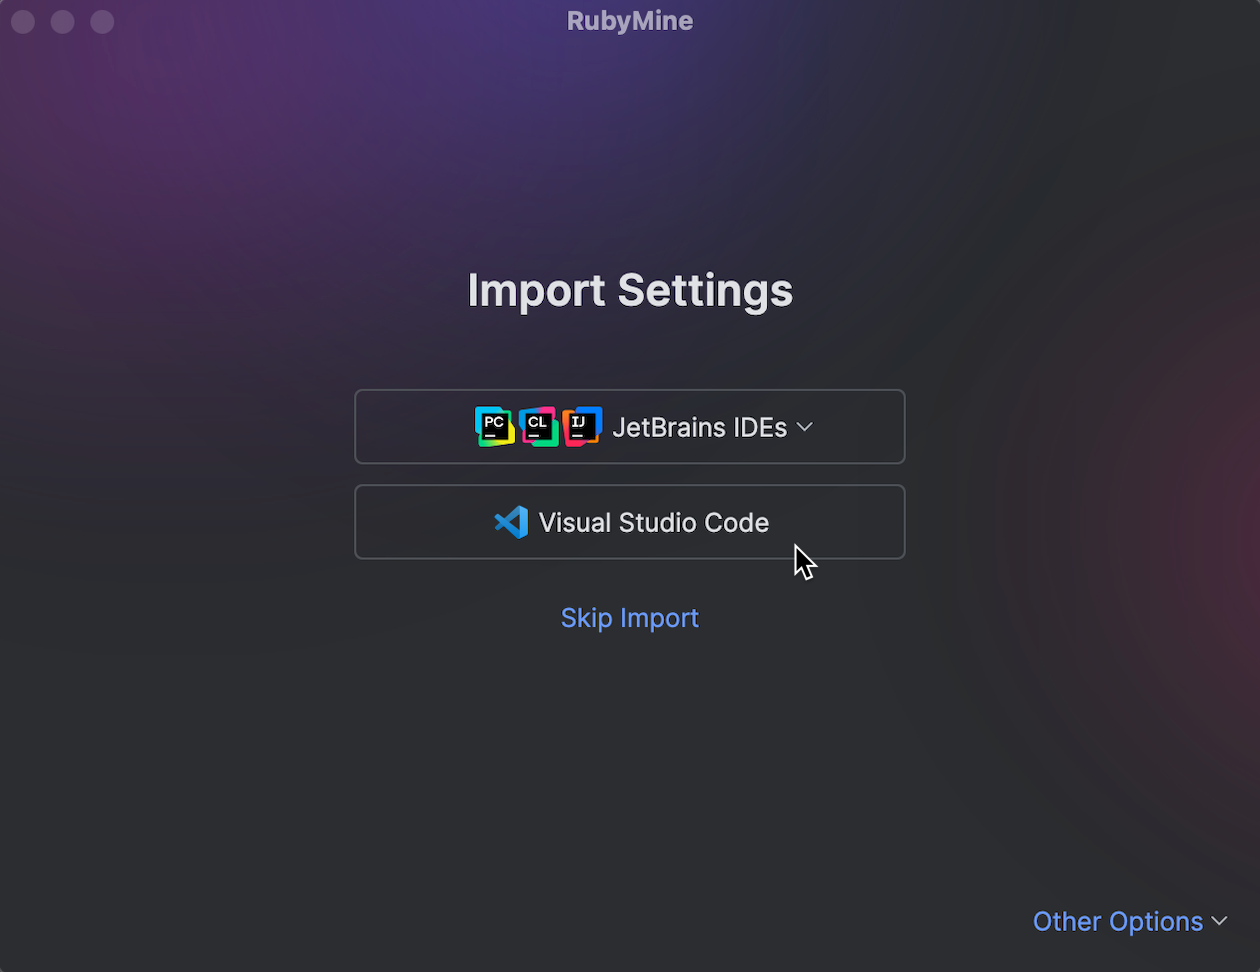
Select which settings you want to import and click Import Settings.
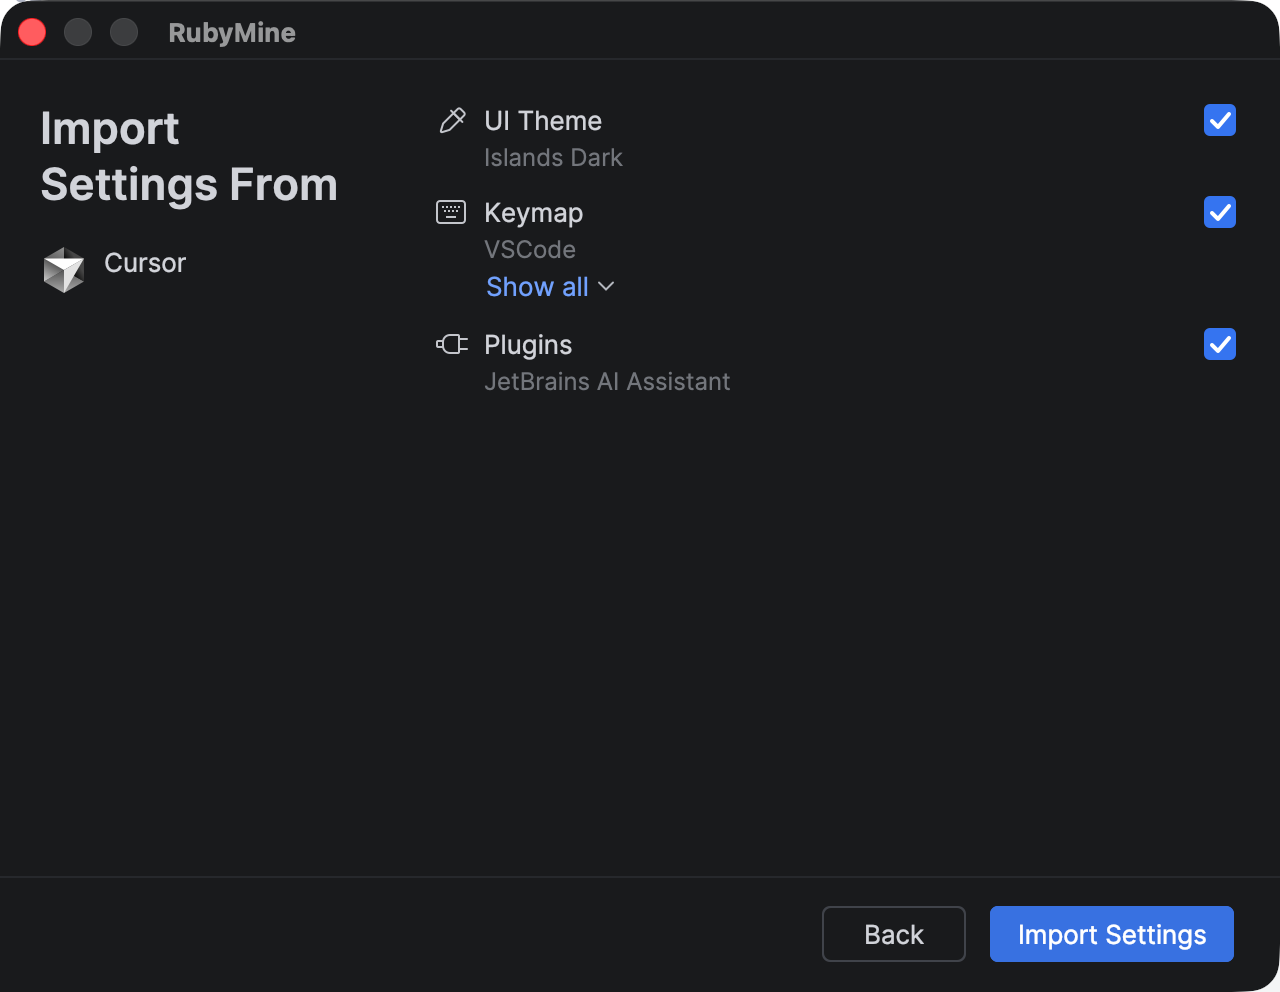
UI Theme – select if you want to import the theme settings.
Keymap – select if you want to import the keyboard shortcuts. Click Show all to review the list of shortcuts that will be imported.
Plugins – select if you want to import the extensions you used in Cursor. These extensions will be substituted with corresponding plugins from the JetBrains Marketplace. Click Show all to review the list of plugins that will be installed.
Recent Projects – select if you want to import the projects you were working on in Cursor.
You will see a confirmation that the settings have been successfully imported.
Open or create your first project
When you start working in RubyMine, you're prompted to open or create a project. This project-first approach enables the IDE to better understand the context and provide more advanced coding assistance.
If you have imported your projects from Cursor, they will be available for opening right away.
Alternatively, you can choose one of the following options:
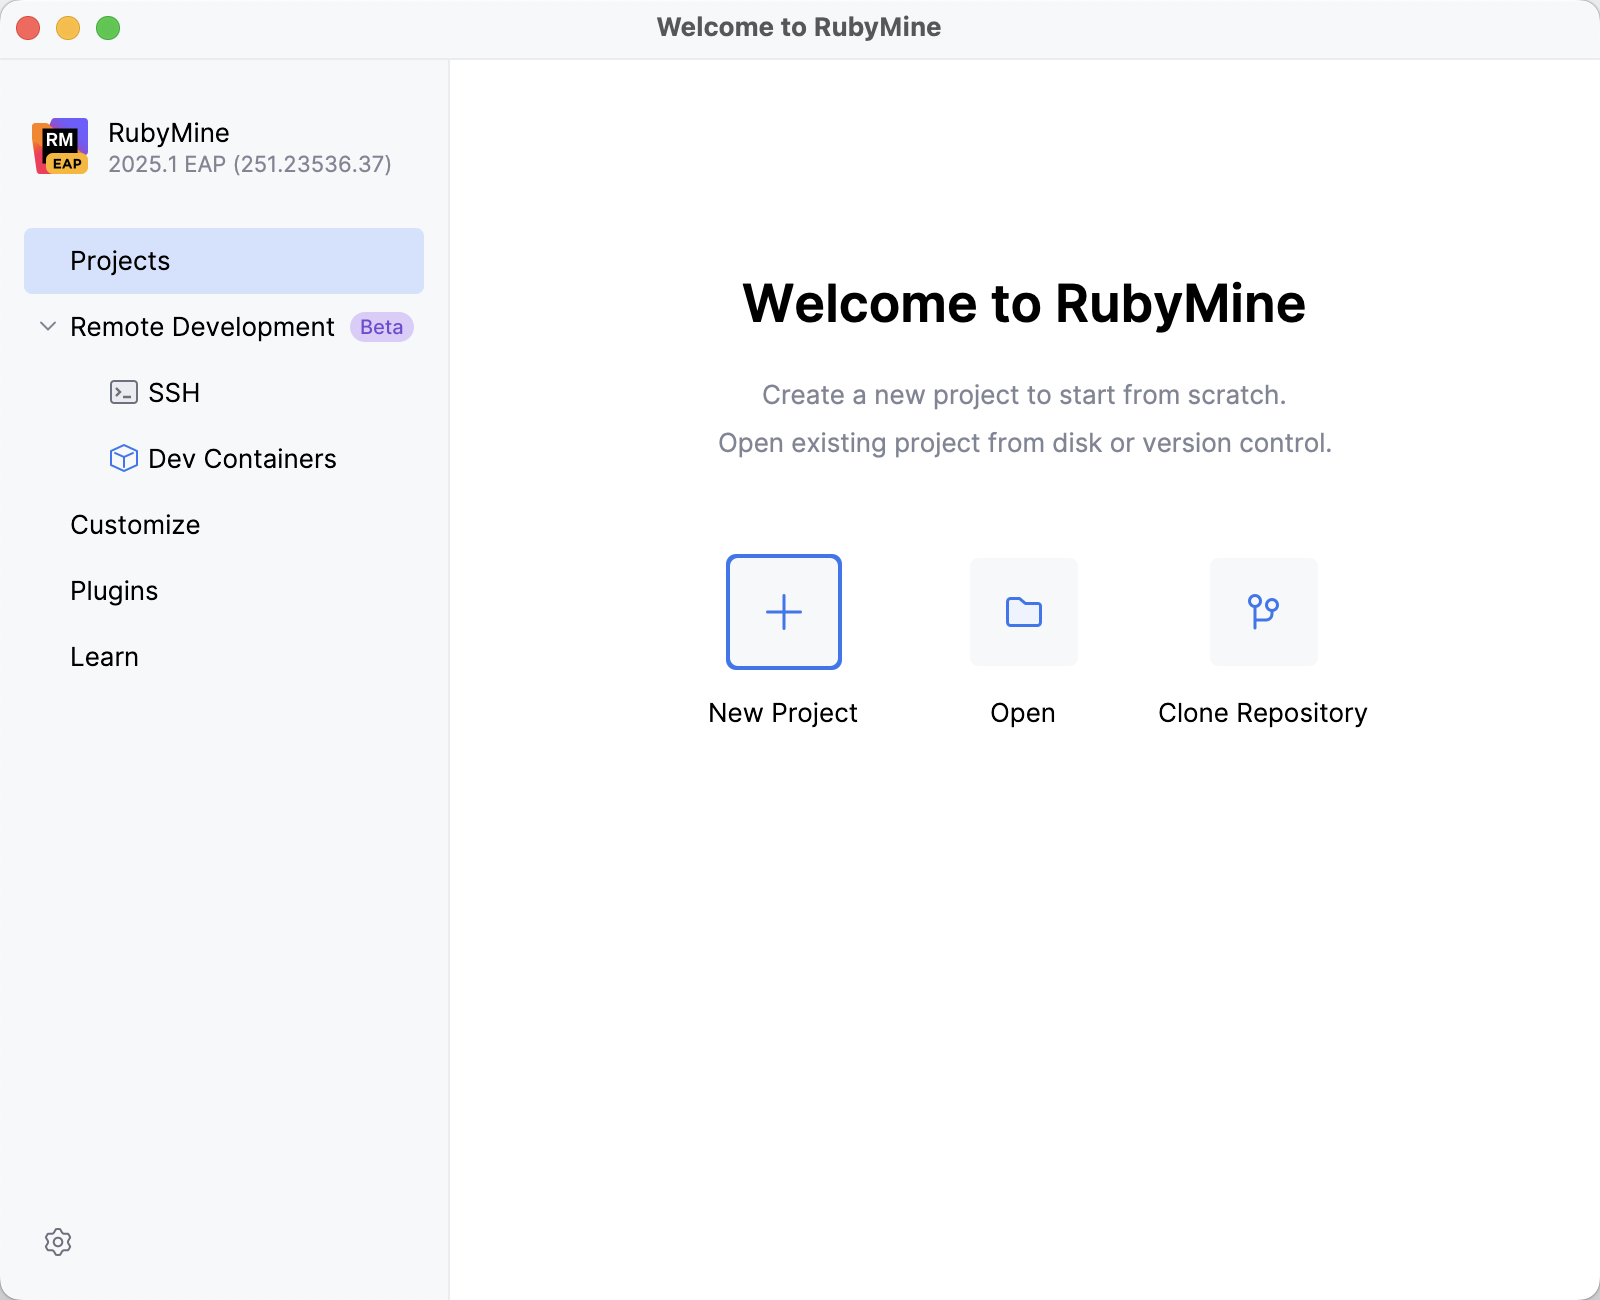
New Project: create an empty project or generate a project from an existing template.
Open: open a project stored on your machine.
Clone Repository: get an existing project from a remote repository on a VCS hosting service like GitHub.
Once you have opened a project, you can start coding as usual.
Install extensions
In JetBrains IDEs, we refer to extensions as plugins. They work pretty much the same way extensions do in Cursor, allowing you to extend the built-in functionality and customize your IDE. To explore the available plugins, open settings by pressing Ctrl+Alt+S and navigate to . The available plugins are under the Marketplace tab.
In RubyMine, most of the tools and plugins required for development are bundled, allowing you to start or continue working on your project with minimal additional configuration.
Change the UI theme
RubyMine comes with a couple of predefined themes, but there is a variety of custom options to choose from. To explore them, press Ctrl+Alt+S to open settings and select Plugins. In the Marketplace tab, search for Theme.
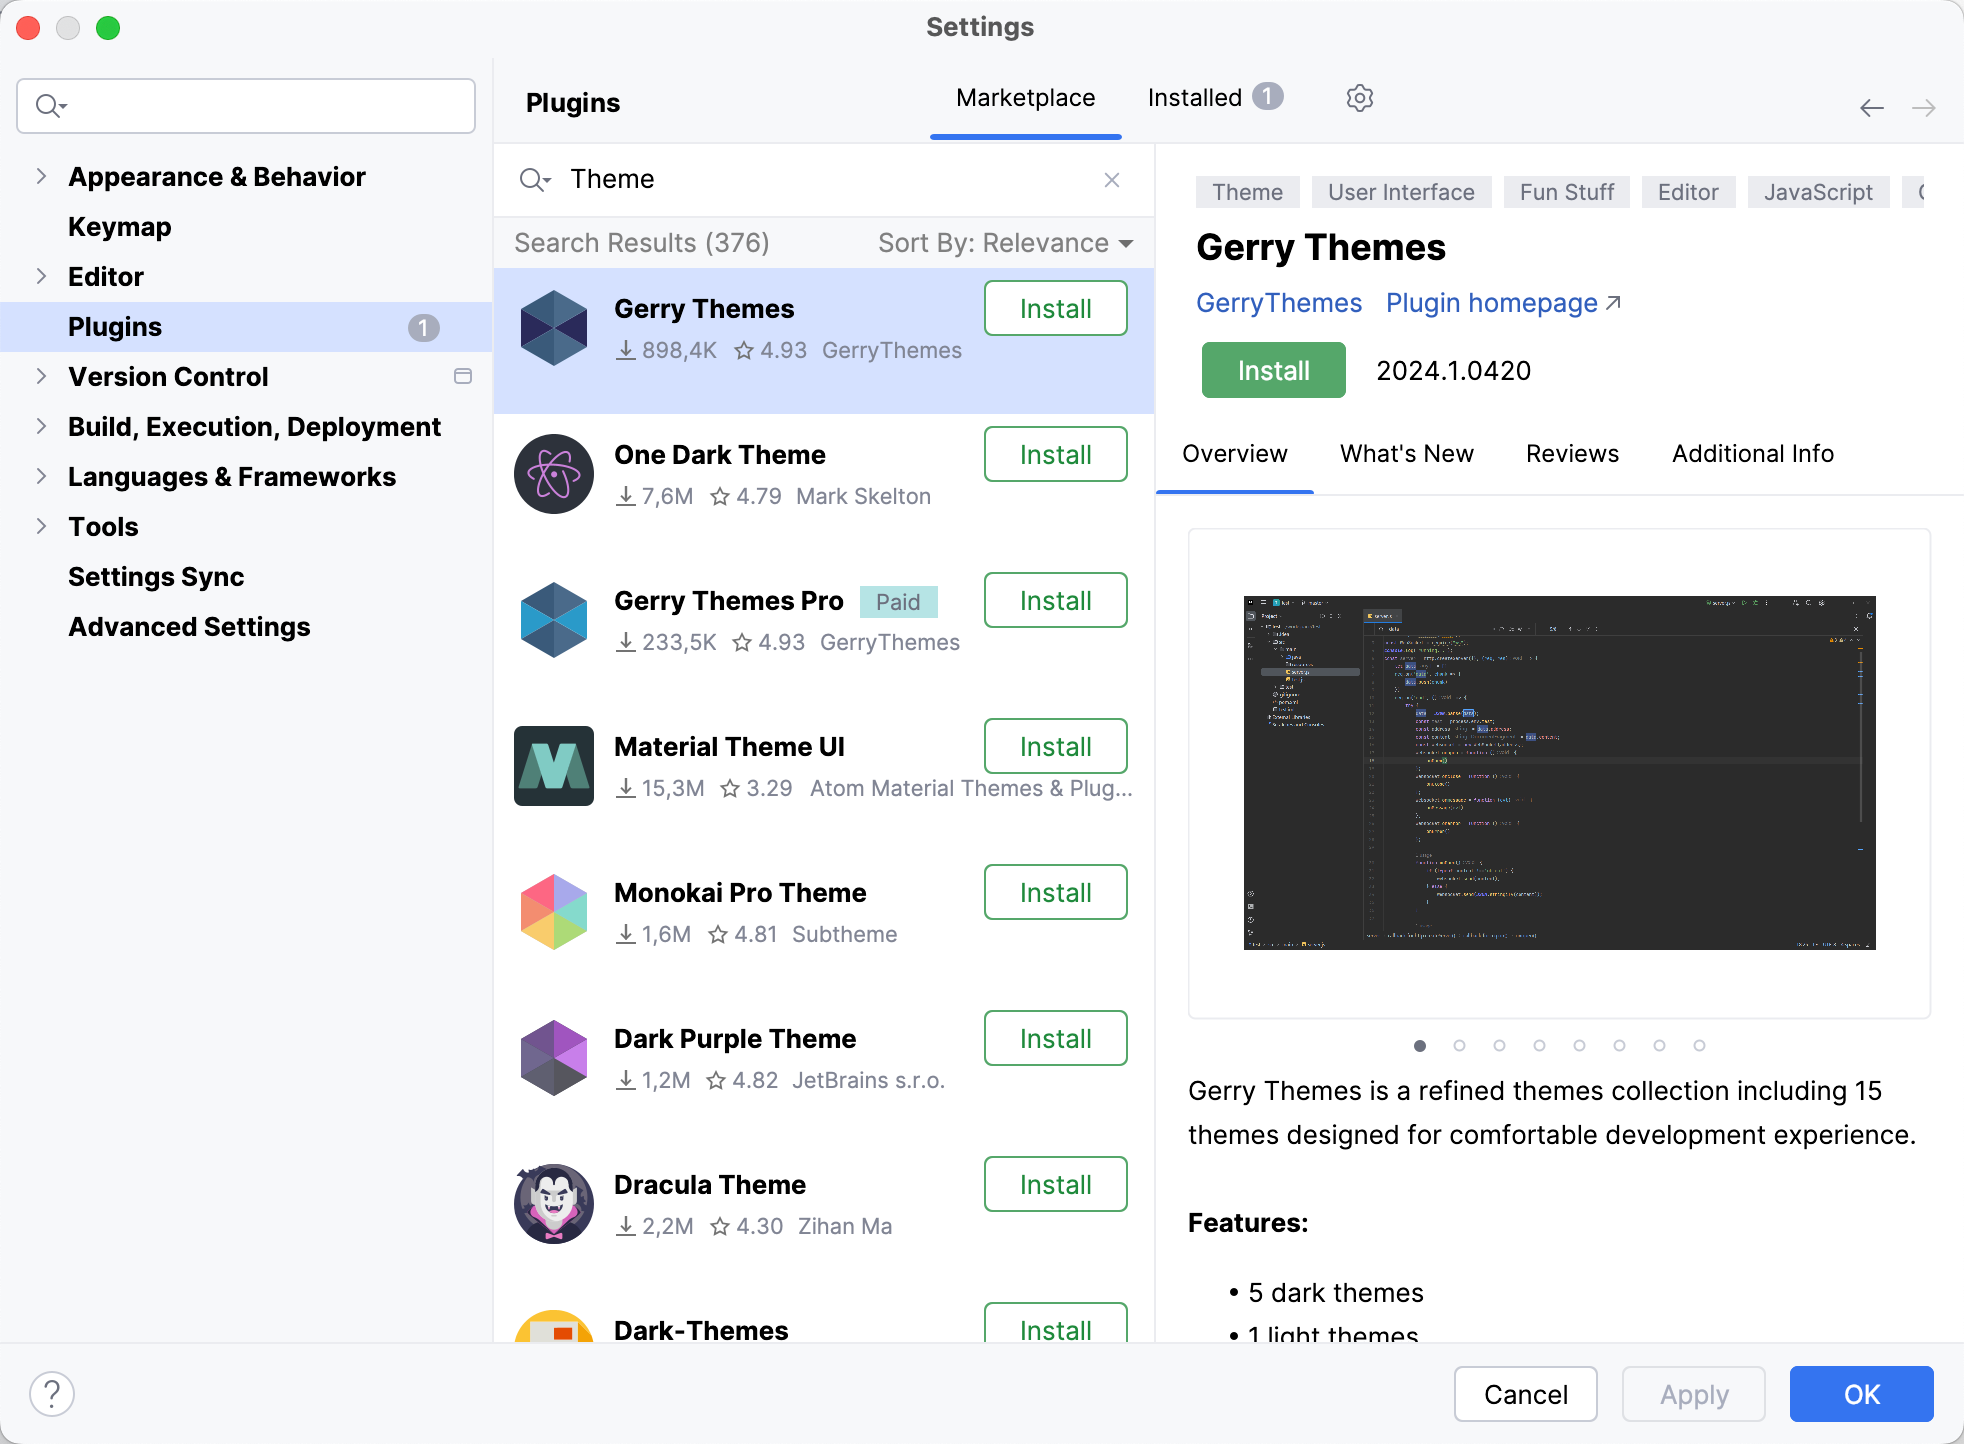
You can then return to the editor to see how the installed themes look. Select from the main menu or press Ctrl+` and select . From there, you can preview all available themes
Configure shortcuts
If you have never used RubyMine or other JetBrains IDEs before, getting used to new shortcuts can be challenging. Here are a few tips that can help you with that.
Switch the keymap
If you did not import your keymap settings into your RubyMine when launching it for the first time, you may switch to it manually.
Some keymaps may not be bundled with the IDE by default, so you need to make sure that the corresponding plugin is installed beforehand. To do this, go to , select the Marketplace tab, and search for the keymap you want to use, for example, VSCode Keymap.
Once installed, set this keymap as the default by going to and selecting VSCode from the list.
Learn RubyMine shortcuts
Learning RubyMine shortcuts will come in handy even if you decide to switch to another JetBrains IDE later on – the shortcuts are the same in almost all of them. Here is what can help you learn them faster:
Memorize RubyMine’s most universal shortcut – double Shift or Search Everywhere. You can use it to find any file, action, class, or symbol, and see all the matches in one place.
Install Key Promoter X – this extension helps you learn essential shortcuts while working. When you use the mouse on a button inside the IDE, Key Promoter X shows you the shortcut you could have used instead.
Use the RubyMine shortcut cheat sheet – You can download the default RubyMine keymap reference for macOS or Windows | Linux and print it out as a card.
Replicate common Cursor workflows
Let’s see how you can set up a few things to work like they do in Cursor.
Using command palette
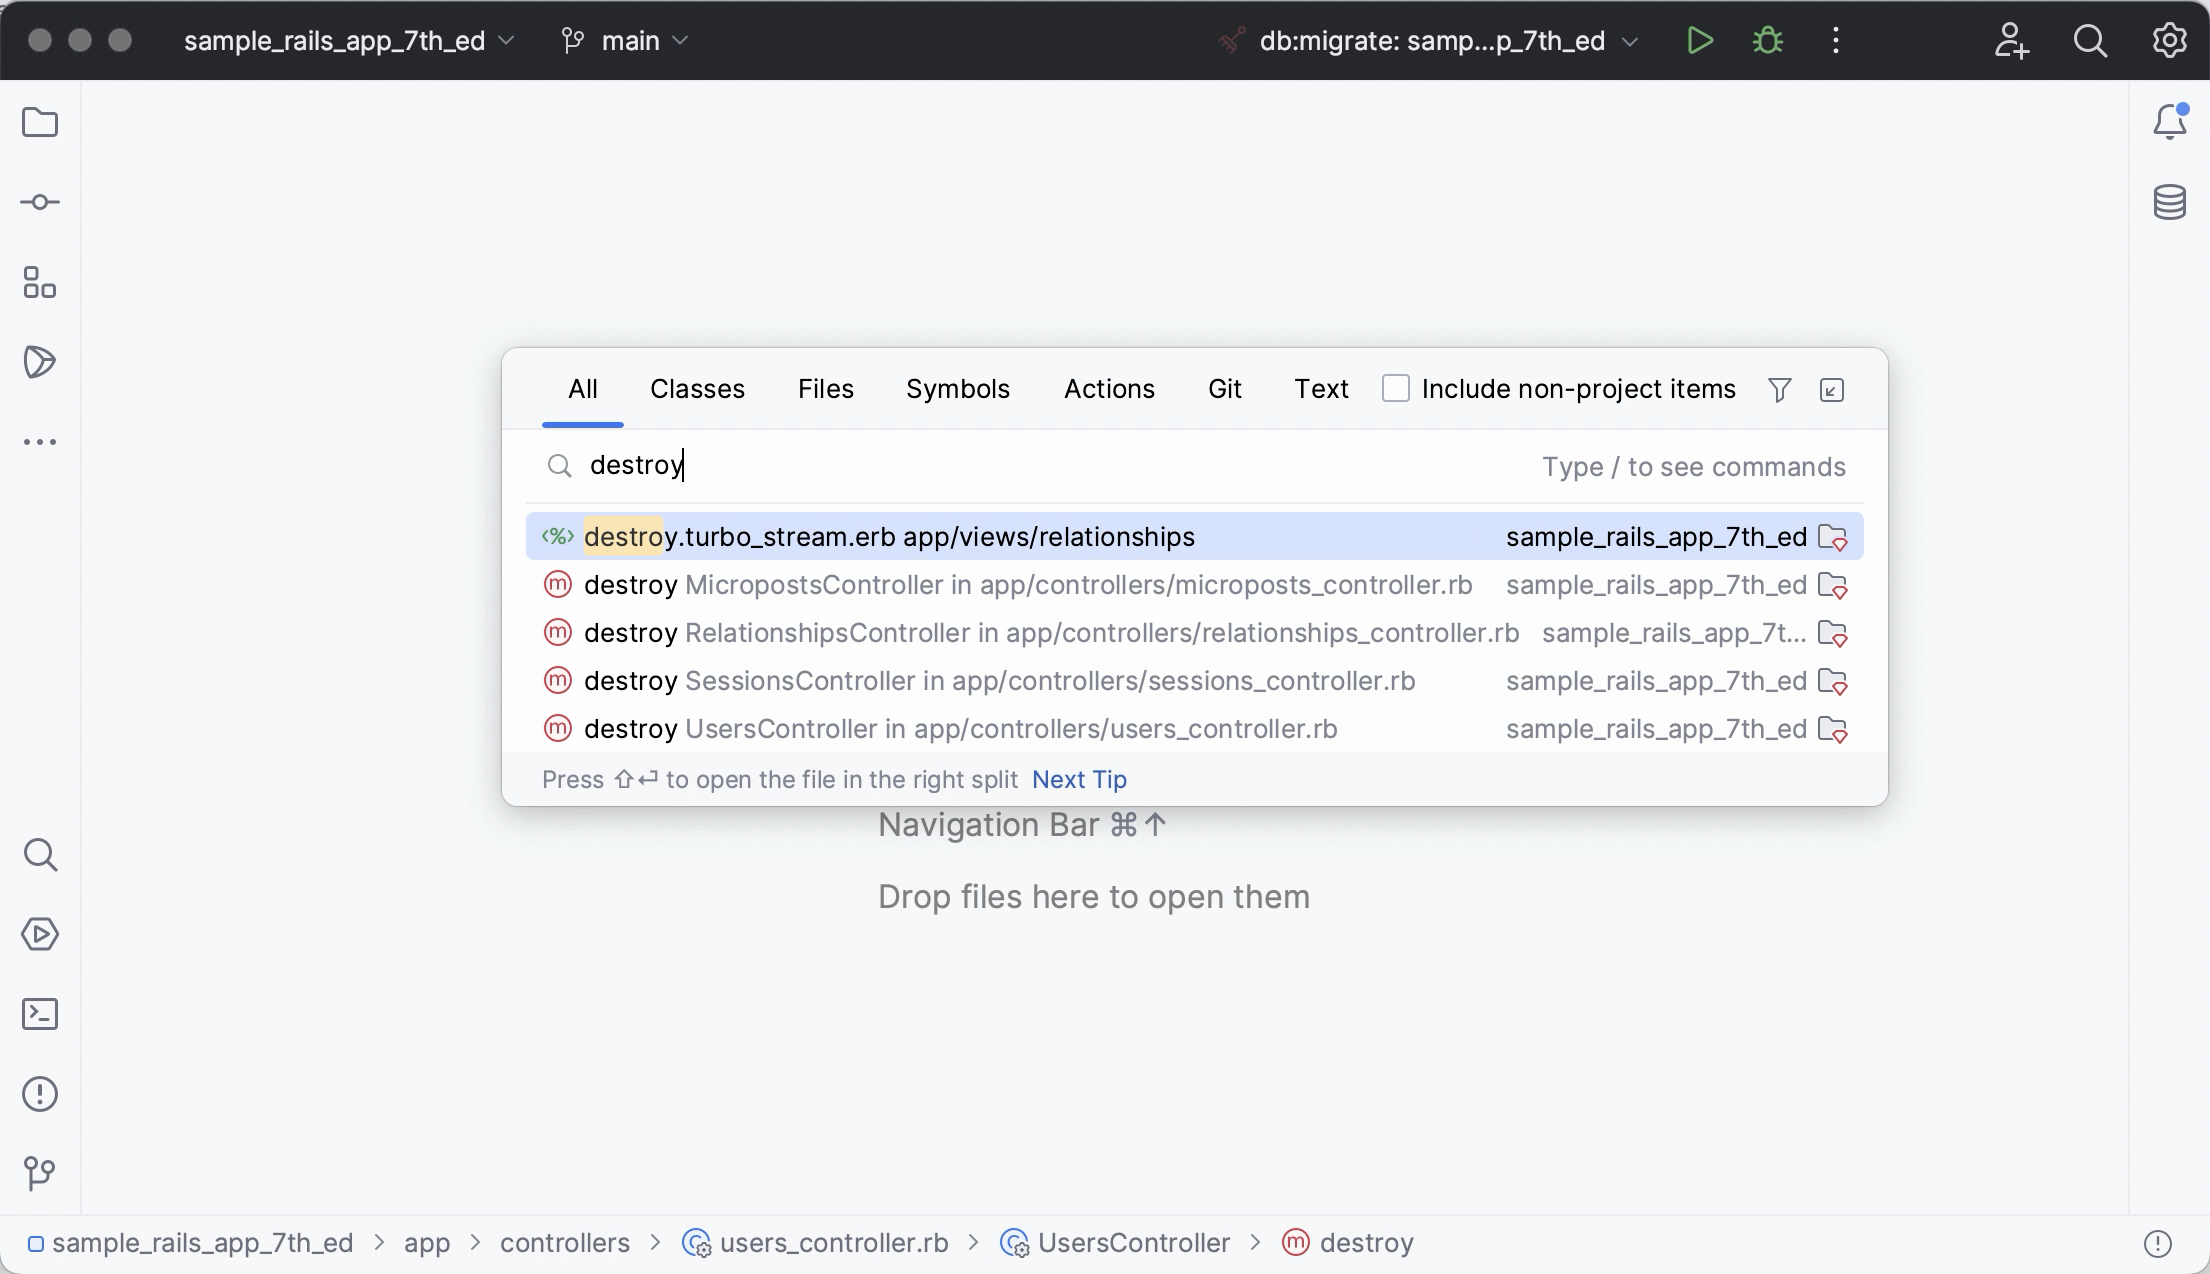
Search Everywhere is your replacement for Command Palette in Cursor. You can use it to search for files, actions, classes, or symbols. All matches are displayed in a single location.
To open the Search Everywhere dialog, press Shift twice.
Search and replace
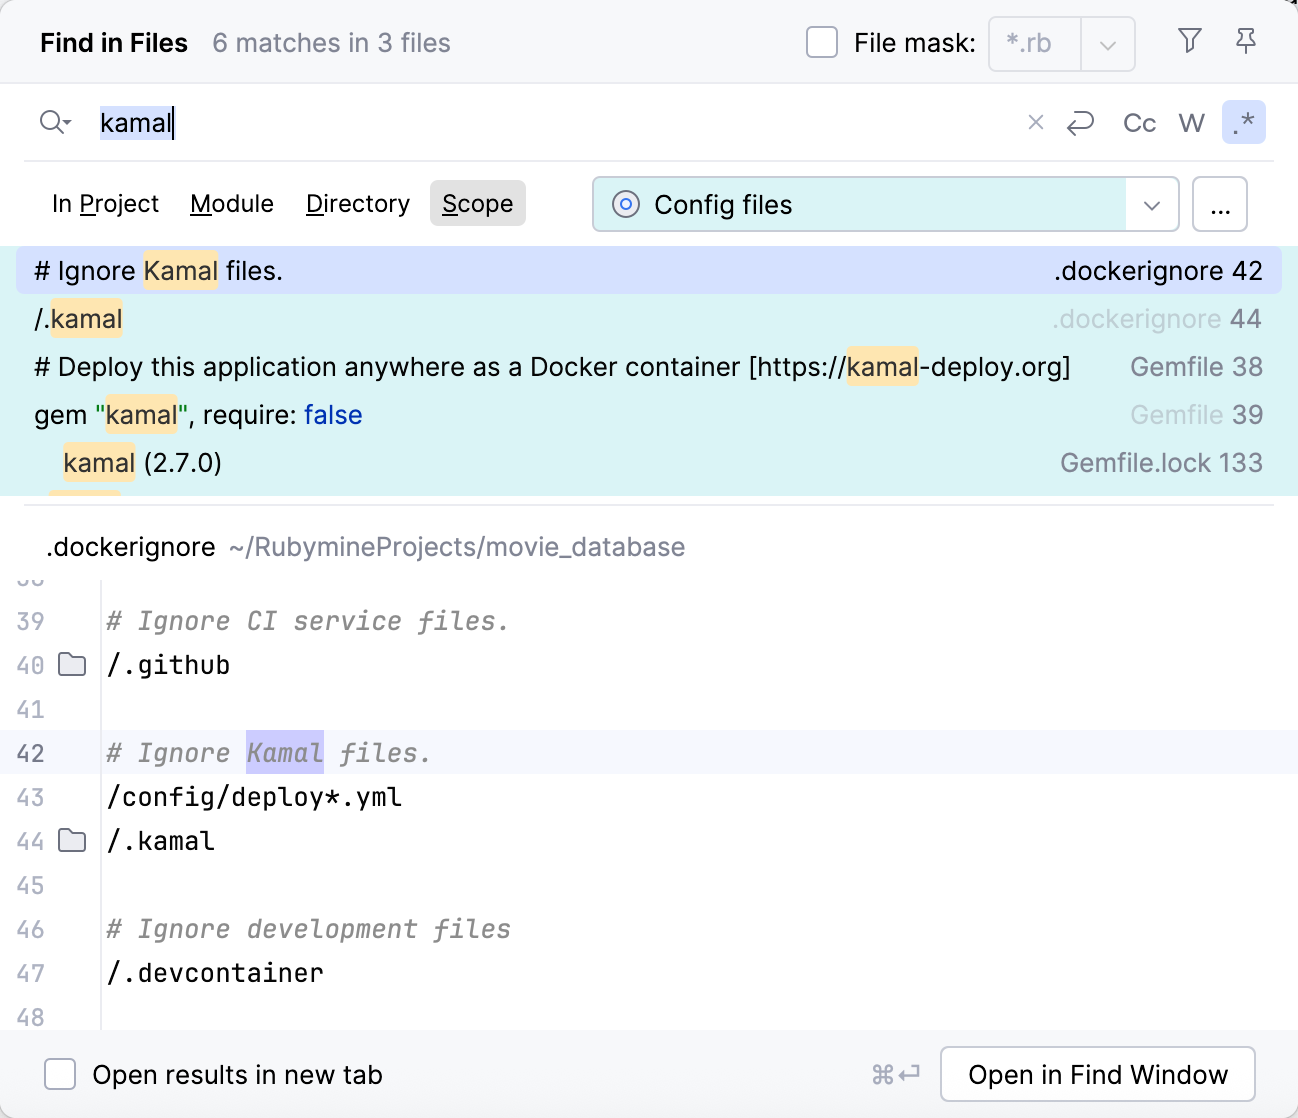
Although RubyMine’s search and replace workflow is slightly different from the one in Cursor, the principles are the same. RubyMine lets you find and replace text strings within both specific files and entire projects.
To begin, navigate to in the main menu. Select to search within the current file or to search the whole project. For text replacement, select or from the same submenu.
Running code
RubyMine provides various ways to run your code. Under the hood, all of them rely on run/debug configurations. By creating a custom run/debug configuraion, you gain the utmost freedom and flexibility. Learn more in Run/debug configurations.
Change the defaults for the Project view
RubyMine has its own Explorer, the Project tool window, and it works a bit differently. For instance, you need to double-click a file to open it in the editor. Here is how you can change the default setup to match what you were used to in Cursor:
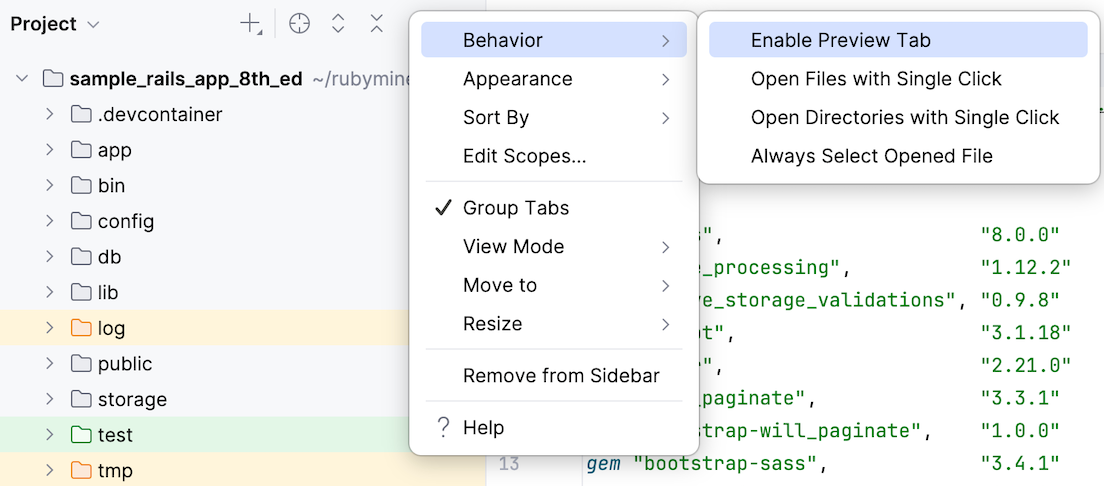
You can go to the Project tool window settings, click Behavior, and select any or all of these options:
Enable Preview Tab: preview files you have selected in the Project view in the editor.
Open Files/Directories with Single Click: open files in the editor with one click.
Always Select Opened File: auto-select the file that is currently open in the Project view.
How to get support
You can check out to find answers to many common questions and ask other RubyMine users for help.
Also, you can always get in touch with our support team if you get stuck. To submit a new ticket, select from RubyMine’s main menu. To report a bug or ask for a new feature, create a new issue here.