# Tutorial: Create your first Spring application
> **TL;DR**
> Required plugins: Spring and Spring Boot (bundled)
This tutorial describes how to create and run a [Spring](https://spring.io/) application in IntelliJ IDEA. It will be a [Spring Boot](https://spring.io/projects/spring-boot) Maven project generated by [Spring Initializr](https://start.spring.io/). This is the quickest way to create a Spring application, and IntelliJ IDEA provides a dedicated project wizard for it.
In this tutorial, you will learn how to create a GET endpoint that returns a greeting and test this endpoint in your browser. You will also learn how to add a static HTML home page for your Spring application.
This tutorial uses [Java 25](https://openjdk.org/projects/jdk/25/) syntax.
Procedure: Create a new Spring Boot project
1. Launch IntelliJ IDEA.
If the Welcome screen opens, click New Project. Otherwise, go to `File | New | Project` in the main menu.
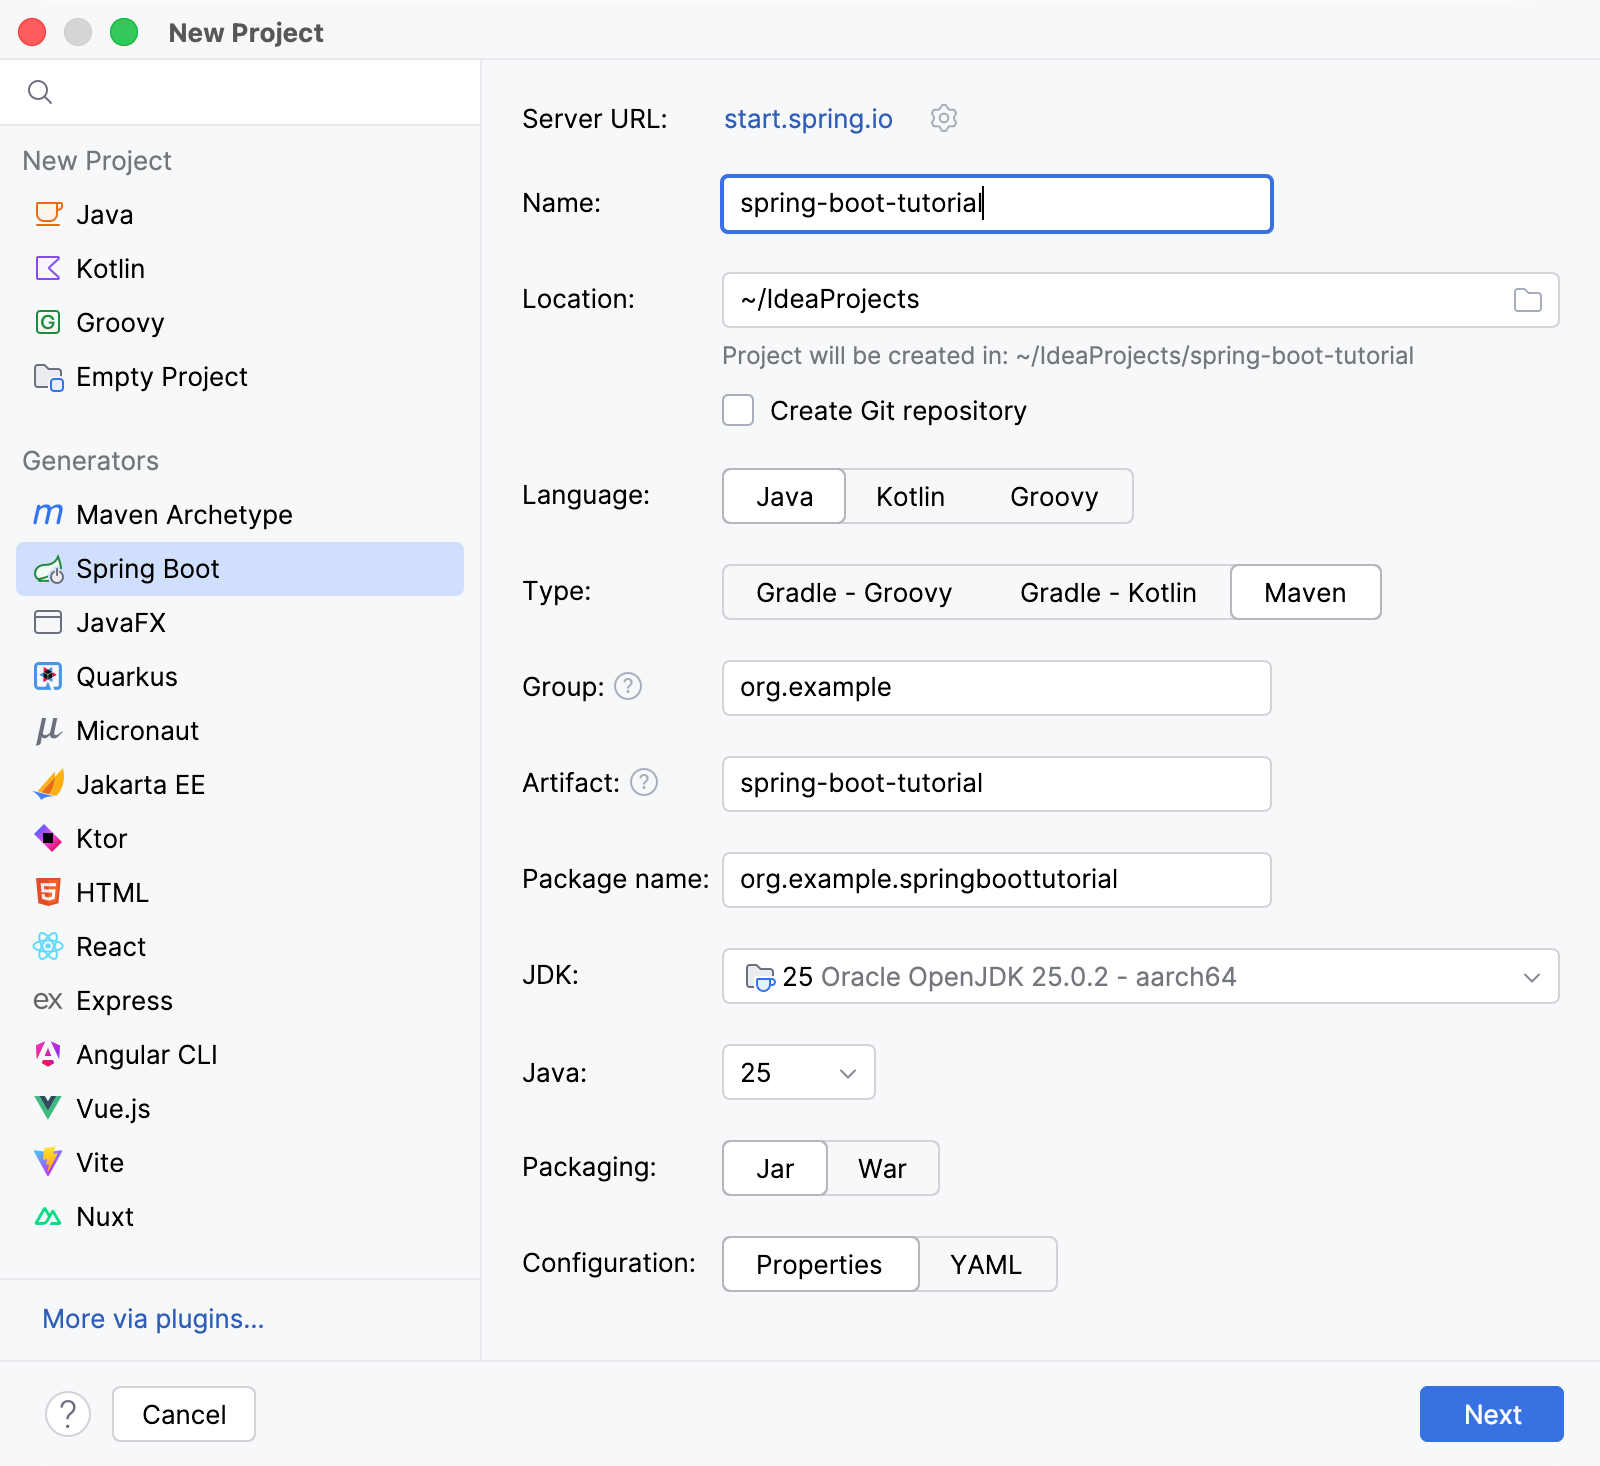
2. In the New Project wizard, select Spring Boot from the Generators list.
3. Give the project a name (for example, `spring-boot-tutorial`) and change the default location path if necessary.
4. Select Java as Language and Maven as Type.
5. From the JDK list, select the latest available Oracle OpenJDK version.
If the JDK is installed on your computer, but not defined in the IDE, select Add JDK and specify the path to the JDK home directory.
If you do not have the necessary JDK on your computer, select Download JDK.
6. From the Java list, select the latest version.
7. Leave the default values in [other fields](spring-initializr-project-wizard.html#step-1-basic-project-configuration). Click Next to continue.
8. On the next screen, select the Spring Web dependency under the Web node. This dependency is required for any web application that uses [Spring MVC](https://docs.spring.io/spring/docs/current/spring-framework-reference/web.html).
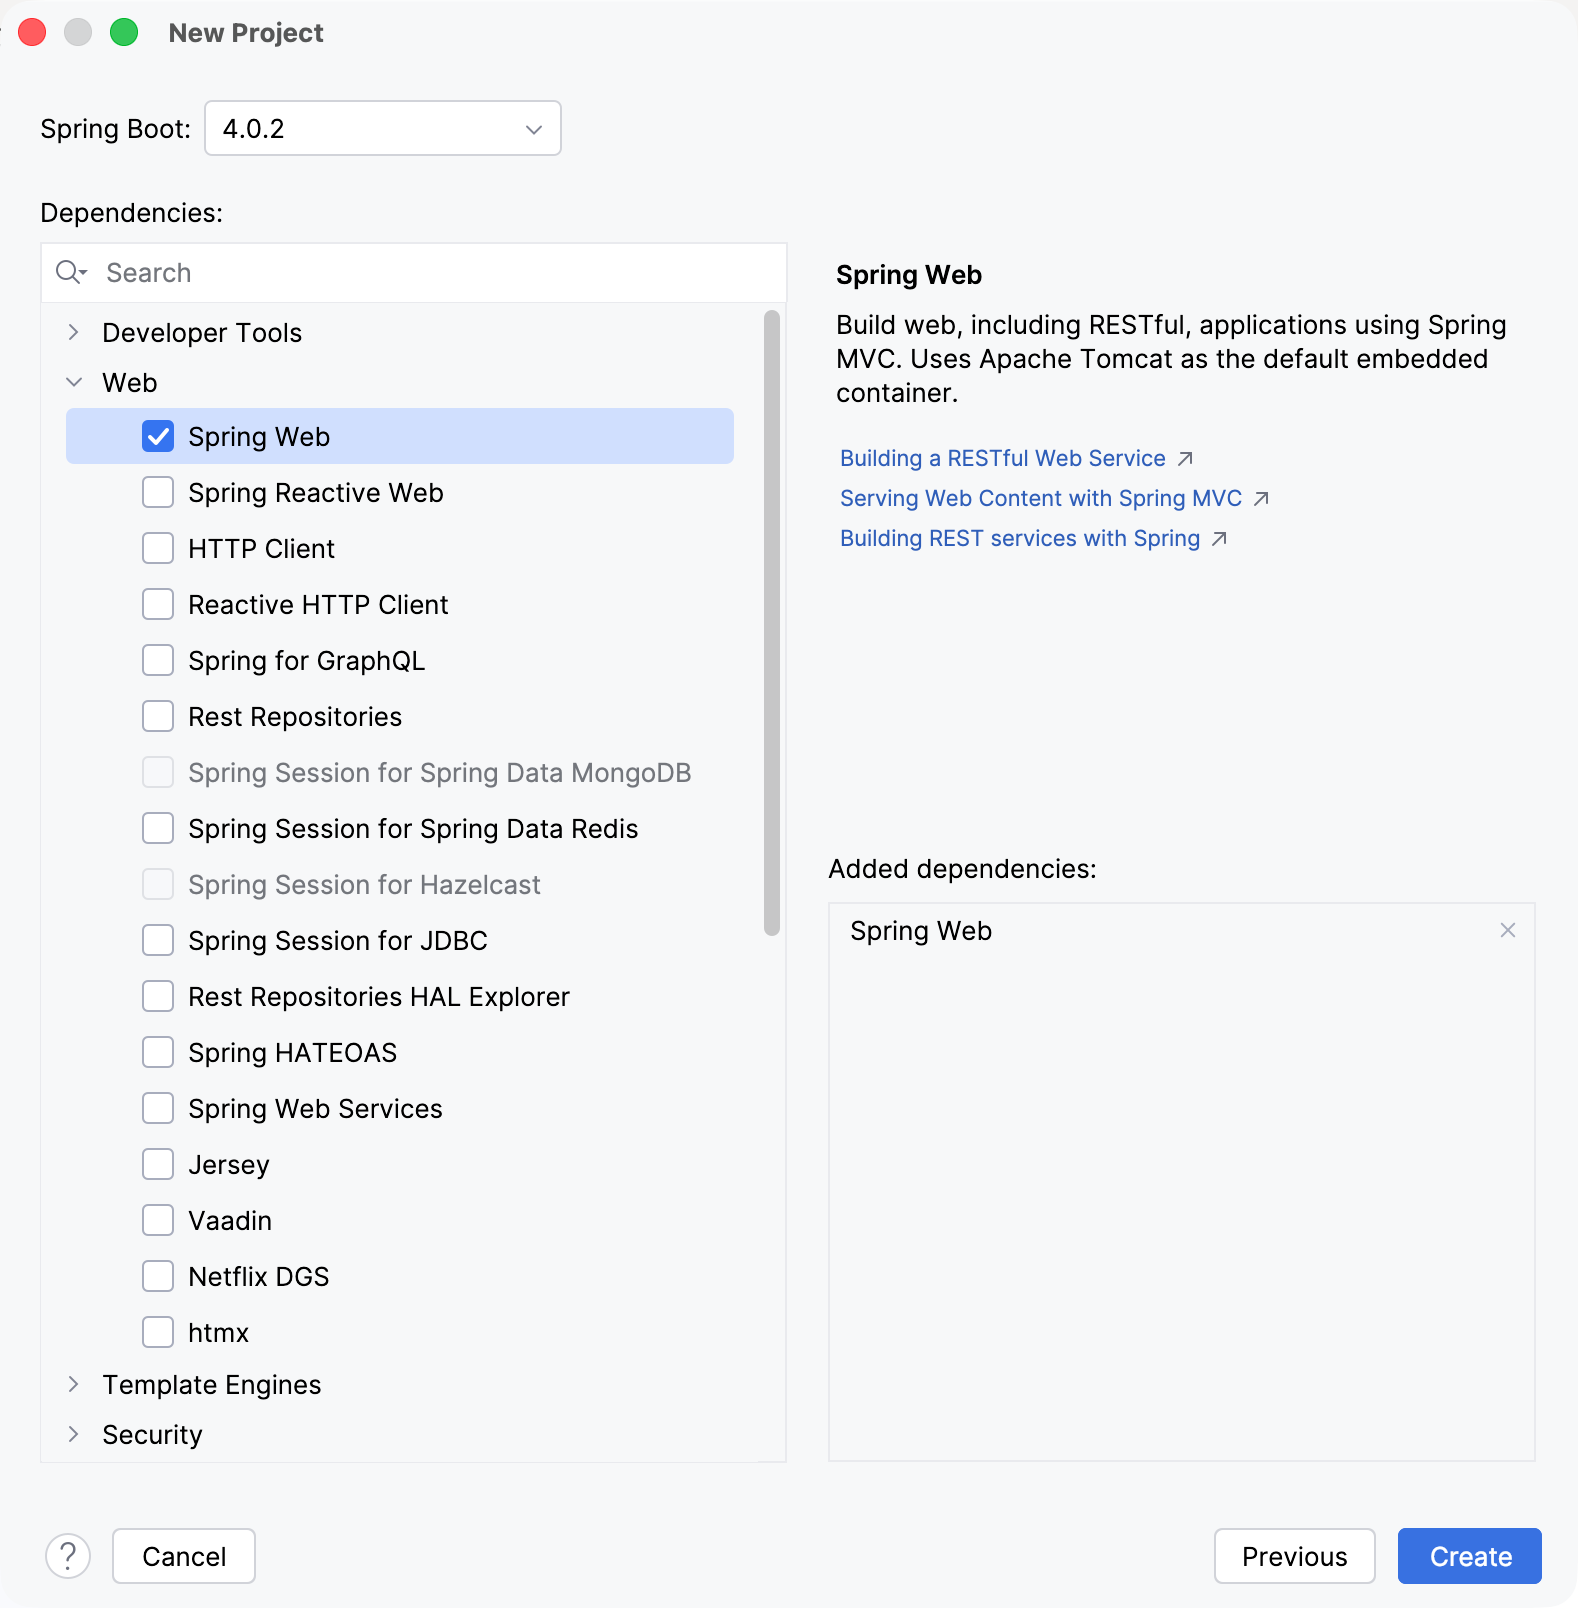
9. Click Create. IntelliJ IDEA will generate and set up the project.
> **Note:**
> Besides the New Project wizard, you can manage Spring Starters later, in existing Spring Boot projects: with your `pom.xml` or `build.gradle` file open in the editor, click the Add Starters… inlay hint next to the `dependencies` list or press `Alt+Insert` (Windows), `⌘ N` (macOS), `⌃ N` (IntelliJ IDEA Classic (macOS)), `⌘ N` (macOS System Shortcuts), `Alt+Insert` (XWin), `Alt+Insert` (GNOME), `Alt+Insert` (KDE), `Alt+Insert` (Emacs), `Ctrl+N` (Sublime Text), `⌘ N` (Sublime Text (macOS)), `Alt+Insert` (NetBeans), `Ctrl+N` (Visual Studio), `⌘ N` (Visual Studio (macOS)), `Alt+Insert` (Eclipse), `⌘ N` (Eclipse (macOS)) and select Add Starters . This lets you quickly find, add, and remove Spring dependencies in existing projects without having to manually modify the file or thinking about compatible versions.
>
>
>
> You can disable and enable this inlay hint in the IDE settings (`Ctrl+Alt+S` (Windows), `⌘ Comma` (macOS), `⌘ Comma` (IntelliJ IDEA Classic (macOS)), `⌘ Comma` (macOS System Shortcuts), `Ctrl+Alt+S` (XWin), `Ctrl+Alt+S` (GNOME), `Ctrl+Alt+S` (KDE), `Ctrl+Alt+S` (Emacs), `Ctrl+Alt+S` (Sublime Text), `⌘ Comma` (Sublime Text (macOS)), `Ctrl+Alt+S` (NetBeans), `Ctrl+Alt+S` (Visual Studio), `⌘ Comma` (Visual Studio (macOS)), `Ctrl+Alt+S` (Eclipse), `⌘ Comma` (Eclipse (macOS))), in `Editor | Inlay Hints | Other`, under Groovy, Kotlin, and XML.
Procedure: Add a method that sends a greeting
Spring Initializr creates a class with the `main()` method to bootstrap your Spring application. In this tutorial, you will add a new `sayHello()` method directly to this class.
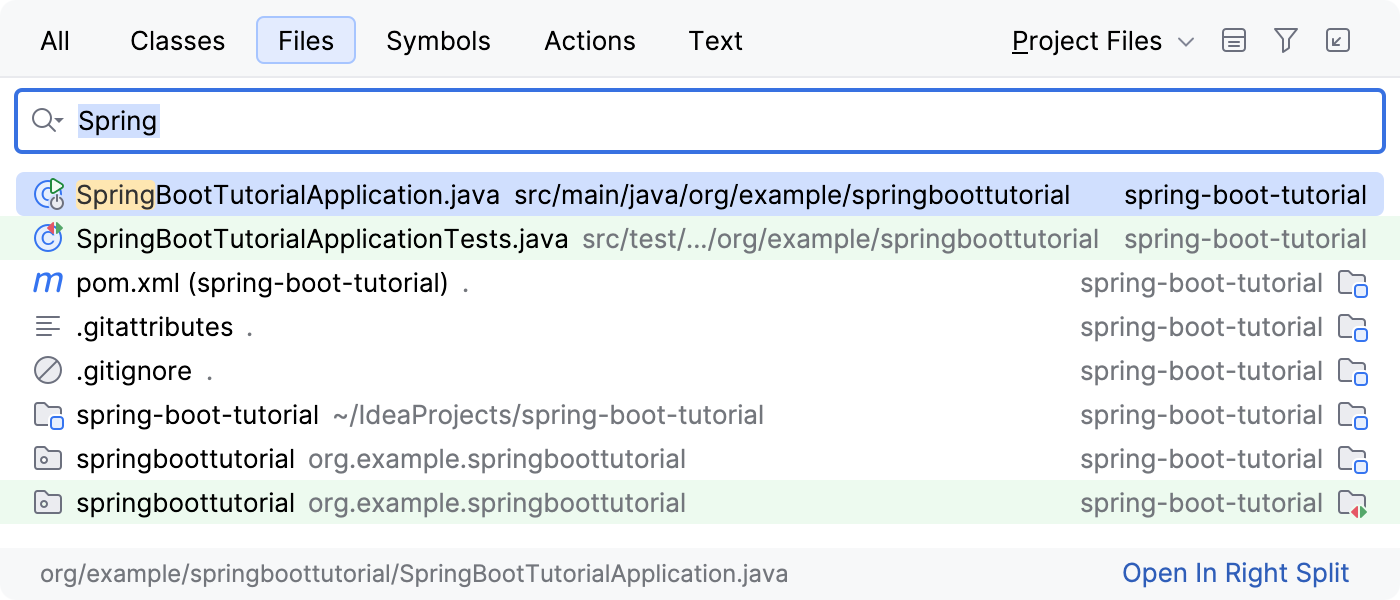
1. From the `src/main/java/org/example/springboottutorial` package, open the `SpringBootTutorialApplication.java` file.
> **Tip:**
> IntelliJ IDEA provides the Go to File… action to quickly find and open files. Go to `Navigate | File` or press `Ctrl+Shift+N` (Windows), `⌘ ⇧ O` (macOS), `⌘ ⇧ N` (IntelliJ IDEA Classic (macOS)), `⌘ ⇧ O` (macOS System Shortcuts), `Ctrl+Shift+N` (XWin), `Ctrl+Shift+N` (GNOME), `Ctrl+Shift+N` (KDE), `Ctrl+X, Ctrl+F` (Emacs), `Ctrl+P` (Sublime Text), `⌘ P` (Sublime Text (macOS)), `Alt+Shift+O` (NetBeans), `Ctrl+Shift+T` (Visual Studio), `⌘ ⇧ T` (Visual Studio (macOS)), `Ctrl+Shift+R` (Eclipse), `⌘ ⇧ R` (Eclipse (macOS)), start typing the name of the file and select it from the list.
>
> 
2. Add the `sayHello()` method that will send a greeting. To do so, add all the necessary imports and annotations in the code and a new `sayHello ()` method to the existing `SpringBootTutorialApplication` class so that the file looks like this:
```JAVA
package org.example.springboottutorial;
import org.springframework.boot.SpringApplication;
import org.springframework.boot.autoconfigure.SpringBootApplication;
import org.springframework.web.bind.annotation.GetMapping;
import org.springframework.web.bind.annotation.RequestParam;
import org.springframework.web.bind.annotation.RestController;
@SpringBootApplication
@RestController
public class SpringBootTutorialApplication {
static void main(String[] args) {
SpringApplication.run(SpringBootTutorialApplication.class, args);
}
@GetMapping("/hello")
public String sayHello(@RequestParam(value = "myName", defaultValue = "World") String name) {
return String.format("Hello %s!", name);
}
}
```
The `sayHello()` method takes the `name` parameter and returns the word `Hello` combined with the parameter value. Everything else is handled by adding Spring annotations:
* The `@RestController` annotation marks the `SpringBootTutorialApplication` class as a request handler (a REST controller).
* The `@GetMapping("/hello")` annotation maps the `sayHello()` method to GET requests for `/hello`.
* The `@RequestParam` annotation maps the `name` method parameter to the `myName` web request parameter. If you do not provide the `myName` parameter in your web request, it will default to `World`.
> **Tip:**
> You can check the Javadoc for Spring annotations right in the editor by hovering over the corresponding annotation or using the [Documentation tool window](documentation-tool-window.html).
Procedure: Run your Spring application
IntelliJ IDEA creates a Spring Boot run configuration that you can use to run your new Spring application.
1. In the [Run widget](guided-tour-around-the-user-interface.html#toolbar) in the main toolbar, select `SpringBootTutorialApplication` and click  Run or press `Shift+F10` (Windows), `⌃ R` (macOS), `⇧ F10` (IntelliJ IDEA Classic (macOS)), `⌥ ⇧ R` (macOS System Shortcuts), `Shift+F10` (XWin), `Shift+F10` (GNOME), `Shift+F10` (KDE), `Shift+F10` (Emacs), `Shift+F10` (Sublime Text), `Shift+F10` (Sublime Text (macOS)), `F6` (NetBeans), `Ctrl+F5` (Visual Studio), `⌃ F5` (Visual Studio (macOS)), `Alt+Shift+X` (Eclipse), `⌘ ⇧ F11` (Eclipse (macOS)). You can also use the  Run icon in the gutter next to the class declaration or the `main()` method declaration.
IntelliJ IDEA will show you the Spring Boot application running in the [Run tool window](run-tool-window.html). The Console tab shows the output of Spring log messages.
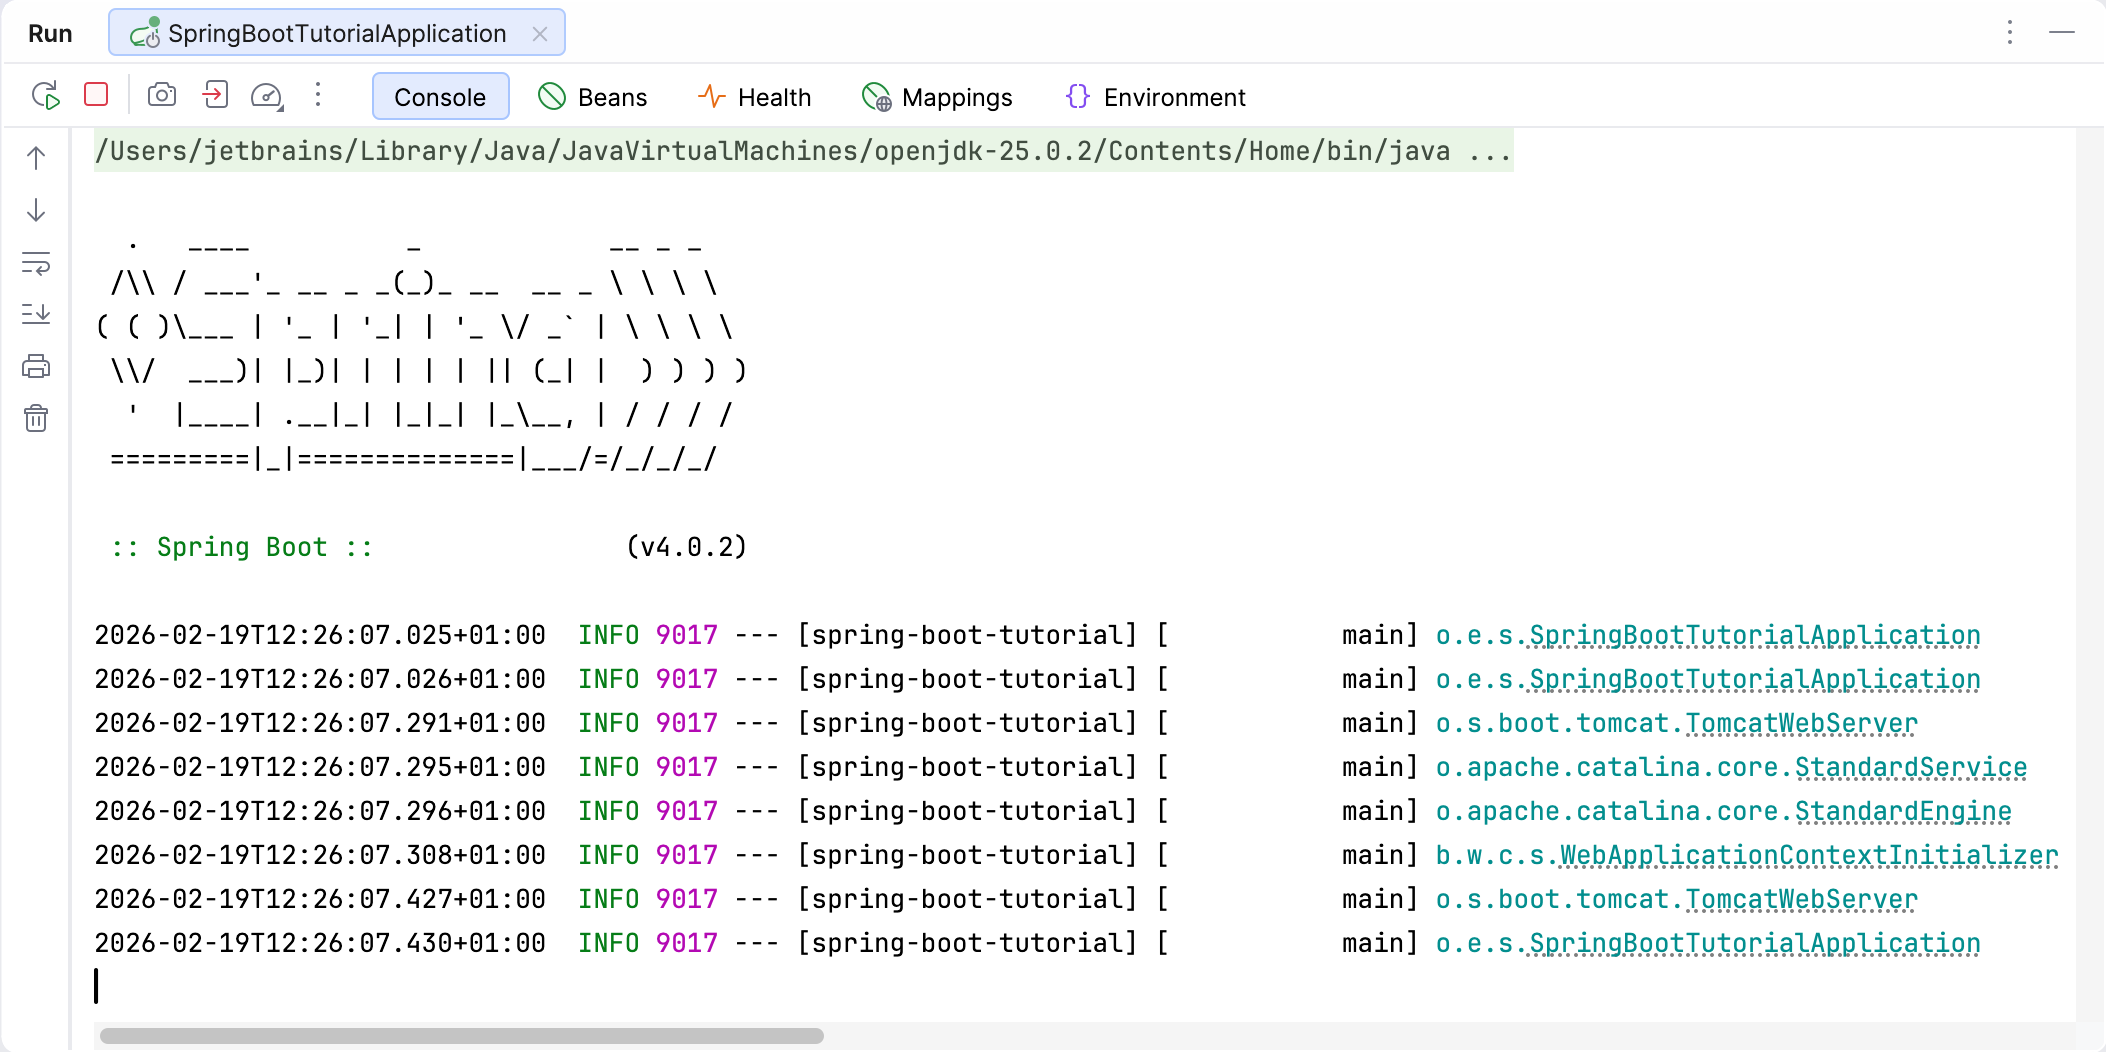
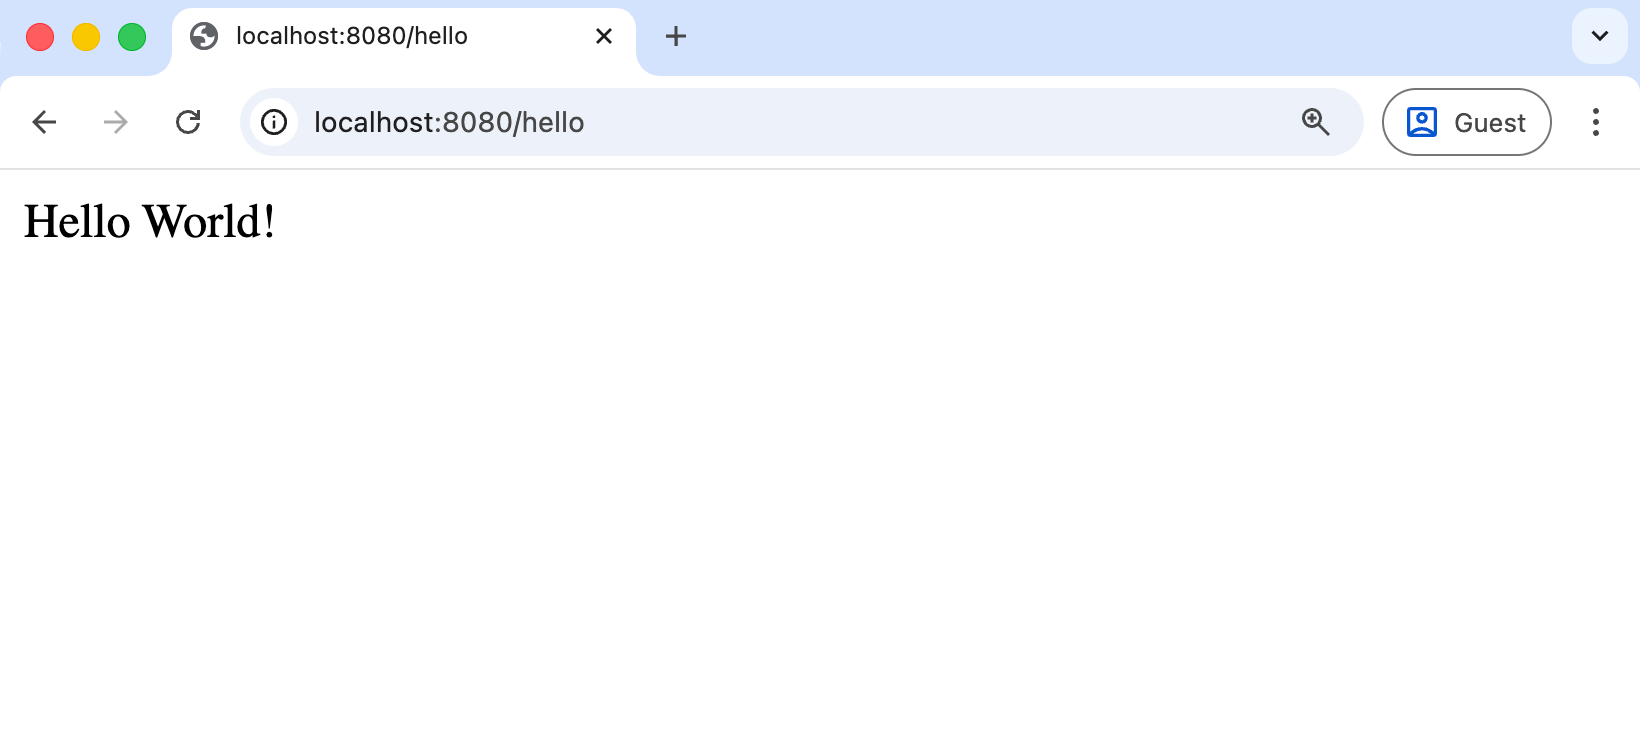
2. Open your web browser. By default, the built-in Apache Tomcat server is listening on port 8080, so go to [http://localhost:8080/hello](http://localhost:8080/hello). If you did everything right, you should see your application respond with `Hello World!`.
> **Tip:**
> You can quickly open this URL in your browser using the dedicated intention action. In the editor, place the caret at the controller URL mapping (such as `/hello`), press `Alt+Enter` (Windows), `⌥ ⏎` (macOS), `⌥ ⏎` (IntelliJ IDEA Classic (macOS)), `⌥ ⏎` (macOS System Shortcuts), `Alt+Enter` (XWin), `Alt+Enter` (GNOME), `Alt+Enter` (KDE), `Alt+Enter` (Emacs), `Alt+Enter` (Sublime Text), `⌥ ⏎` (Sublime Text (macOS)), `Alt+Enter` (NetBeans), `Alt+Enter` (Visual Studio), `⌥ ⏎` (Visual Studio (macOS)), `Ctrl+1` (Eclipse), `⌘ 1` (Eclipse (macOS)), and select Open in web browser.
`Hello World!` is the default generic response. You can provide a parameter in your web request to let the application know how to greet you properly. For example, try [http://localhost:8080/hello?myName=Human](http://localhost:8080/hello?myName=Human).
Procedure: Add a home page
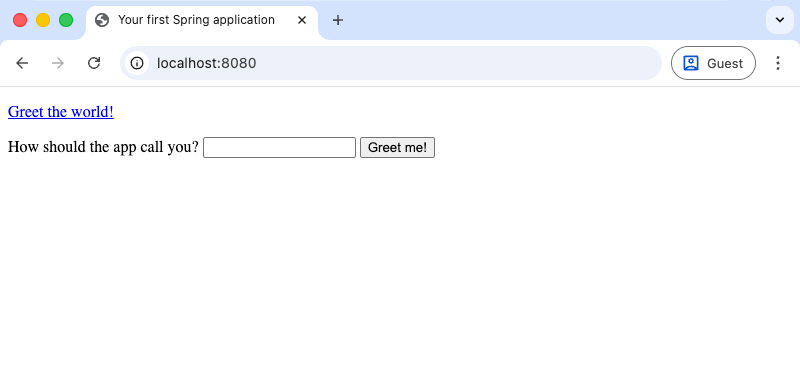
The created Spring Boot application has one endpoint available at [/hello](http://localhost:8080/hello). However, if you open the root context of your application at [http://localhost:8080/](http://localhost:8080/), you will get an error because there is no root resource defined. Let's add a static HTML home page with links to your endpoint.
1. In the Project tool window, right-click the `/src/main/resources/static/` directory, select New | HTML File, specify the name `index.html`, and press `Enter` (Windows), `⏎` (macOS), `⏎` (IntelliJ IDEA Classic (macOS)), `⏎` (macOS System Shortcuts), `Enter` (XWin), `Enter` (GNOME), `Enter` (KDE), `Enter` (Emacs), `Enter` (Sublime Text), `⏎` (Sublime Text (macOS)), `Enter` (NetBeans), `Enter` (Visual Studio), `⏎` (Visual Studio (macOS)), `Enter` (Eclipse), `⏎` (Eclipse (macOS)).
2. Modify the default template or replace it with the following HTML code:
```HTML
Your first Spring application
```
3. In the Run tool window, click  or press `Shift+F10` (Windows), `⌃ R` (macOS), `⇧ F10` (IntelliJ IDEA Classic (macOS)), `⌥ ⇧ R` (macOS System Shortcuts), `Shift+F10` (XWin), `Shift+F10` (GNOME), `Shift+F10` (KDE), `Shift+F10` (Emacs), `Shift+F10` (Sublime Text), `Shift+F10` (Sublime Text (macOS)), `F6` (NetBeans), `Ctrl+F5` (Visual Studio), `⌃ F5` (Visual Studio (macOS)), `Alt+Shift+X` (Eclipse), `⌘ ⇧ F11` (Eclipse (macOS)) to restart your Spring application.
Now your application will serve `index.html` as the root resource at [http://localhost:8080/](http://localhost:8080/).
## Summary
In this tutorial, you have learned how to:
* [Create a new Spring Boot project](#create-new-spring-boot-project) in IntelliJ IDEA
* [Create an HTTP GET request](#add-greeting-method) using Spring annotations
* [Run a Spring application](#run-spring-application) locally
* [Add a static HTML home page](#add-home-page) for your Spring application
## Next steps
The simple application you created in this tutorial demonstrates how to get started with Spring. To learn how IntelliJ IDEA helps you write your code and manage the application at runtime, refer to [the next tutorial](spring-support-tutorial.html), which focuses on more advanced Spring support features.
For a full list of available tutorials, refer to [IntelliJ IDEA tutorials](instance-tutorials.html).