# Tutorial: Your first RESTful web service
This tutorial describes how to create a simple RESTful web service in IntelliJ IDEA and deploy it to the Tomcat GlassFish application server. The service will output `Hello, World!` when you access a specific URL through the web browser or otherwise send a GET request to this URL. Use the switcher at the top of this page for instructions for a different application server.
You will create a new Java Enterprise project, add the necessary Java code, tell IntelliJ IDEA where your GlassFishTomcat server is located, then use a run configuration to build the artifact, start the server, and deploy the artifact to it.
Here is what you will need:
| Relevant plugins | By default, the following necessary plugins are bundled and enabled in IntelliJ IDEA Ultimate. If something does not work, make sure that the following plugins are enabled: * Jakarta EE Platform * Jakarta EE: Application Servers * Jakarta EE: Web/Servlets * Jakarta EE: RESTful Web Services (JAX-RS) * Tomcat and TomEE Install and enable the GlassFish plugin as described in [Plugins](managing-plugins.html). |
| Java SE Development Kit (JDK) version 1.8 or later | You can get the JDK directly from IntelliJ IDEA as described in [Java Development Kit (JDK)](sdk.html#jdk) or download and install it manually, for example: [Oracle JDK](http://www.oracle.com/technetwork/java/javase/downloads/index.html) or [OpenJDK](https://openjdk.java.net/). |
| Tomcat | The [Tomcat](http://tomcat.apache.org/) application server version 7 or later. > **Note:** > This tutorial uses JDK 21, Jakarta EE 11, and Tomcat 11. For more information about the compatibility between other Tomcat, Java, and Jakarta EE versions, refer to [https://tomcat.apache.org/whichversion.html](https://tomcat.apache.org/whichversion.html). |
| GlassFish | The [GlassFish](https://projects.eclipse.org/projects/ee4j.glassfish) application server version 4.0 or later. You can get the latest release from the [official repository](https://github.com/eclipse-ee4j/glassfish). The Web Profile subset should be enough for the purposes of this tutorial. > **Note:** > This tutorial uses Oracle OpenJDK 17, Jakarta EE 9.1, and GlassFish 6.2.5. For more information about the compatibility between other GlassFish, Java, and Jakarta EE versions, refer to [https://github.com/eclipse-ee4j/glassfish#compatibility](https://github.com/eclipse-ee4j/glassfish#compatibility). |
| Web browser | You will need a web browser to view your web application. |
Procedure: Create a new Java Enterprise project
IntelliJ IDEA includes a dedicated wizard for creating Java Enterprise projects based on various Java EE and Jakarta EE implementations. In this tutorial, we will create a simple web application.
1. In the main menu, go to `File | New | Project`.
2. In the New Project dialog, select Jakarta EE.
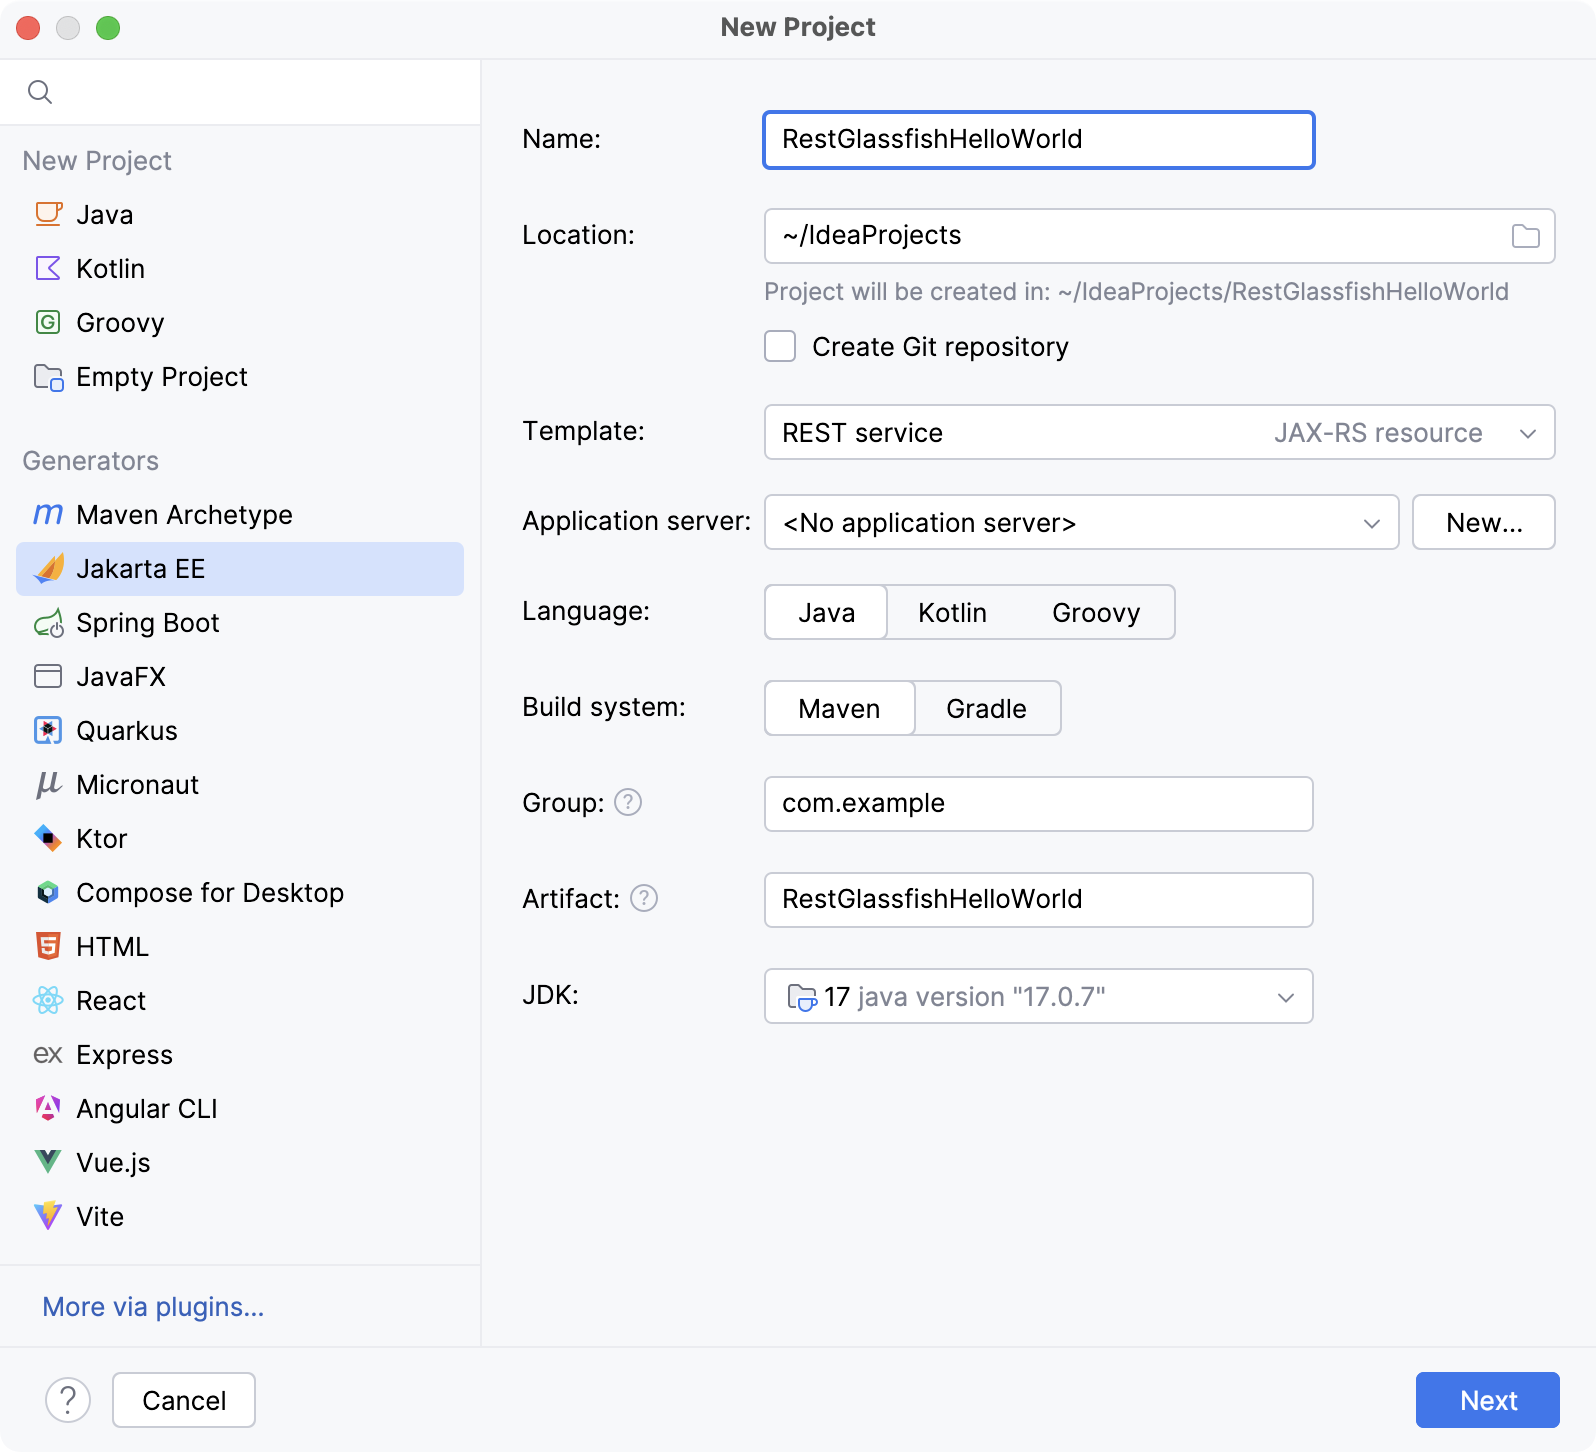
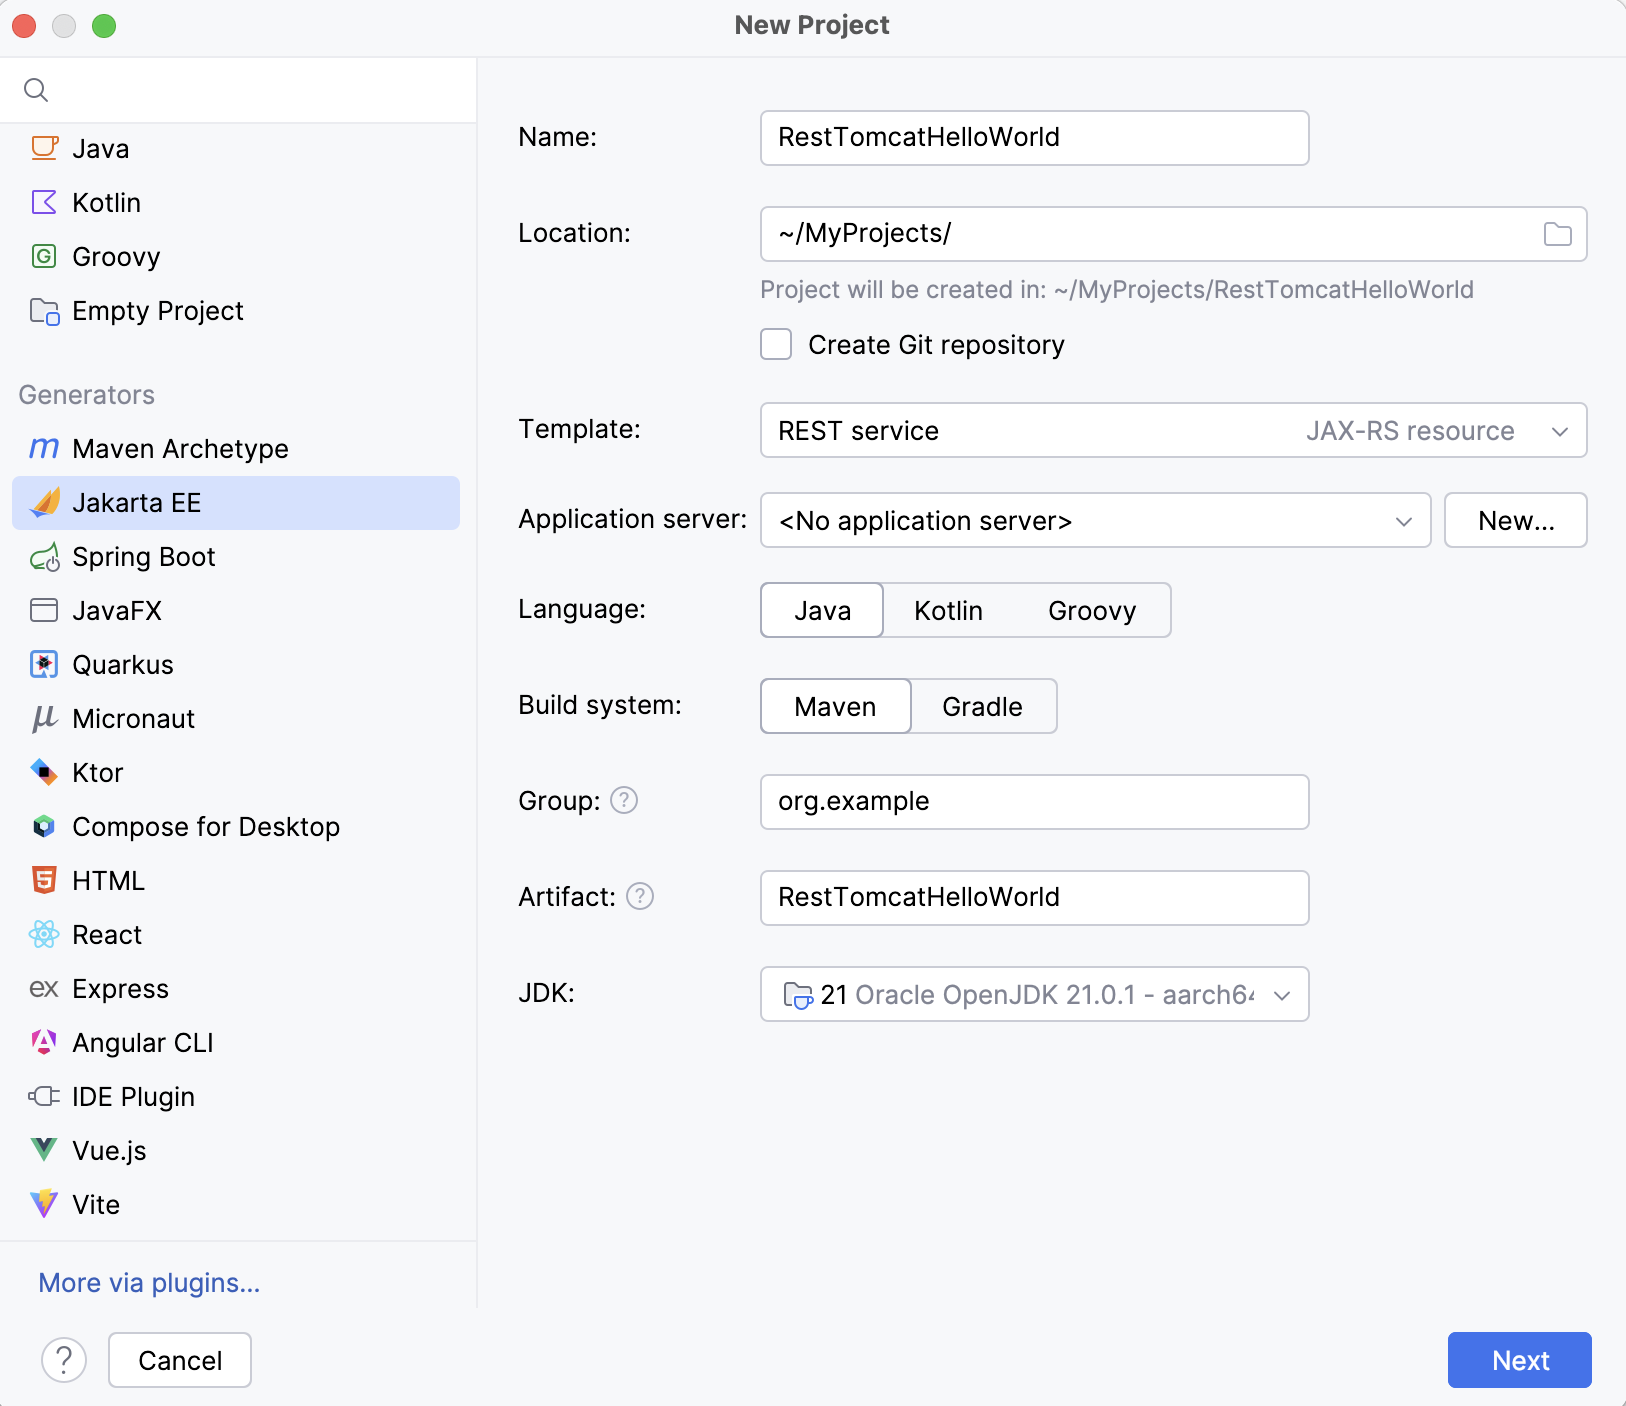
Enter a name for your project: `RestGlassfishHelloWorld``RestTomcatHelloWorld`. For this tutorial, use Oracle OpenJDK 21 as the project [SDK](sdk.html) and select the REST service template. Don't select or add an application server, we will do it later. Select Java and Maven. Click Next to continue.
3. In the Version field, select Jakarta EE 10 because that's what Tomcat 10.1 used in this tutorial is compatible with.
> **Tip:**
> For Tomcat 9, select Java EE 8. For Tomcat 10, select Jakarta EE 9.1.
In the Version field, select Jakarta EE 9.1 because that's what GlassFish 6.2.5 used in this tutorial is compatible with.
> **Tip:**
> For GlassFish 5, select the Java EE 8 specification. For GlassFish 7, select Jakarta EE 10.
In the Dependencies list, select the following:
* Contexts and Dependency Injection (CDI)
* RESTful Web Services (JAX-RS)
* Servlet
* Eclipse Jersey Server
* Weld SE
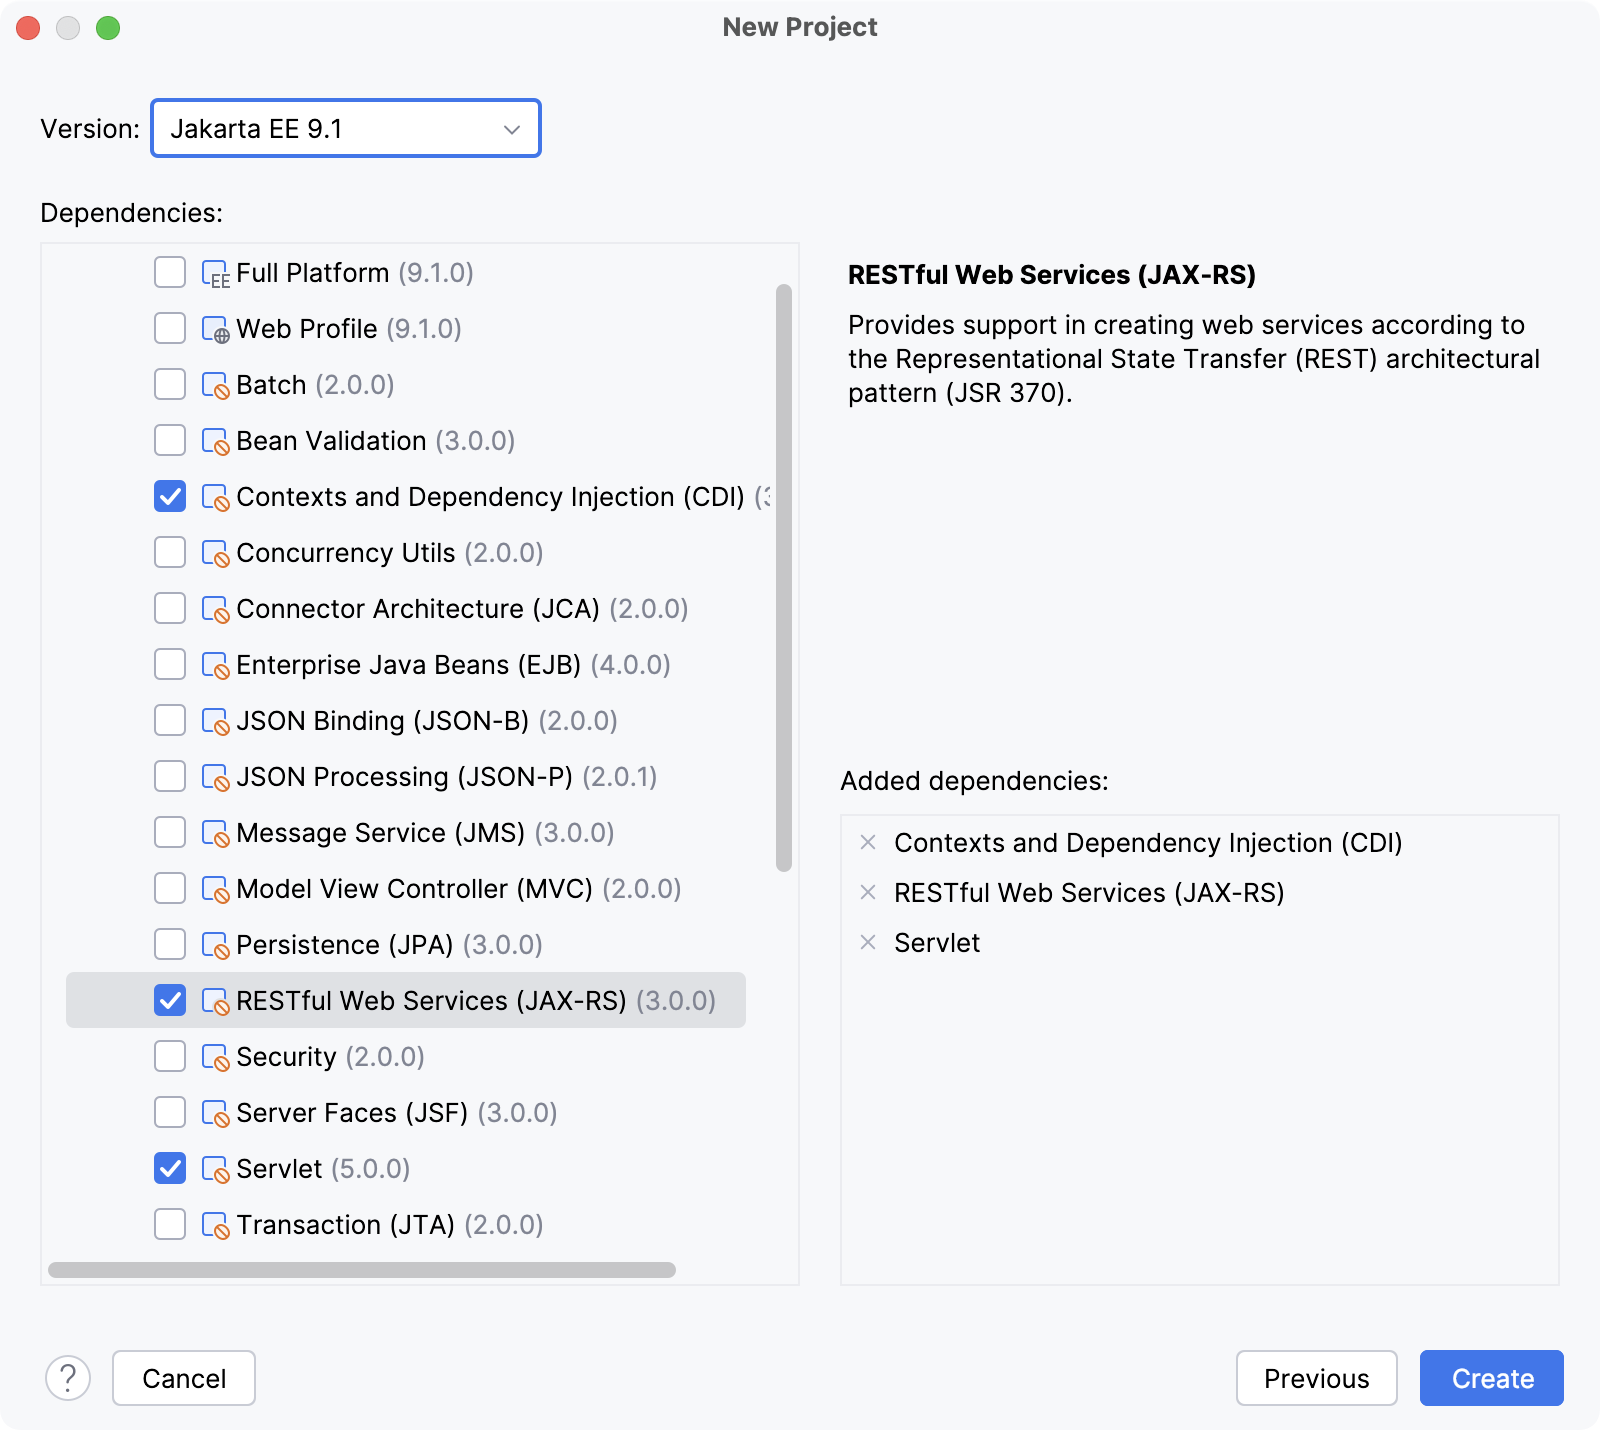
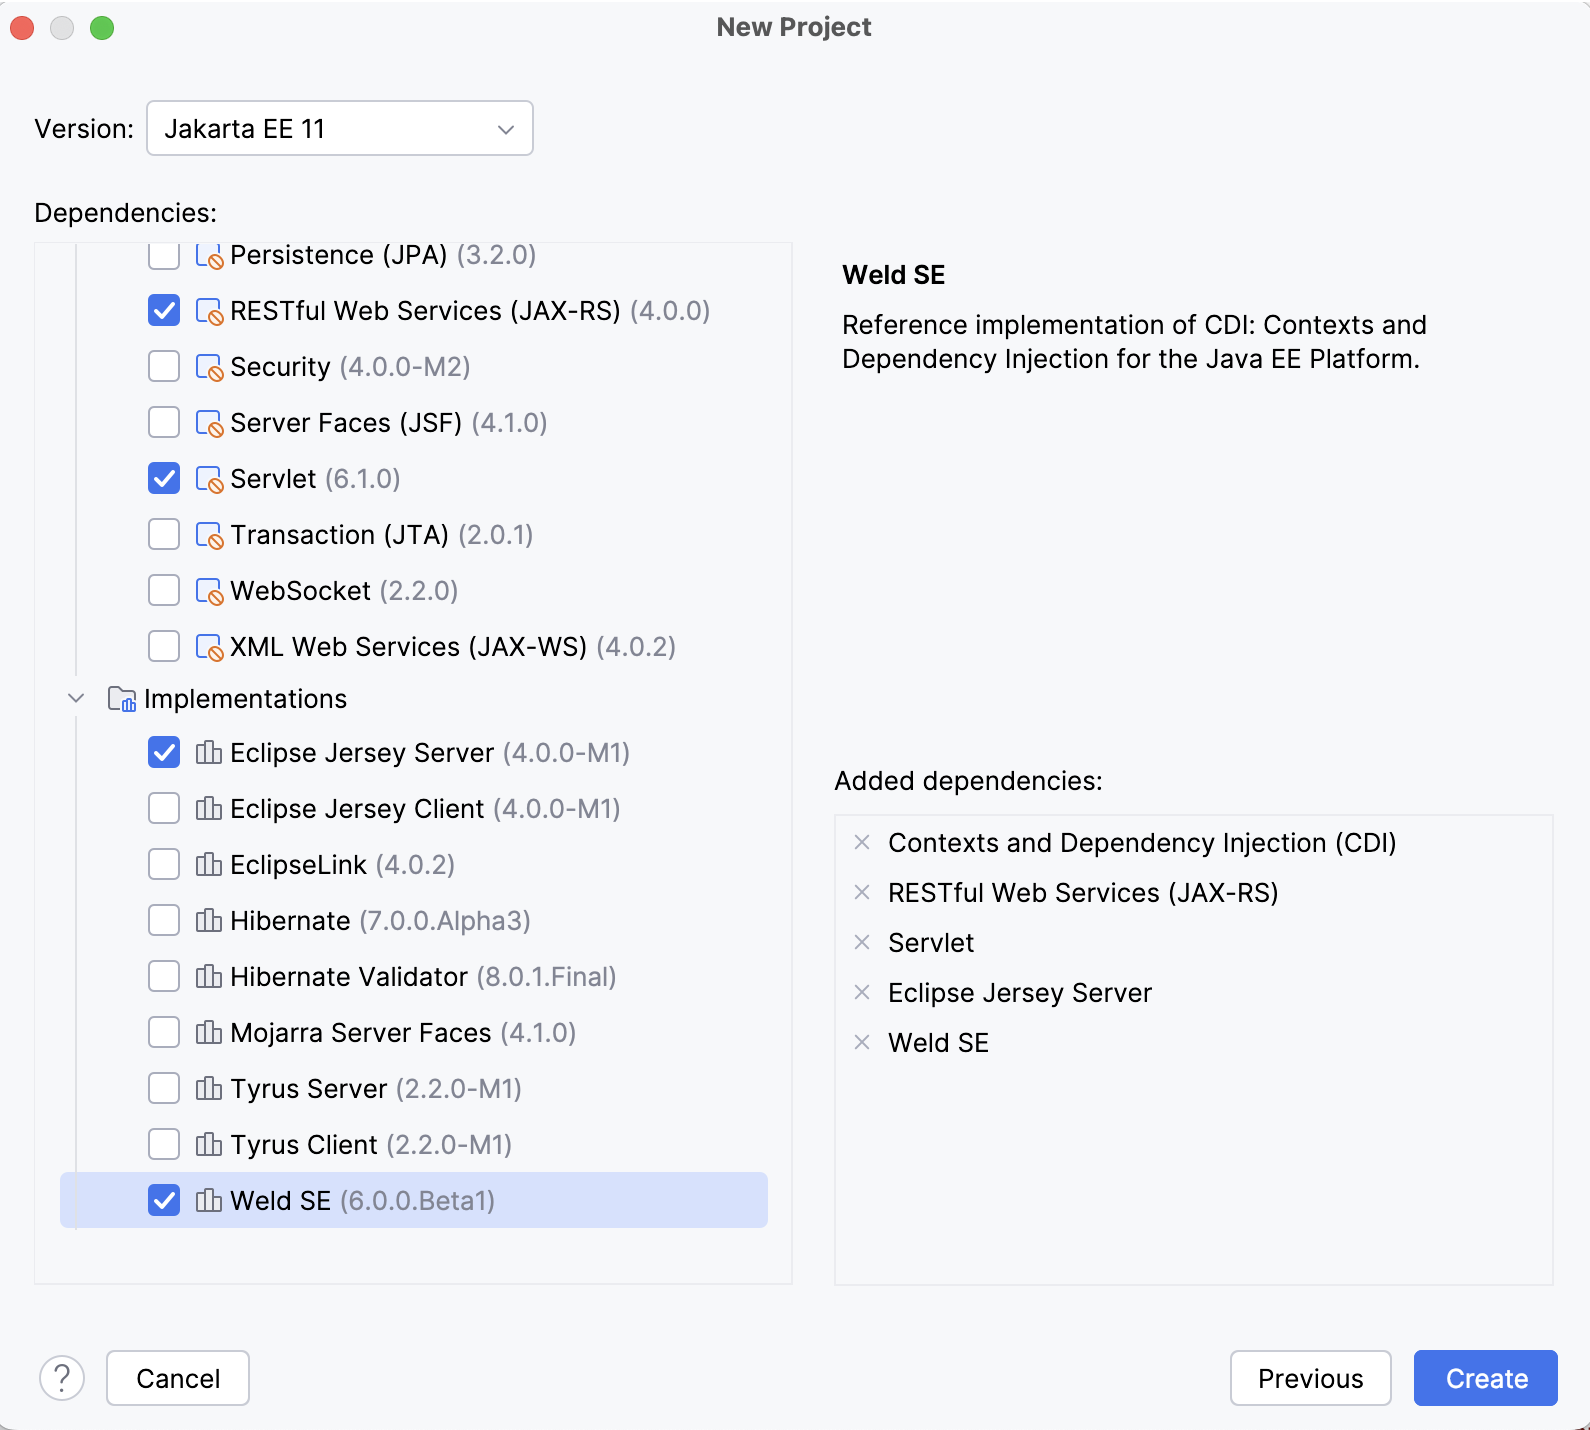
Click Create.
Procedure: Explore the default project structure
IntelliJ IDEA creates a project with some boilerplate code that you can build and deploy successfully.
> **Tip:**
> Use the Project tool window to browse and open files in your project or press `Ctrl+Shift+N` (Windows), `⌘ ⇧ O` (macOS), `⌘ ⇧ N` (IntelliJ IDEA Classic (macOS)), `⌘ ⇧ O` (macOS System Shortcuts), `Ctrl+Shift+N` (XWin), `Ctrl+Shift+N` (GNOME), `Ctrl+Shift+N` (KDE), `Ctrl+X, Ctrl+F` (Emacs), `Ctrl+P` (Sublime Text), `⌘ P` (Sublime Text (macOS)), `Alt+Shift+O` (NetBeans), `Ctrl+Shift+T` (Visual Studio), `⌘ ⇧ T` (Visual Studio (macOS)), `Ctrl+Shift+R` (Eclipse), `⌘ ⇧ R` (Eclipse (macOS)) and type the name of the file.
* `pom.xml` is the Project Object Model with Maven configuration information, including dependencies and plugins necessary for building the project.
```XML
4.0.0
org.example
RestTomcatHelloWorld
1.0-SNAPSHOT
RestTomcatHelloWorld
war
UTF-8
21
21
5.11.0-M2
jakarta.servlet
jakarta.servlet-api
6.1.0
provided
org.glassfish.jersey.containers
jersey-container-servlet
4.0.0-M1
org.glassfish.jersey.media
jersey-media-json-jackson
4.0.0-M1
org.glassfish.jersey.inject
jersey-cdi2-se
4.0.0-M1
org.jboss.weld.se
weld-se-core
6.0.0.Beta1
org.junit.jupiter
junit-jupiter-api
${junit.version}
test
org.junit.jupiter
junit-jupiter-engine
${junit.version}
test
org.apache.maven.plugins
maven-war-plugin
3.4.0
```
```XML
4.0.0
com.example
RestTomcatHelloWorld
1.0-SNAPSHOT
RestTomcatHelloWorld
war
UTF-8
11
11
5.9.2
jakarta.servlet
jakarta.servlet-api
5.0.0
provided
org.glassfish.jersey.containers
jersey-container-servlet
3.0.4
org.glassfish.jersey.media
jersey-media-json-jackson
3.0.4
org.glassfish.jersey.inject
jersey-cdi2-se
3.0.4
org.jboss.weld.se
weld-se-core
4.0.3.Final
org.junit.jupiter
junit-jupiter-api
${junit.version}
test
org.junit.jupiter
junit-jupiter-engine
${junit.version}
test
org.apache.maven.plugins
maven-war-plugin
3.3.2
```
* `HelloResource.java` is a root resource class, which uses the following JAX-RS annotations to implement the RESTful web service:
* The `@Path` annotation identifies the URI for accessing this resource, relative to the application root.
* The `@GET` annotation indicates that the `hello()` method will process HTTP GET requests to the specified URI.
* The `@Produces` annotation specifies the MIME media type that the method produces and returns.
```JAVA
package com.example.restglassfishhelloworld;
import jakarta.ws.rs.GET;
import jakarta.ws.rs.Path;
import jakarta.ws.rs.Produces;
@Path("/hello-world")
public class HelloResource {
@GET
@Produces("text/plain")
public String hello() {
return "Hello, World!";
}
}
```
```JAVA
package com.example.resttomcathelloworld;
import jakarta.ws.rs.GET;
import jakarta.ws.rs.Path;
import jakarta.ws.rs.Produces;
@Path("/hello-world")
public class HelloResource {
@GET
@Produces("text/plain")
public String hello() {
return "Hello, World!";
}
}
```
* `HelloApplication.java` is a subclass of `javax.ws.rs.core.Application`, which is used to configure the environment where the application runs REST resources defined in your resource classes. The `@ApplicationPath` annotation identifies the URL mapping for the application root (by default, it is set to `/api`).
```JAVA
package com.example.restglassfishhelloworld;
import jakarta.ws.rs.ApplicationPath;
import jakarta.ws.rs.core.Application;
@ApplicationPath("/api")
public class HelloApplication extends Application {
}
```
```JAVA
package com.example.resttomcathelloworld;
import jakarta.ws.rs.ApplicationPath;
import jakarta.ws.rs.core.Application;
@ApplicationPath("/api")
public class HelloApplication extends Application {
}
```
Procedure: Configure the application server
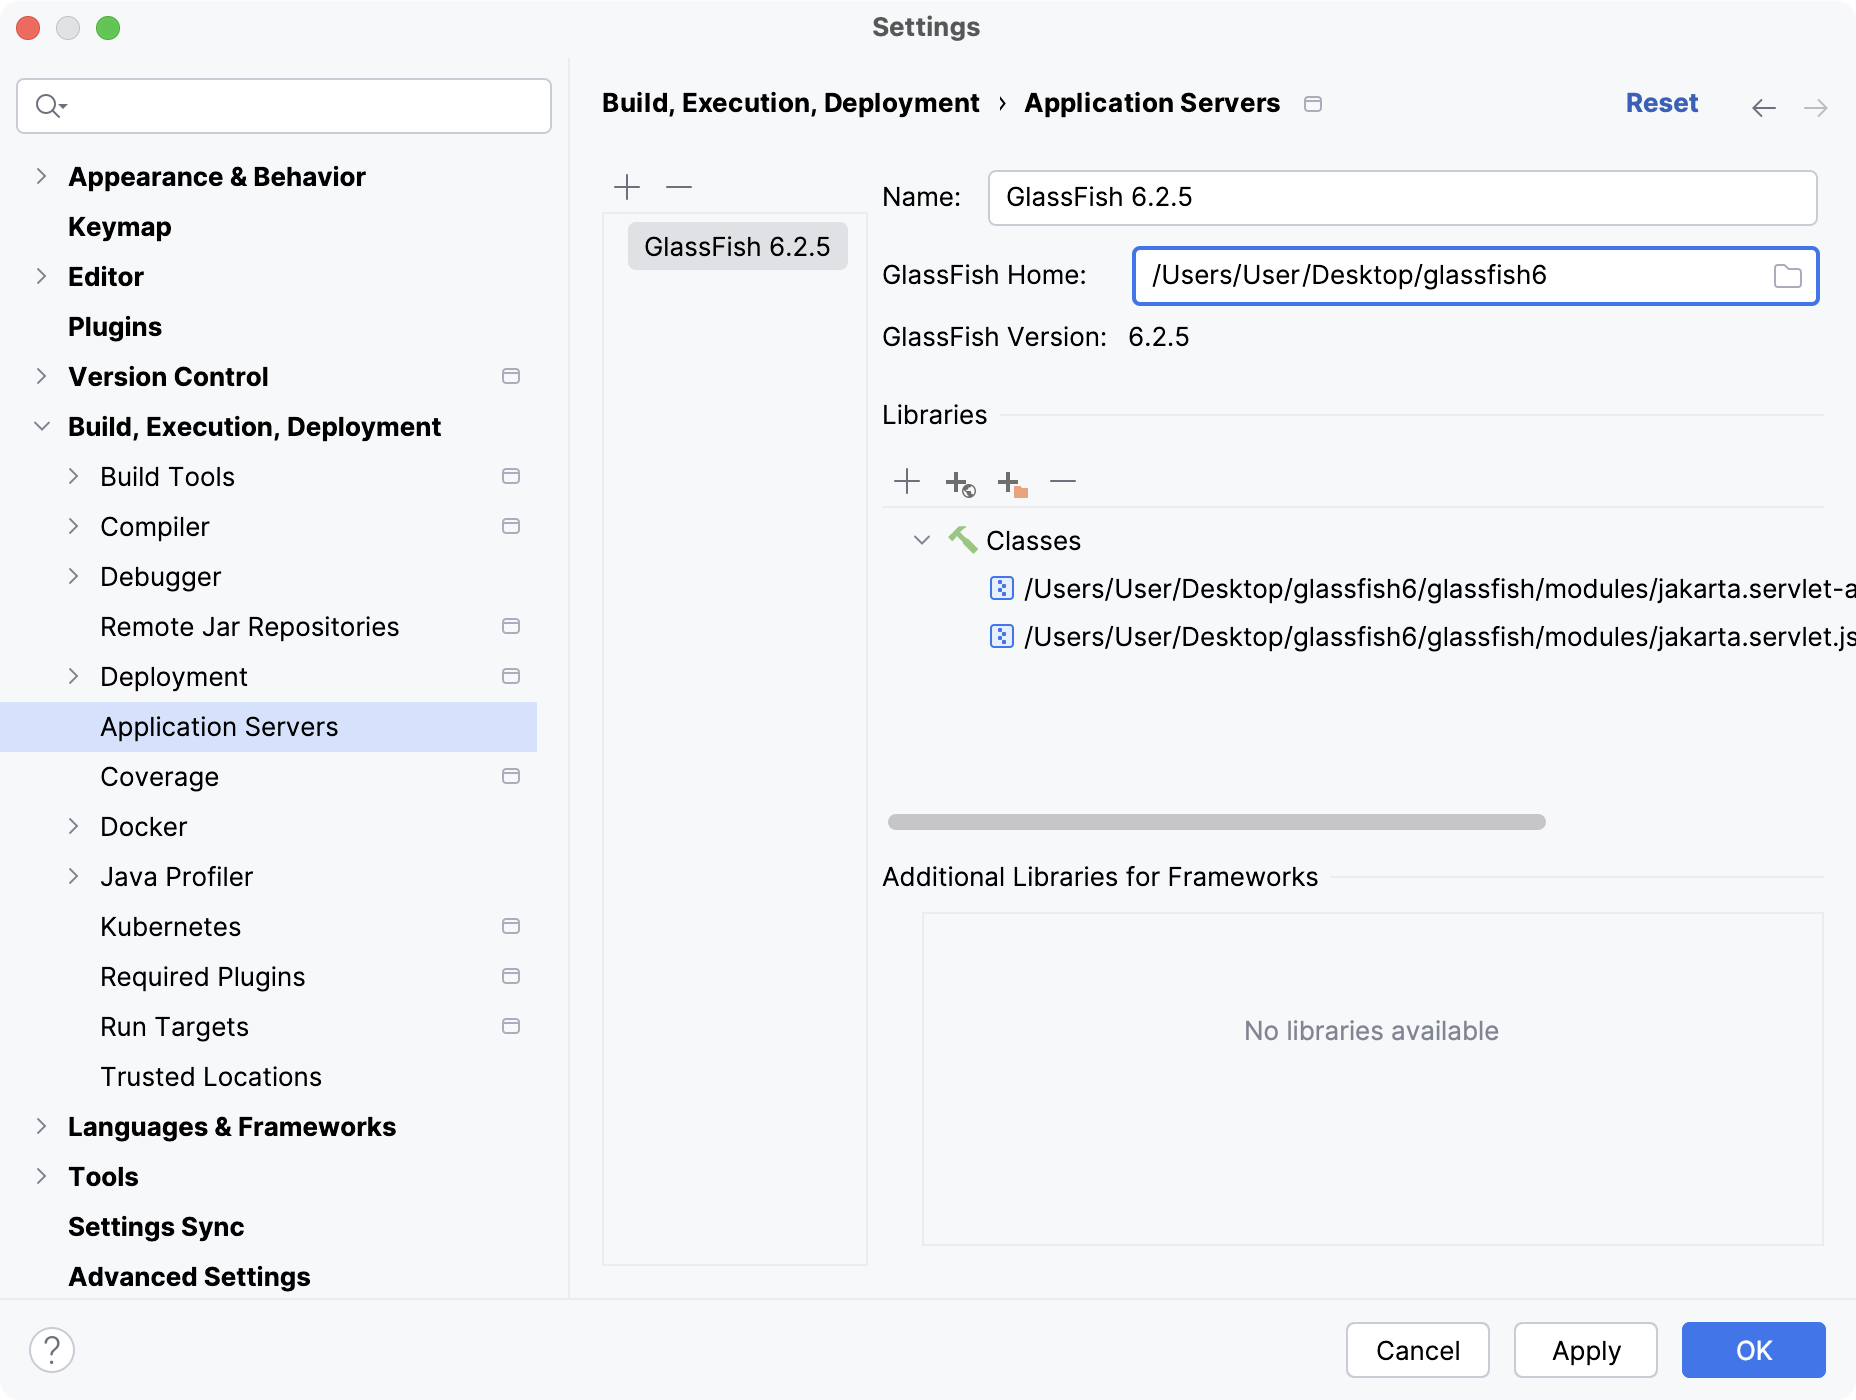
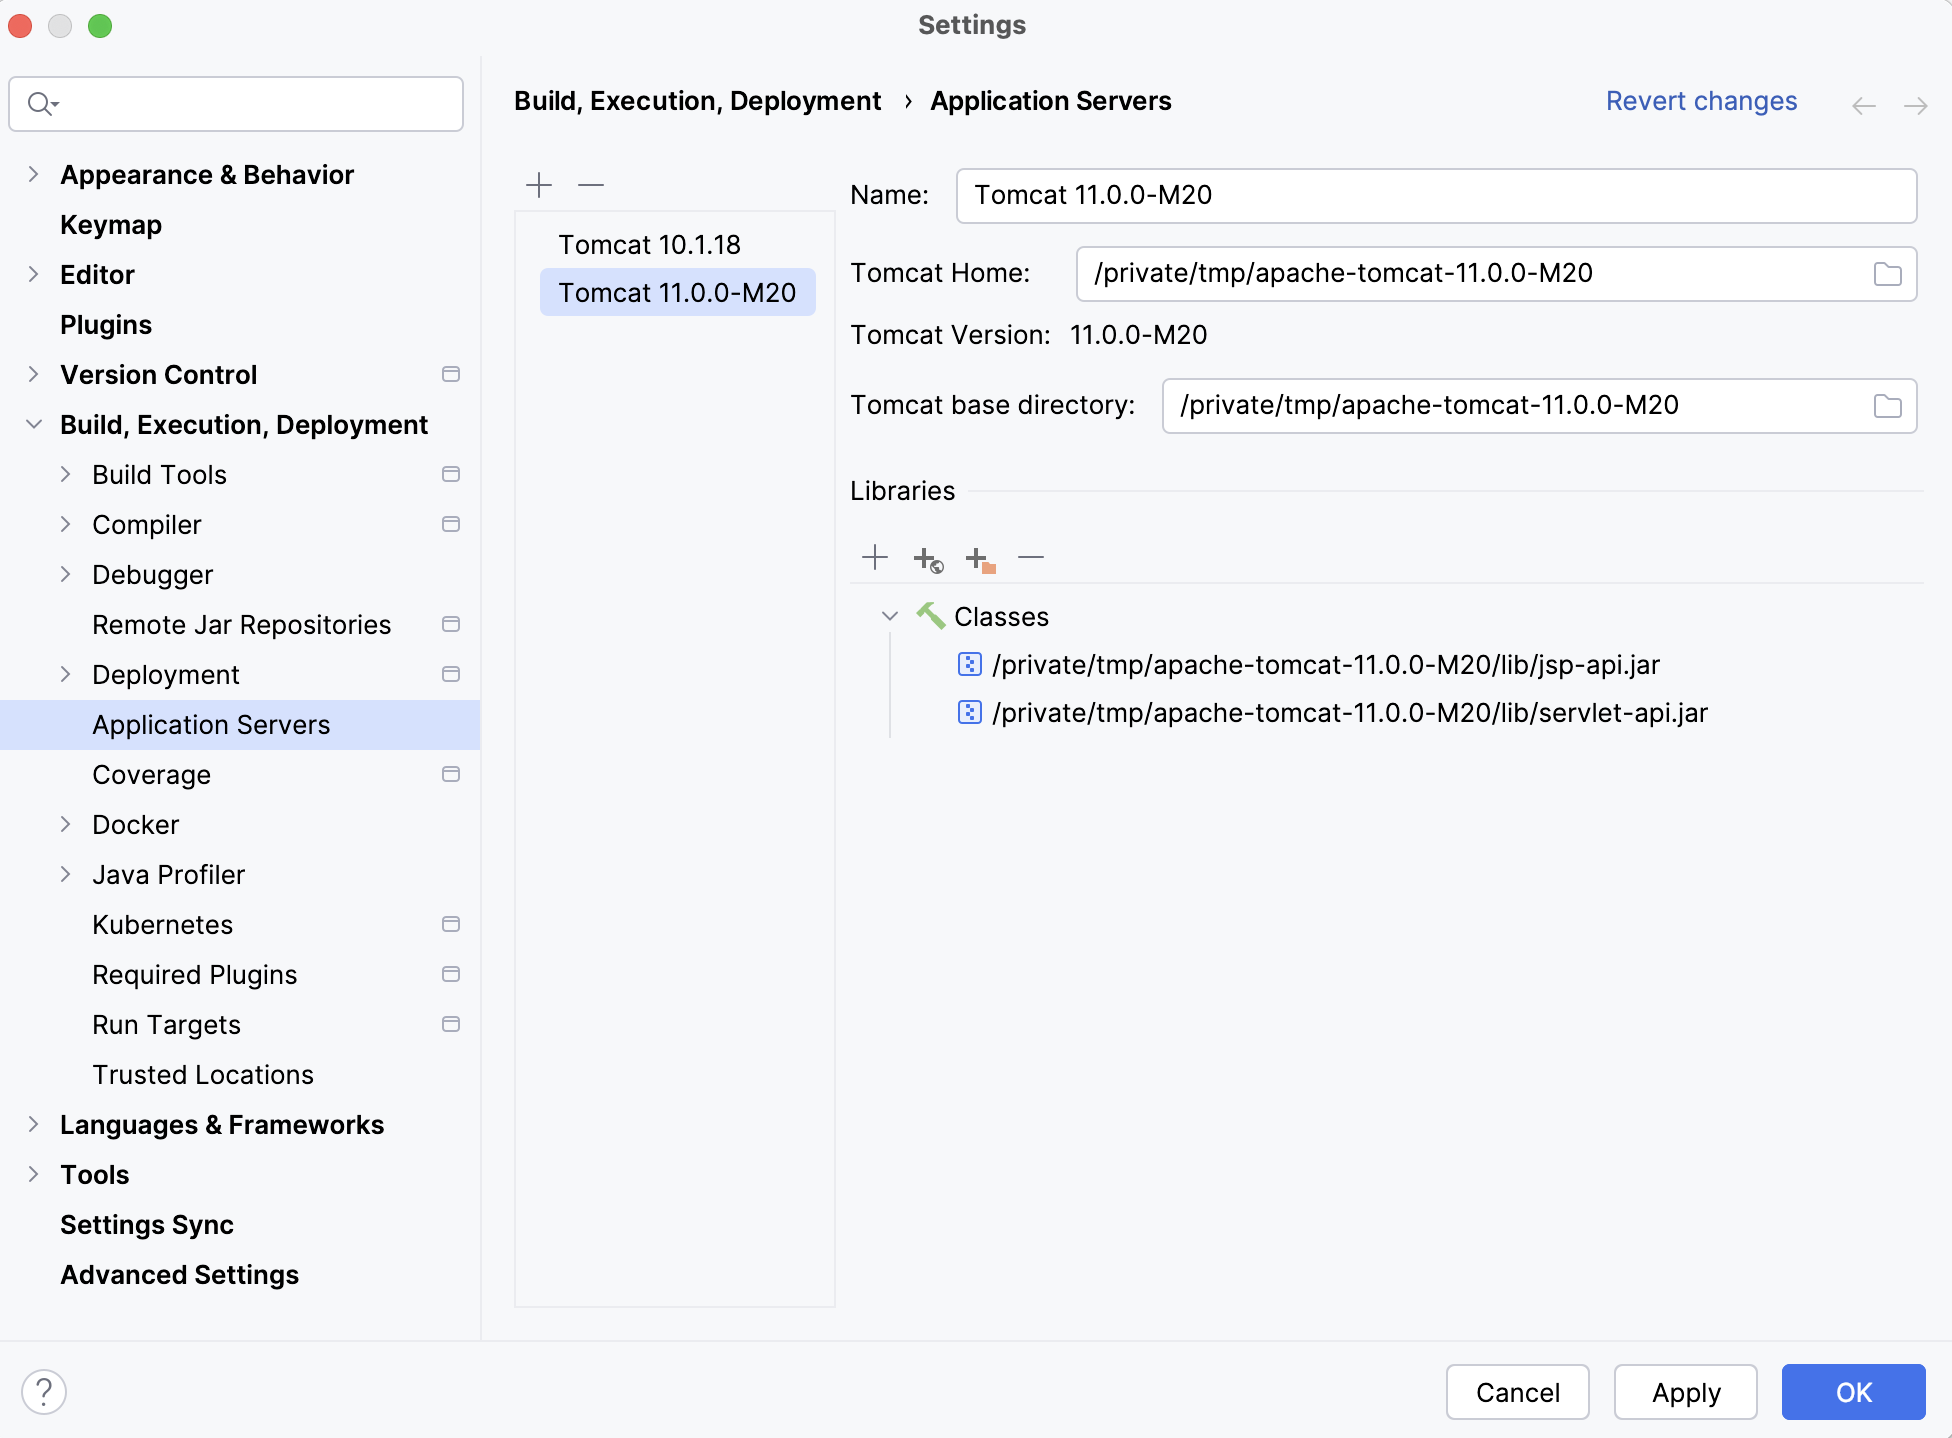
Let IntelliJ IDEA know where the GlassFish Tomcat application server is located.
1. Press `Ctrl+Alt+S` (Windows), `⌘ Comma` (macOS), `⌘ Comma` (IntelliJ IDEA Classic (macOS)), `⌘ Comma` (macOS System Shortcuts), `Ctrl+Alt+S` (XWin), `Ctrl+Alt+S` (GNOME), `Ctrl+Alt+S` (KDE), `Ctrl+Alt+S` (Emacs), `Ctrl+Alt+S` (Sublime Text), `⌘ Comma` (Sublime Text (macOS)), `Ctrl+Alt+S` (NetBeans), `Ctrl+Alt+S` (Visual Studio), `⌘ Comma` (Visual Studio (macOS)), `Ctrl+Alt+S` (Eclipse), `⌘ Comma` (Eclipse (macOS)) to open settings and then select `Build, Execution, Deployment | Application Servers`.
2. Click  and select Glassfish Server Tomcat .
3. Specify the path to the GlassFish Tomcat server install location. IntelliJ IDEA detects and sets the name and version appropriately.
Procedure: Create a run configuration
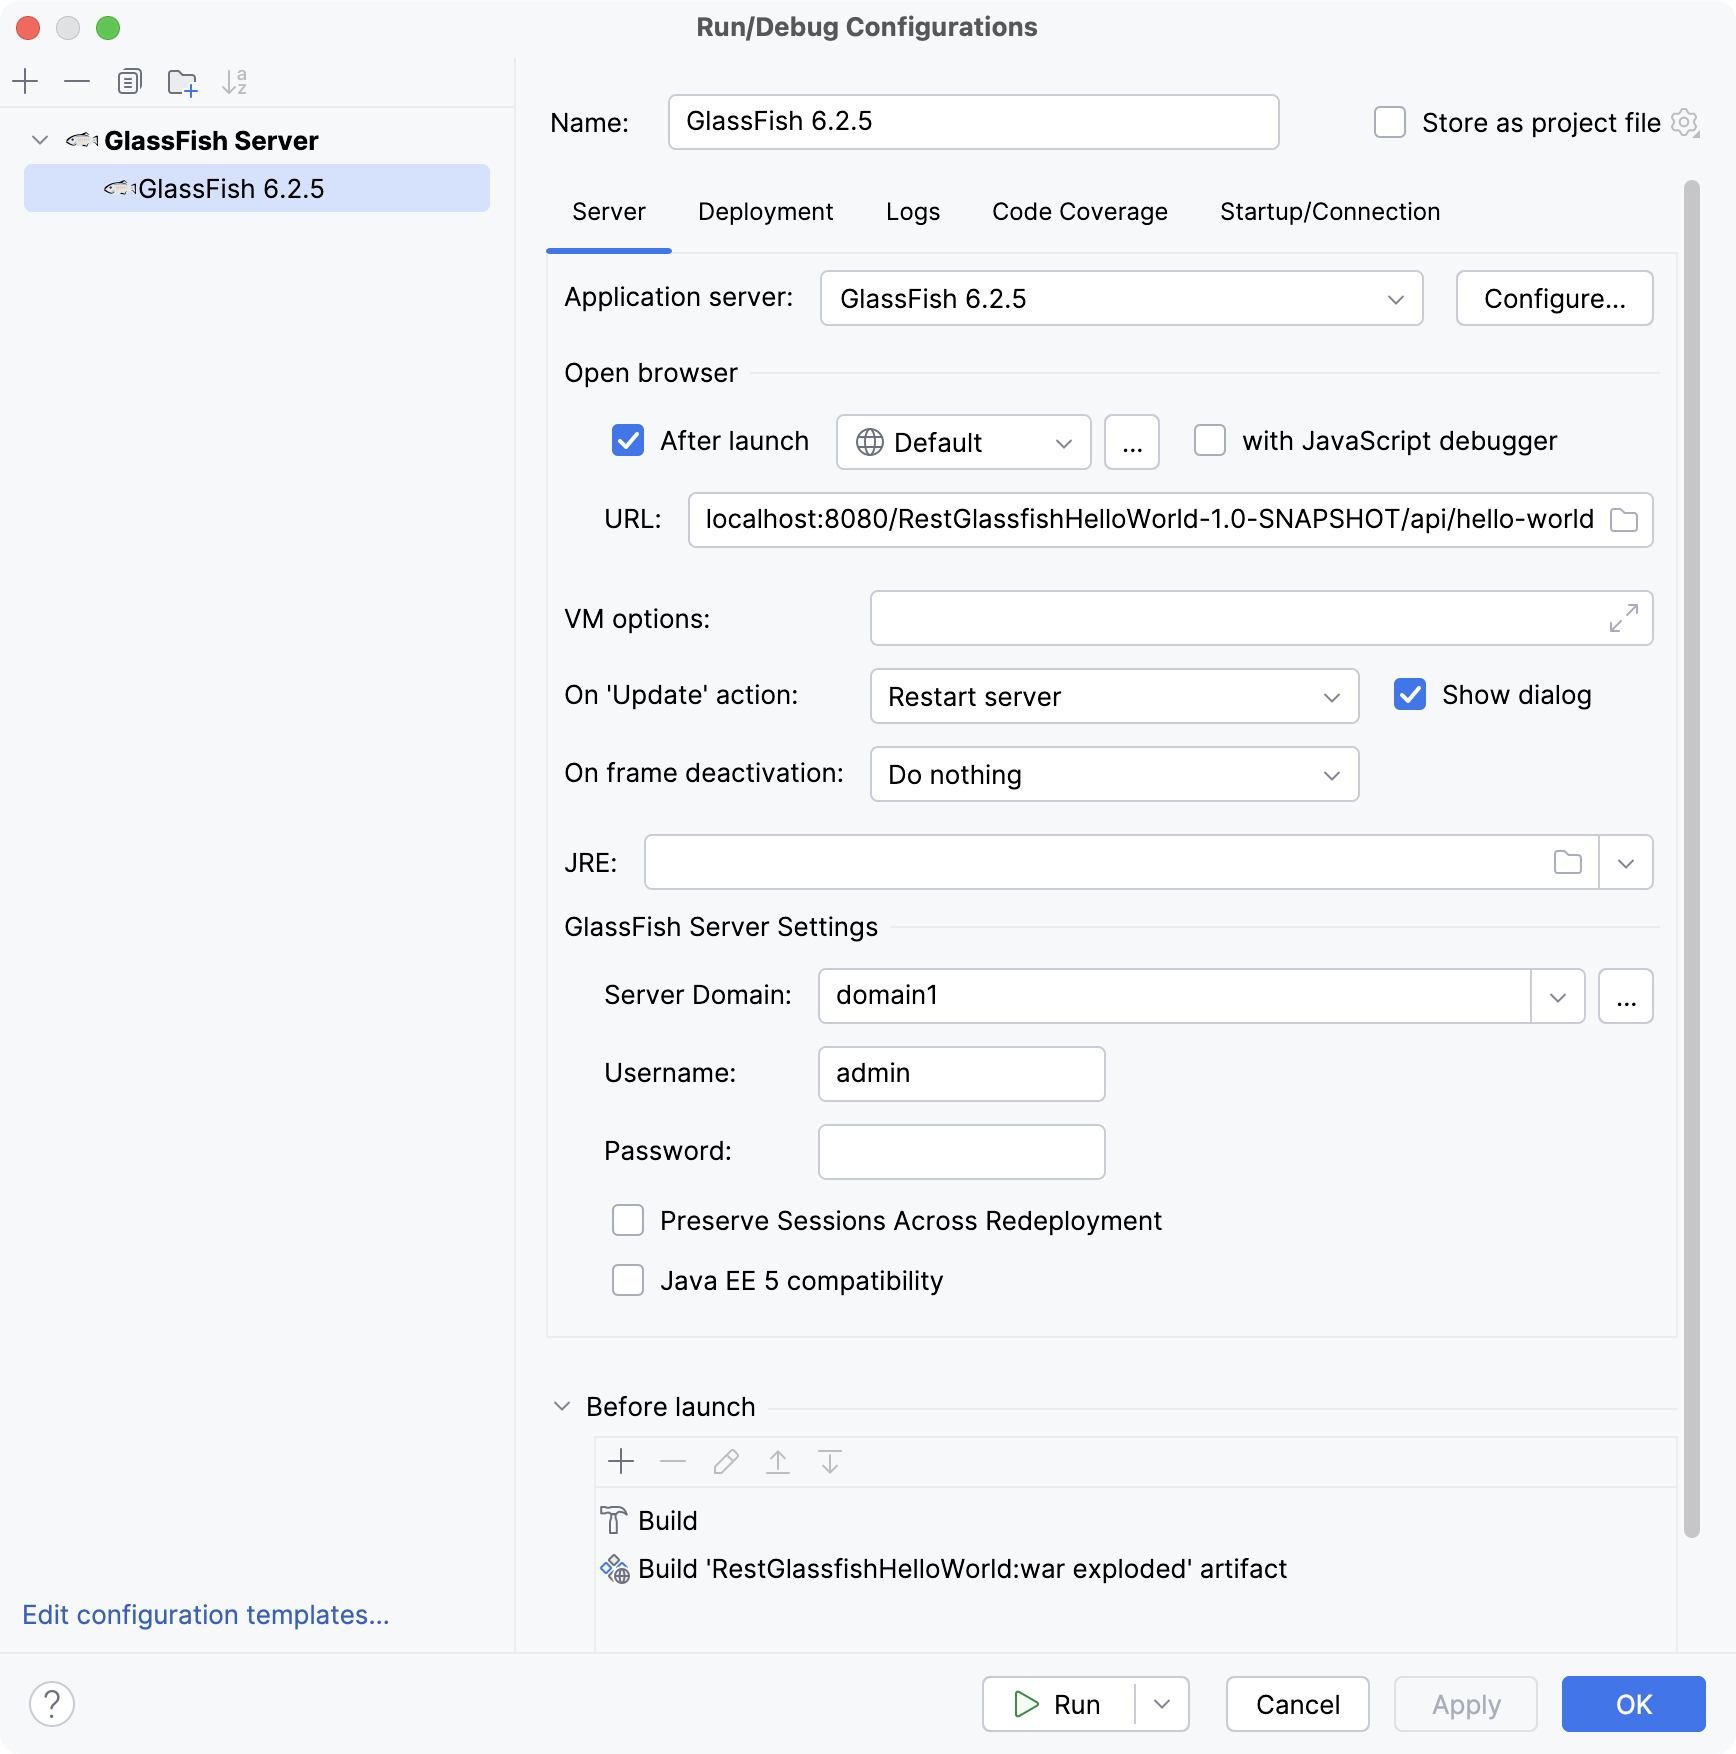
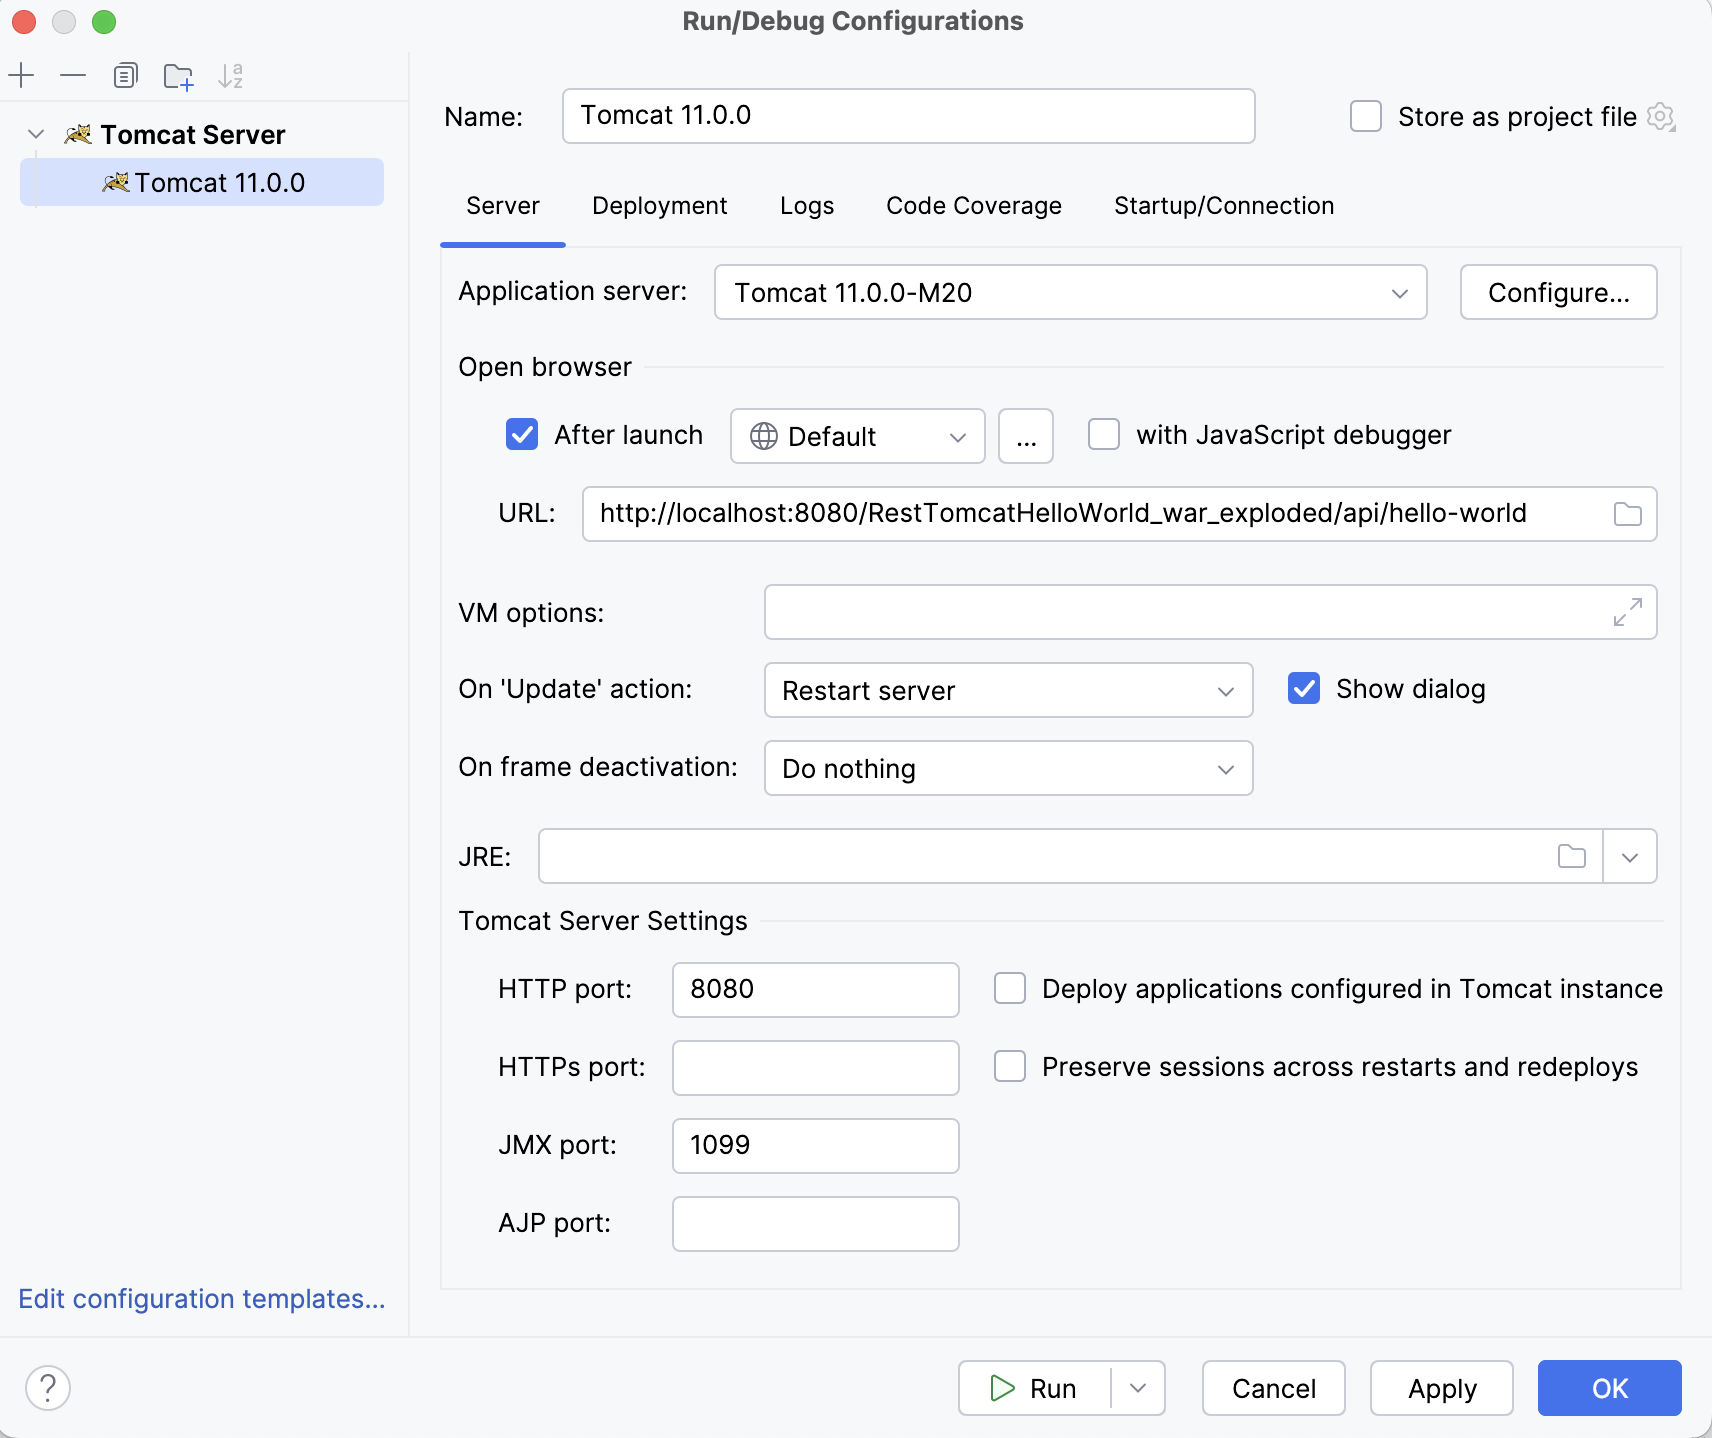
IntelliJ IDEA needs a run configuration to build the artifacts and deploy them to your application server.
1. In the main menu, go to `Run | Edit Configurations` .
2. In the Run/Debug Configurations dialog, click , expand the Glassfish Server Tomcat Server node, and select Local .
3. Fix any warnings that appear at the bottom of the run configuration settings dialog.

Most likely, you will need to fix the following:
* On the Server tab, set the Server Domain to `domain1`.
* On the Deployment tab, add the artifact that you want to deploy: `RestGlassfishHelloWorld:war exploded` `RestTomcatHelloWorld:war exploded`
4. On the Server tab, set the URL to point to the [root resource](#source_code):
```
http://localhost:8080/RestGlassfishHelloWorld-1.0-SNAPSHOT/api/hello-world
```
```
http://localhost:8080/RestTomcatHelloWorld_war_exploded/api/hello-world
```
5. Click OK to save the run configuration.
6. To run the configuration, press `Alt+Shift+F10` (Windows), `⌃ ⌥ R` (macOS), `⌥ ⇧ F10` (IntelliJ IDEA Classic (macOS)), `⌃ ⌥ R` (macOS System Shortcuts), `Alt+Shift+F10` (XWin), `Alt+Shift+F10` (GNOME), `Alt+Shift+F10` (KDE), `Alt+Shift+F10` (Emacs), `Alt+Shift+F10` (Sublime Text), `⌃ ⌥ R` (Sublime Text (macOS)), `Alt+Shift+F10` (NetBeans), `Ctrl+Alt+Shift+R` (Visual Studio), `⌘ ⌥ ⇧ R` (Visual Studio (macOS)), `Alt+Shift+F10` (Eclipse), `⌃ ⌥ R` (Eclipse (macOS)) and select the created application server configuration.
Alternatively, if you have your run configuration selected in the main toolbar at the top, you can click  in the main toolbar or press `Shift+F10` (Windows), `⌃ R` (macOS), `⇧ F10` (IntelliJ IDEA Classic (macOS)), `⌥ ⇧ R` (macOS System Shortcuts), `Shift+F10` (XWin), `Shift+F10` (GNOME), `Shift+F10` (KDE), `Shift+F10` (Emacs), `Shift+F10` (Sublime Text), `Shift+F10` (Sublime Text (macOS)), `F6` (NetBeans), `Ctrl+F5` (Visual Studio), `⌃ F5` (Visual Studio (macOS)), `Alt+Shift+X` (Eclipse), `⌘ ⇧ F11` (Eclipse (macOS)) to run it.
This run configuration builds the artifacts, then starts the GlassFish Tomcat server, and deploys the artifacts to the server. You should see the corresponding output in the Services tool window.
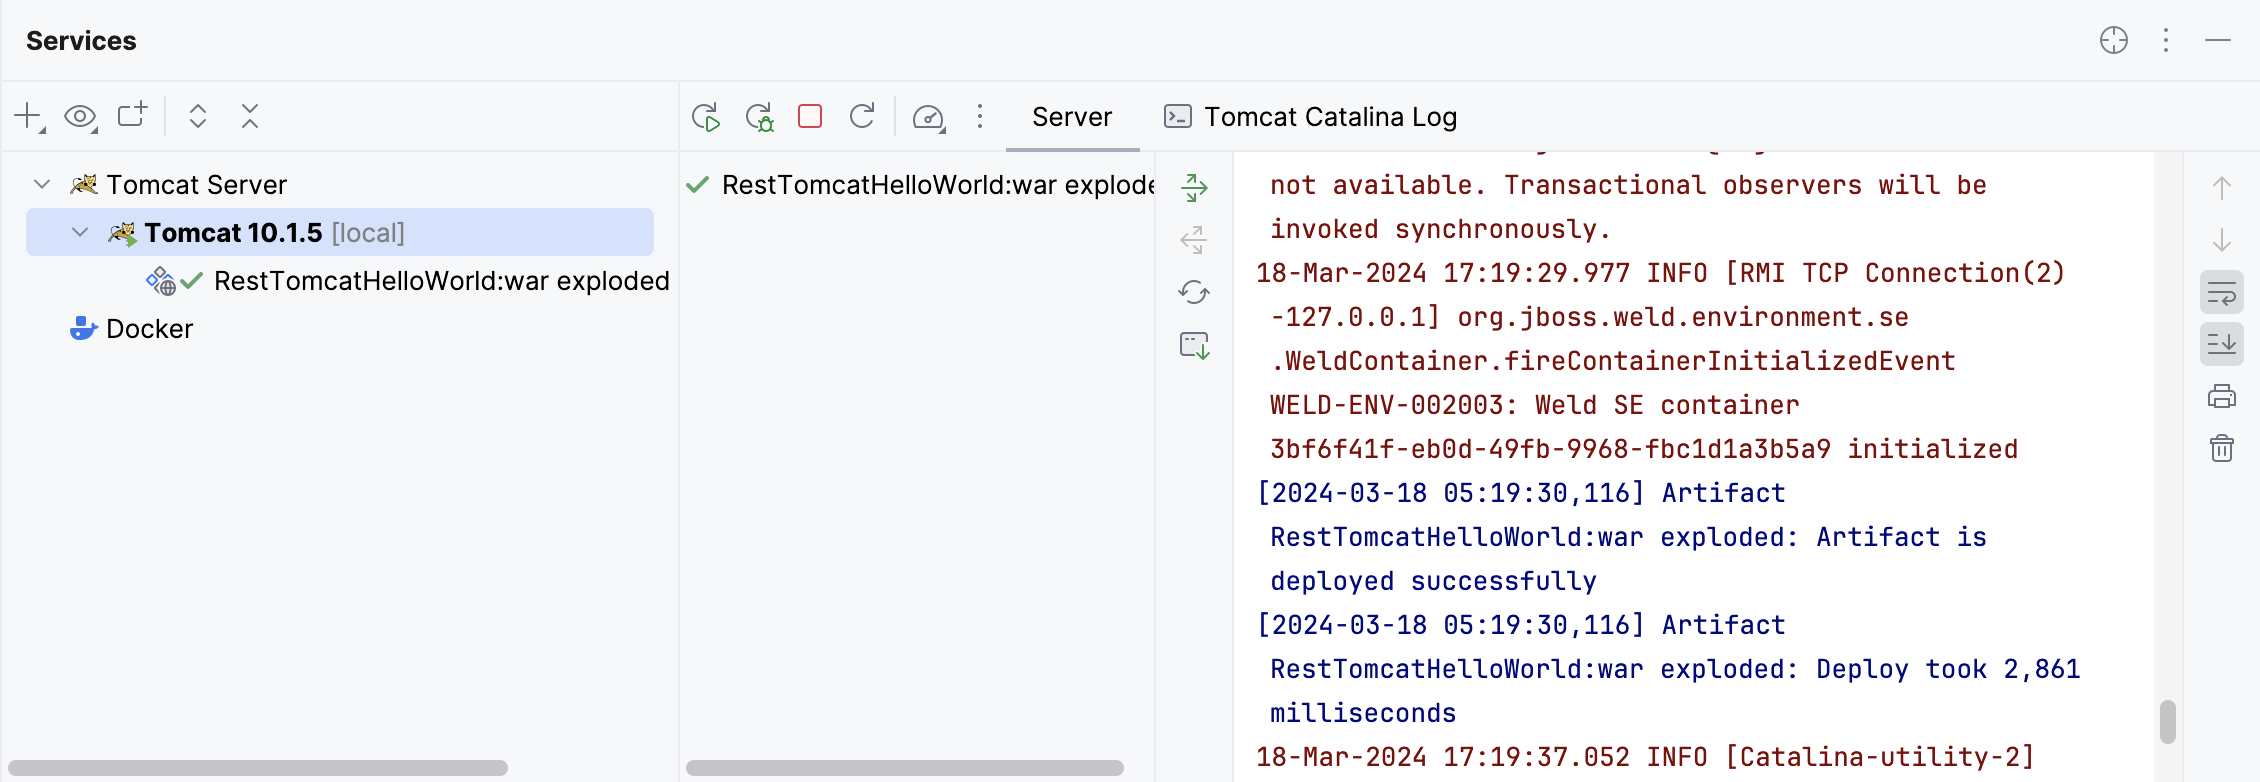
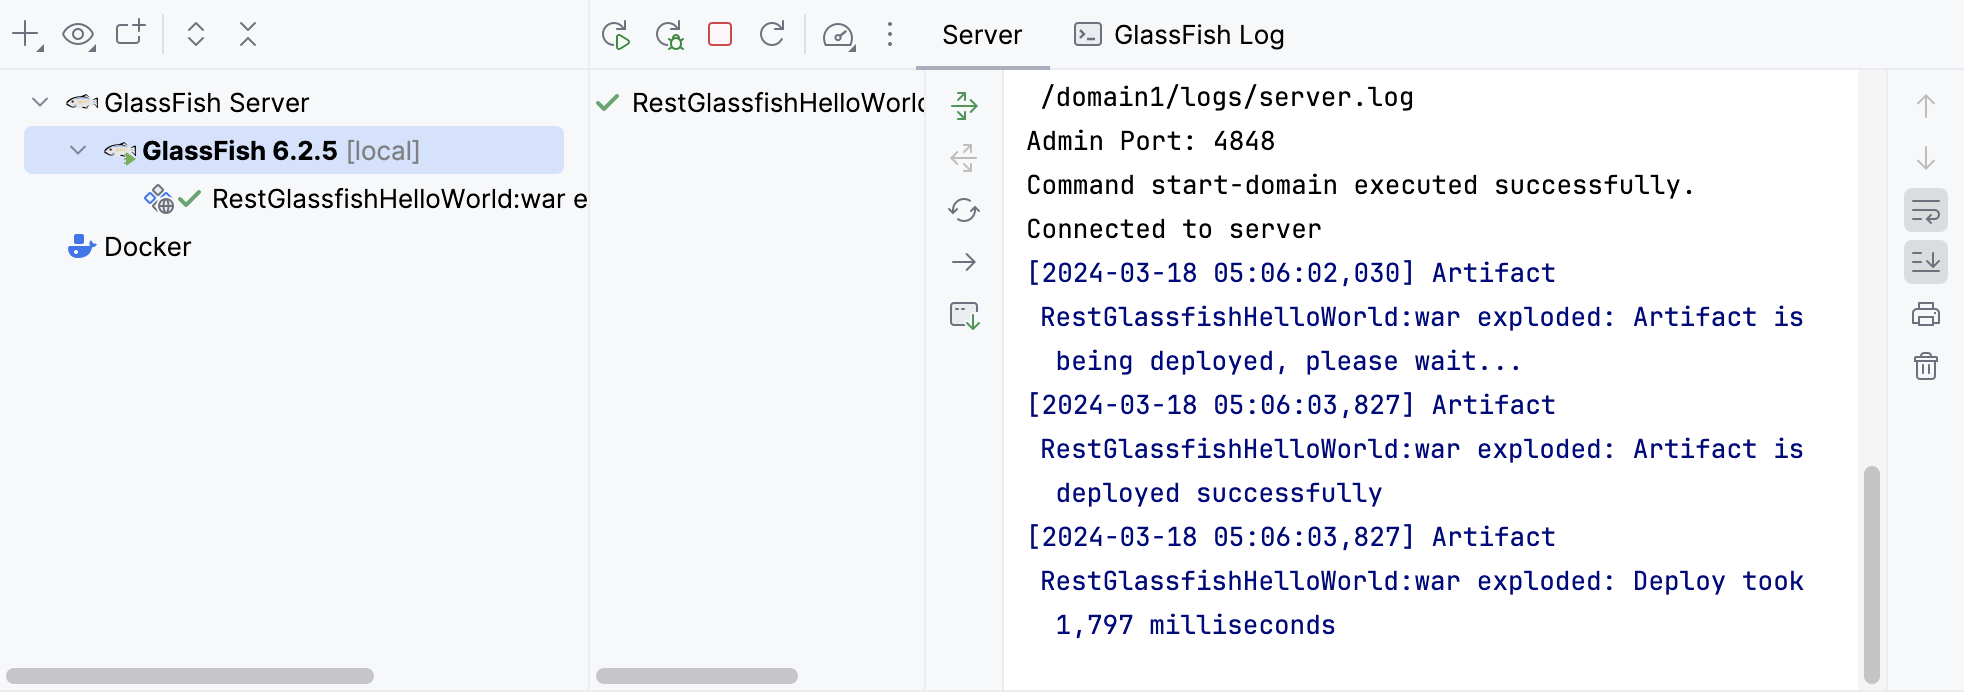
Once this is done, IntelliJ IDEA opens the specified URL in your web browser.
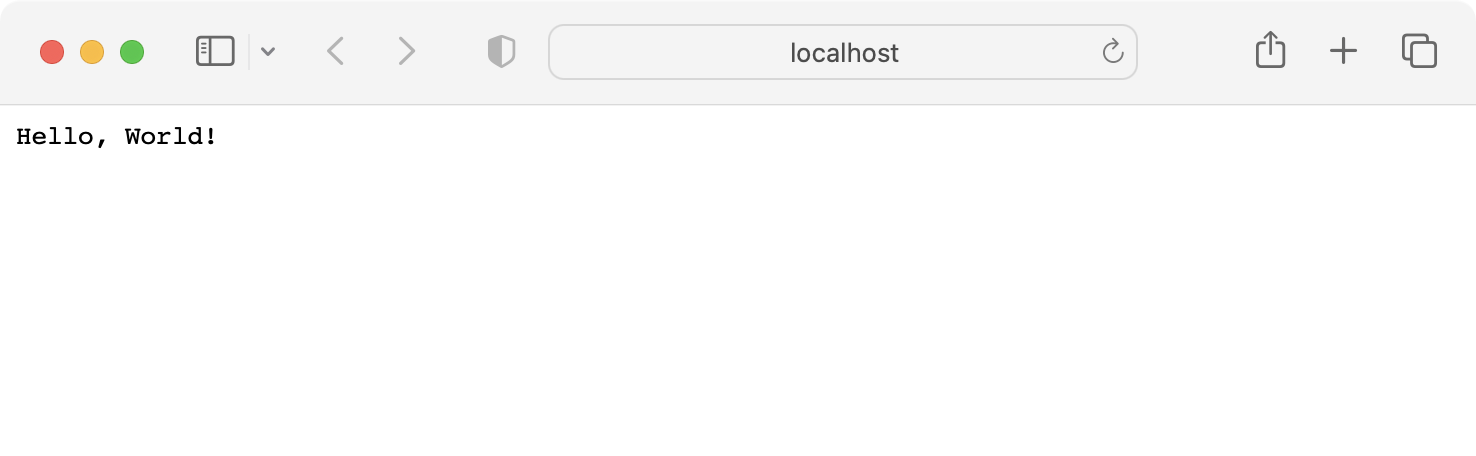
If not, try opening the URL yourself: [http://localhost:8080/RestGlassfishHelloWorld-1.0-SNAPSHOT/api/hello-world](http://localhost:8080/RestGlassfishHelloWorld-1.0-SNAPSHOT/api/hello-world) [http://localhost:8080/RestTomcatHelloWorld_war_exploded/api/hello-world](http://localhost:8080/RestTomcatHelloWorld_war_exploded/api/hello-world)
## Troubleshooting
### Compatibility with Jakarta EE
If you get a `404` error, make sure you have selected the Jakarta EE specification version that is compatible with your version of GlassFish when [creating the project](#new_project).
For more information, refer to the [GlassFish version compatibility](https://github.com/eclipse-ee4j/glassfish#compatibility).
### Older IntelliJ IDEA versions
If you are using IntelliJ IDEA version 2020.2.2 or earlier, the New Project wizard will not add all of the necessary dependencies required for Tomcat. In this case, open `pom.xml` and add the following dependencies:
```XML
org.glassfish.jersey.media
jersey-media-json-jackson
2.31
org.glassfish.jersey.inject
jersey-hk2
2.31
```
For example, in version 2020.2.3, the generated `pom.xml` looks like this:
```XML
4.0.0
com.example
RestTomcatHelloWorld
1.0-SNAPSHOT
RestTomcatHelloWorld
war
1.8
1.8
5.6.2
javax.ws.rs
javax.ws.rs-api
2.1.1
provided
org.glassfish.jersey.containers
jersey-container-servlet
2.31
org.glassfish.jersey.media
jersey-media-json-jackson
2.31
org.glassfish.jersey.inject
jersey-hk2
2.31
org.glassfish.jersey.core
jersey-client
2.31
org.junit.jupiter
junit-jupiter-api
${junit.version}
test
org.junit.jupiter
junit-jupiter-engine
${junit.version}
test
org.apache.maven.plugins
maven-war-plugin
3.3.0
```